Bulk Import Records into Boost.space Using API
This guide shows how to bulk import records into Boost.space using a simple automation scenario. While this tutorial uses Google Sheets as an example data source, you can use any other source (e.g., CRM, forms, databases, or other apps).
In this scenario, you will:
- Use any data source (Google Sheets is just an example)
- Aggregate records into JSON format
- Generate a data structure
- Send the data to Boost.space via API
This approach allows you to import multiple records in a single operation.
Step 1: Prepare Your Data Source
You can use any data source that provides structured data.
In this example, we use Google Sheets with fields like:
- First Name
- Last Name
- etc.
💡 The same logic applies to any other tool — as long as you can map the data fields, the source does not matter.
Step 2: Set Up the Scenario
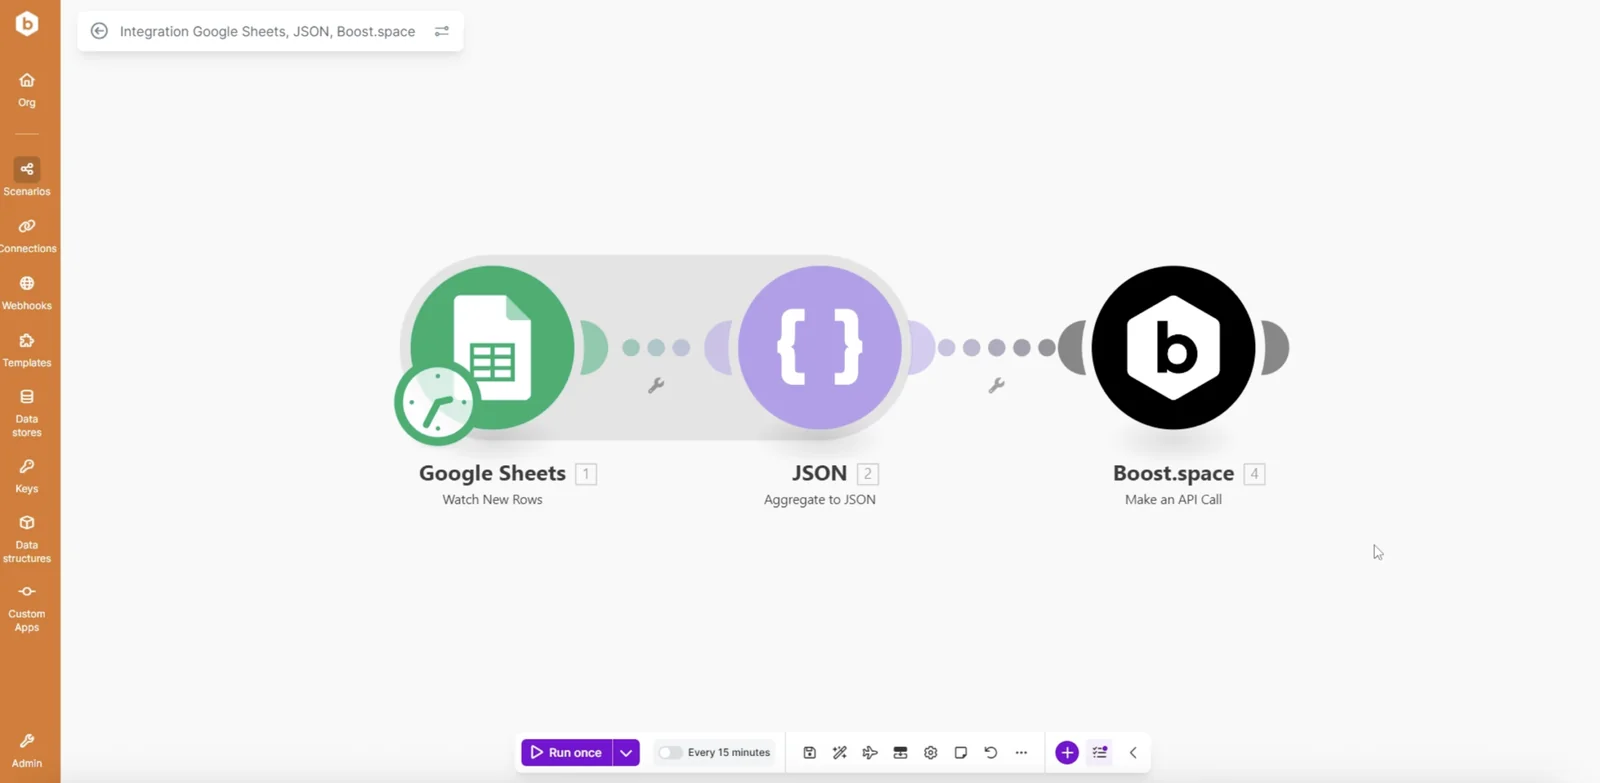
Create a scenario with the following modules:
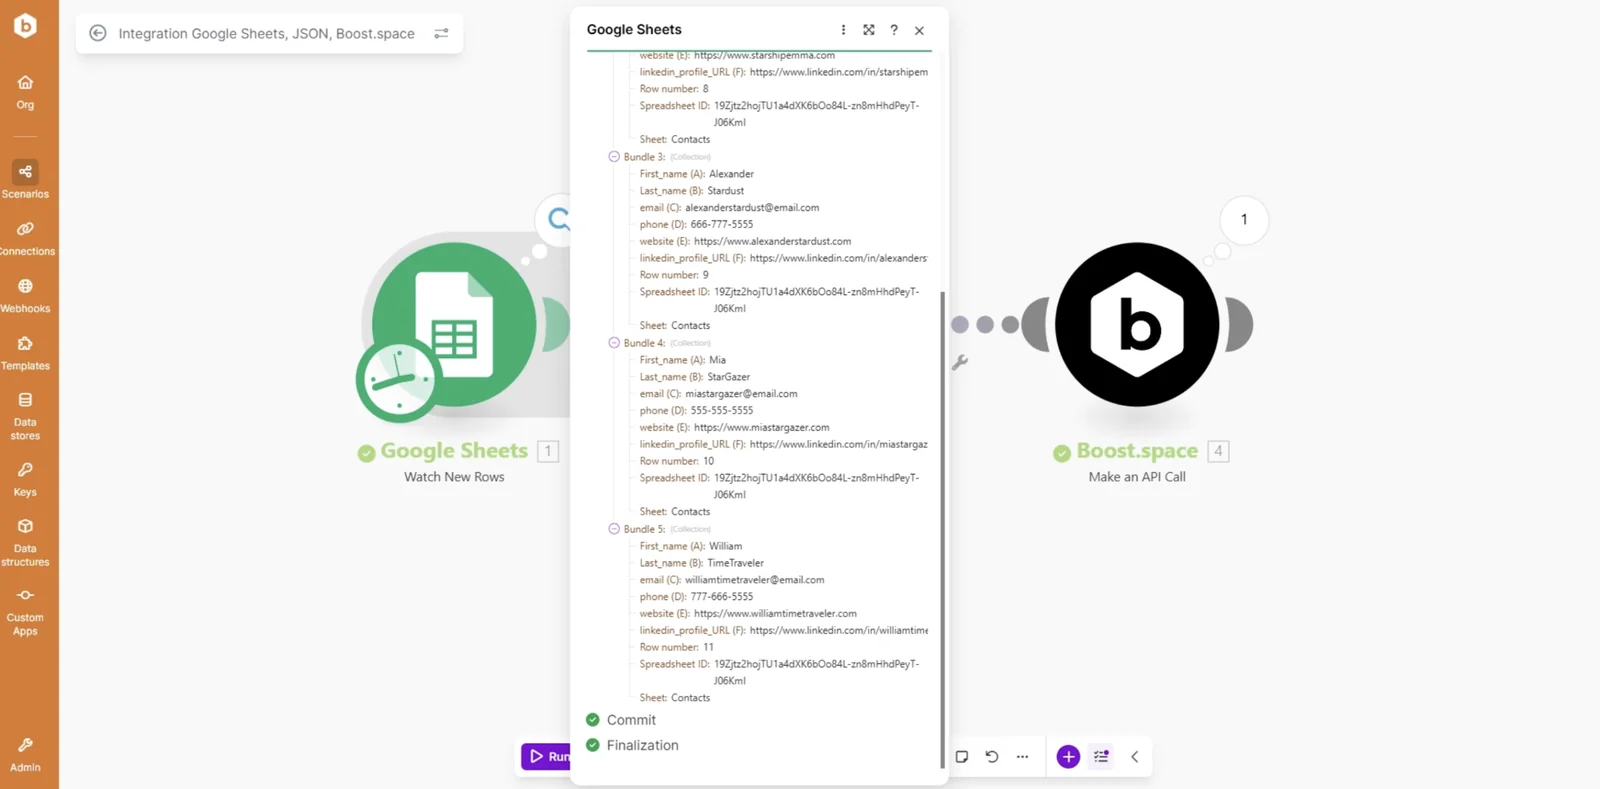
- A trigger module (e.g., Google Sheets – Watch Rows or any other source)
- Aggregate to JSON
- Boost.space Module – Make an API call
This setup collects multiple records and sends them in one request.
Step 3: Create a Data Structure
In the Aggregate to JSON module:
1. Click Add to create a new data structure
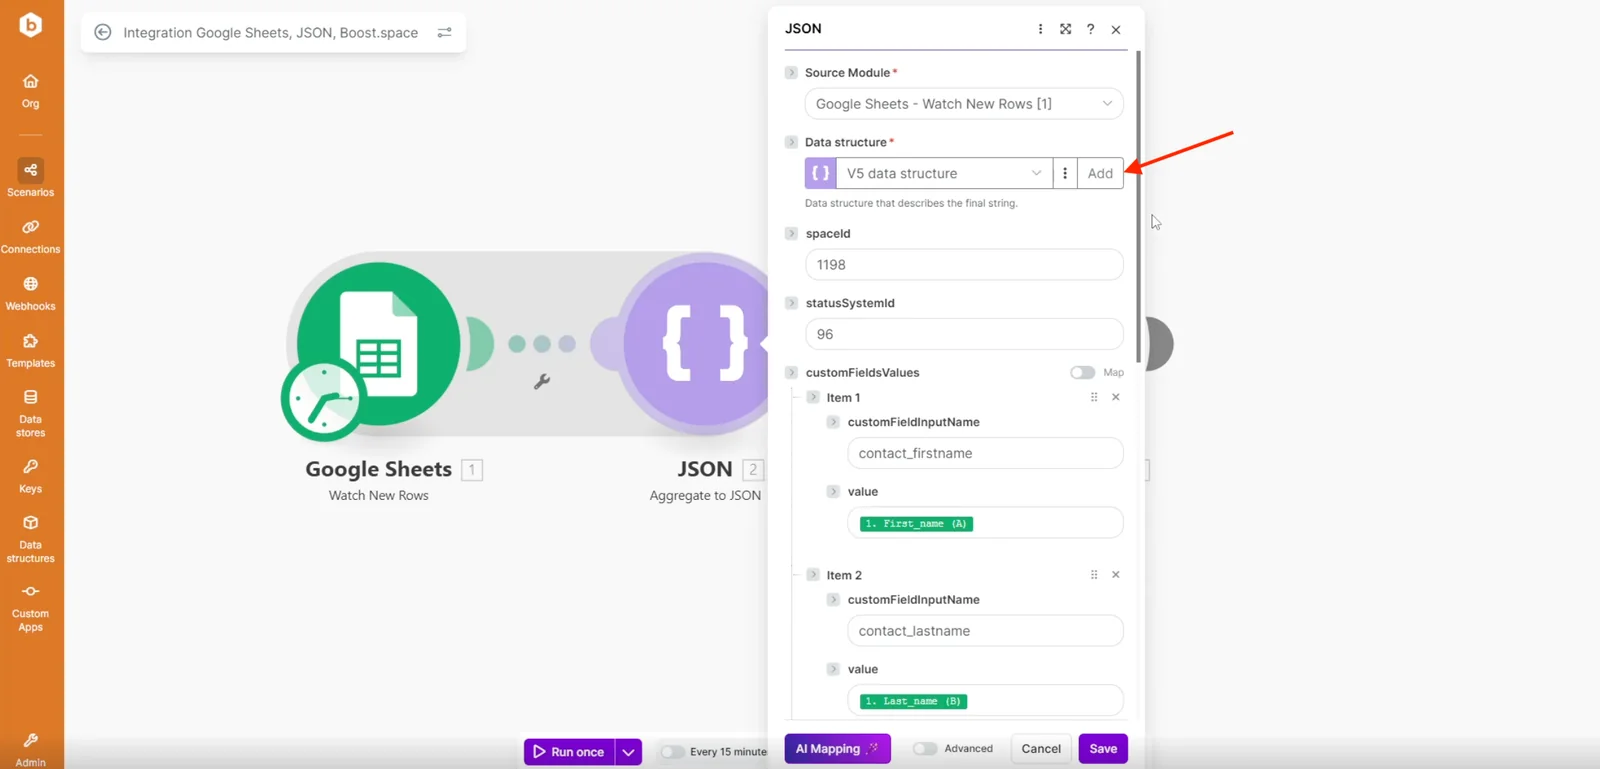
2. Give it a name
3. Click Generate
Use Sample Data
To generate the structure:
- Go to the Boost.space API documentation
- Find: Custom Module section and choose custom module item and copy the example payload
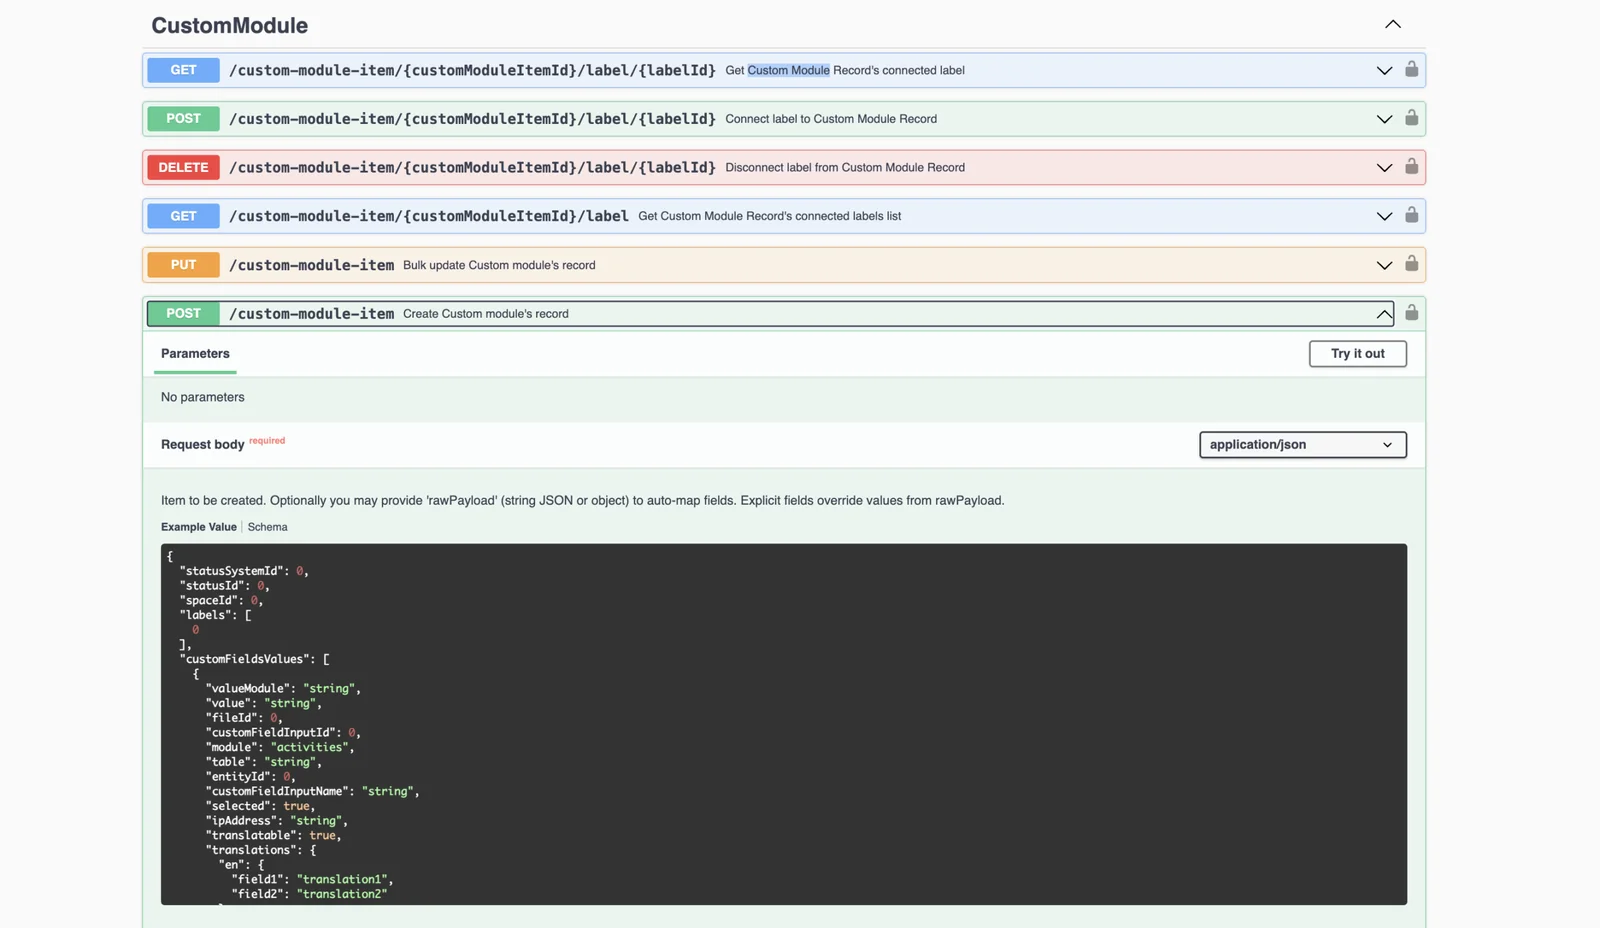
3. Paste it into the sample data field
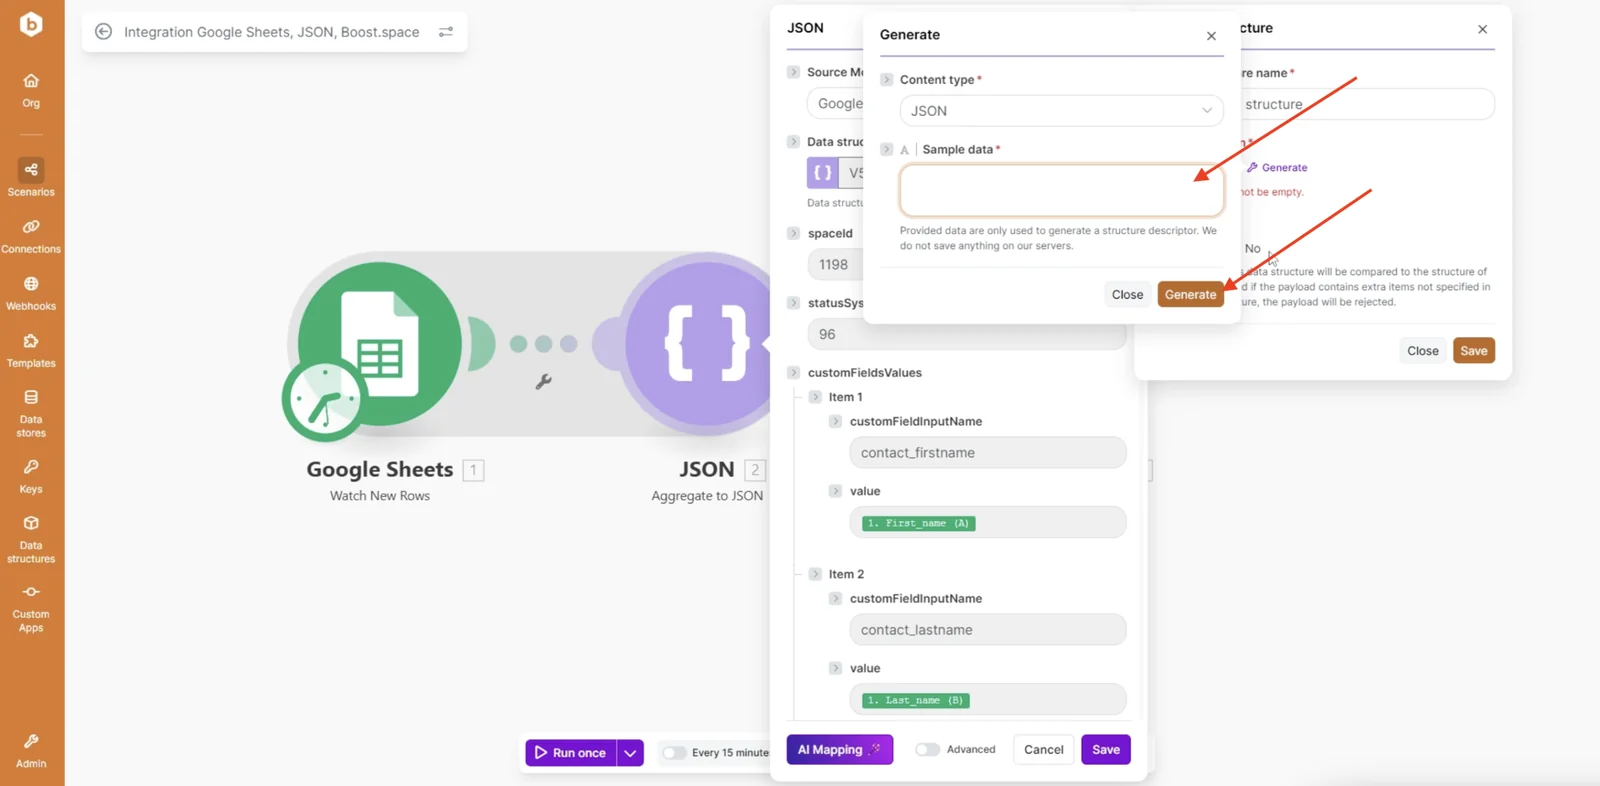
4. Click Generate and your data structure will be generated.
Step 4: Simplify the Data Structure
After generating the structure, remove unnecessary fields.
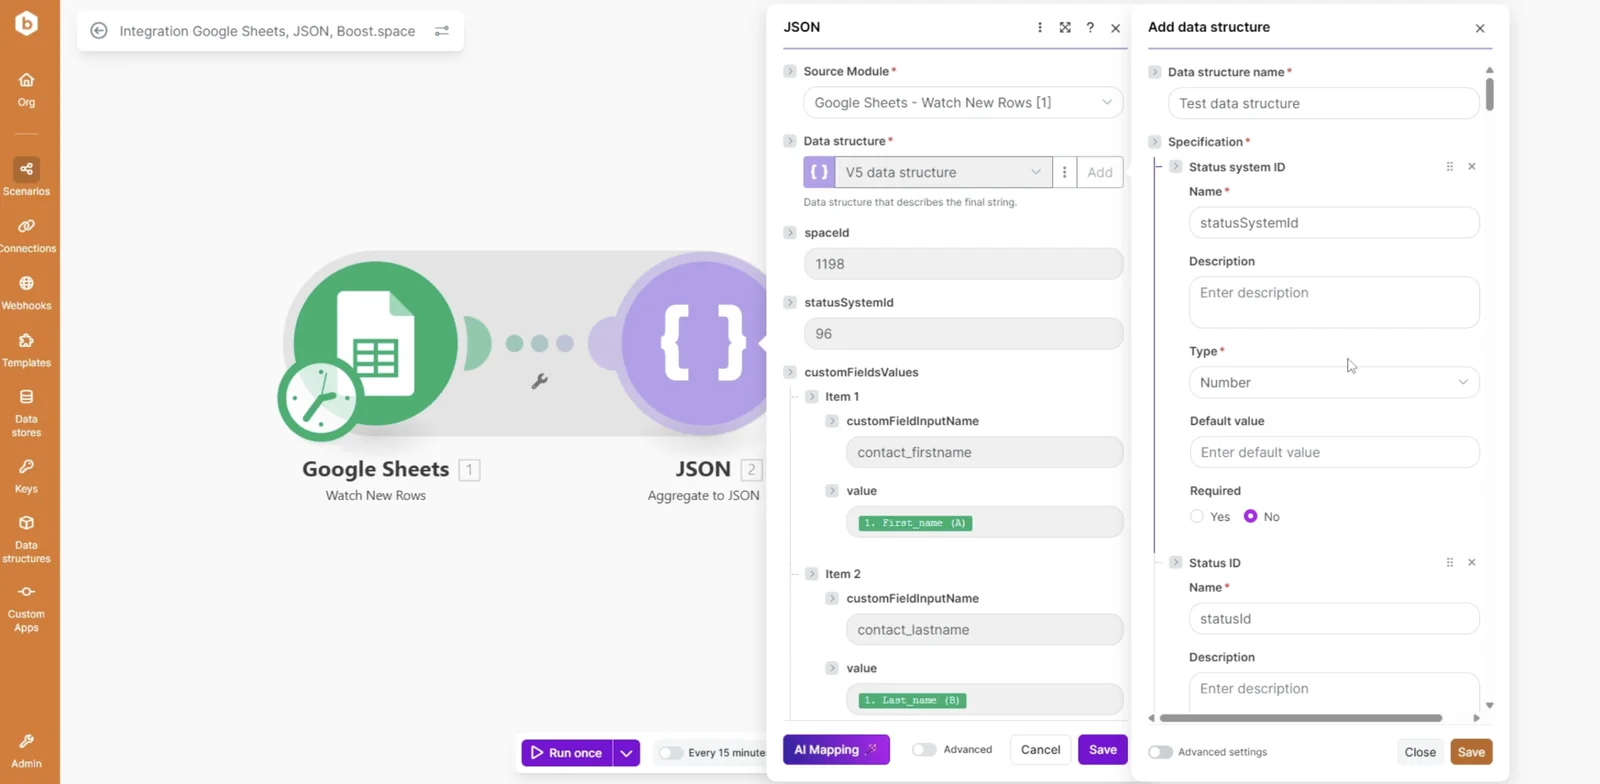
In this example we will keep only:
space_idstatus_system_idcustom_field_values:custom_field_input_namevalue
This makes mapping easier and reduces potential errors. After that click save.
Step 5: Get Required IDs from Boost.space
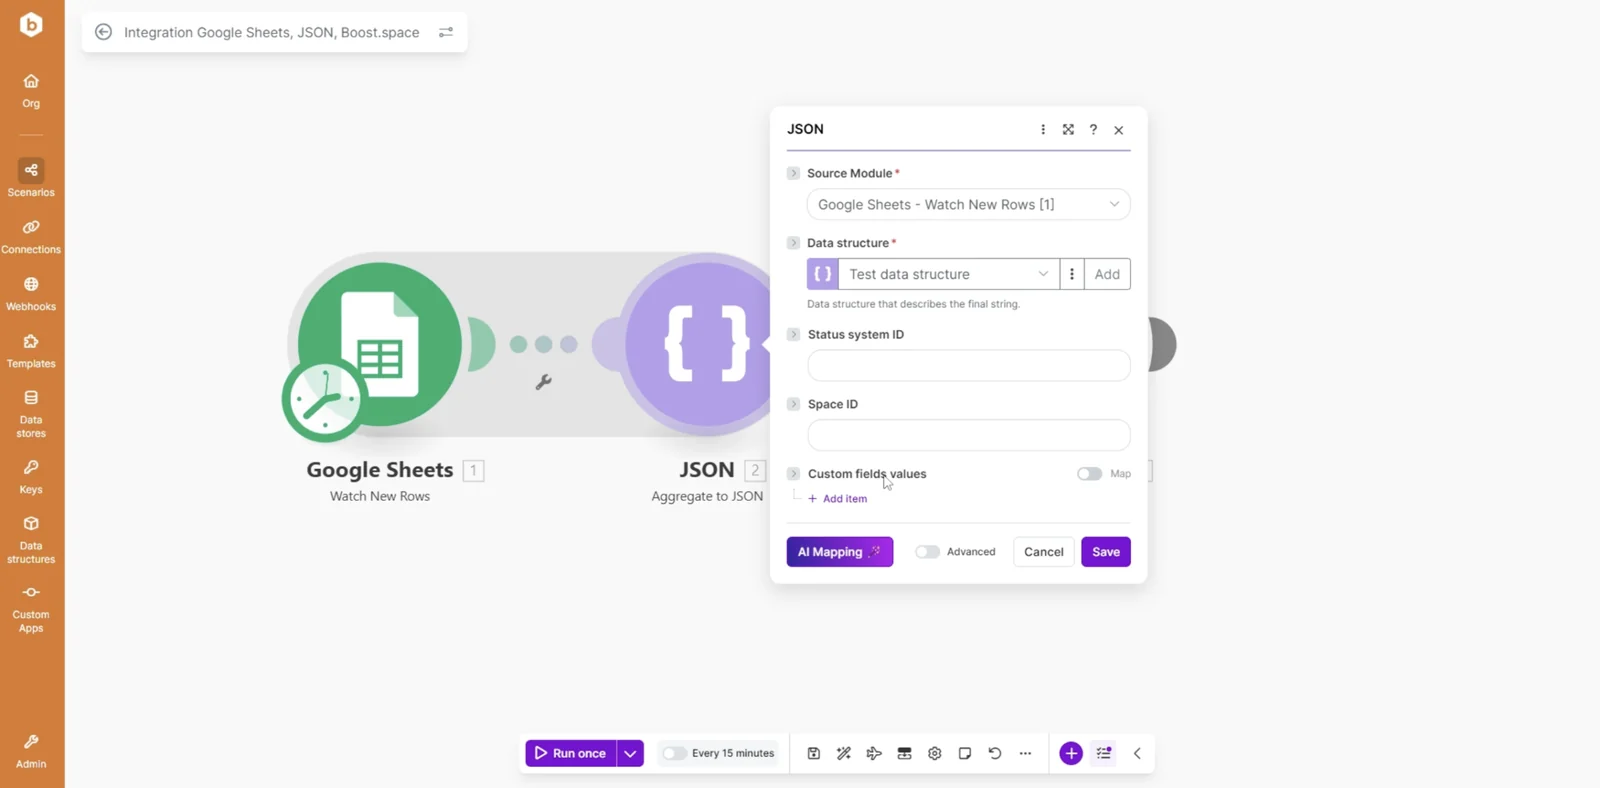
Space ID
1. Open your target Space in Boost.space
2. Copy the Space ID from the URL
Status System ID
1. Go to System Settings → Modules → Settings
2. Scroll to Statuses
3. Copy the ID of the desired status (e.g., Active)
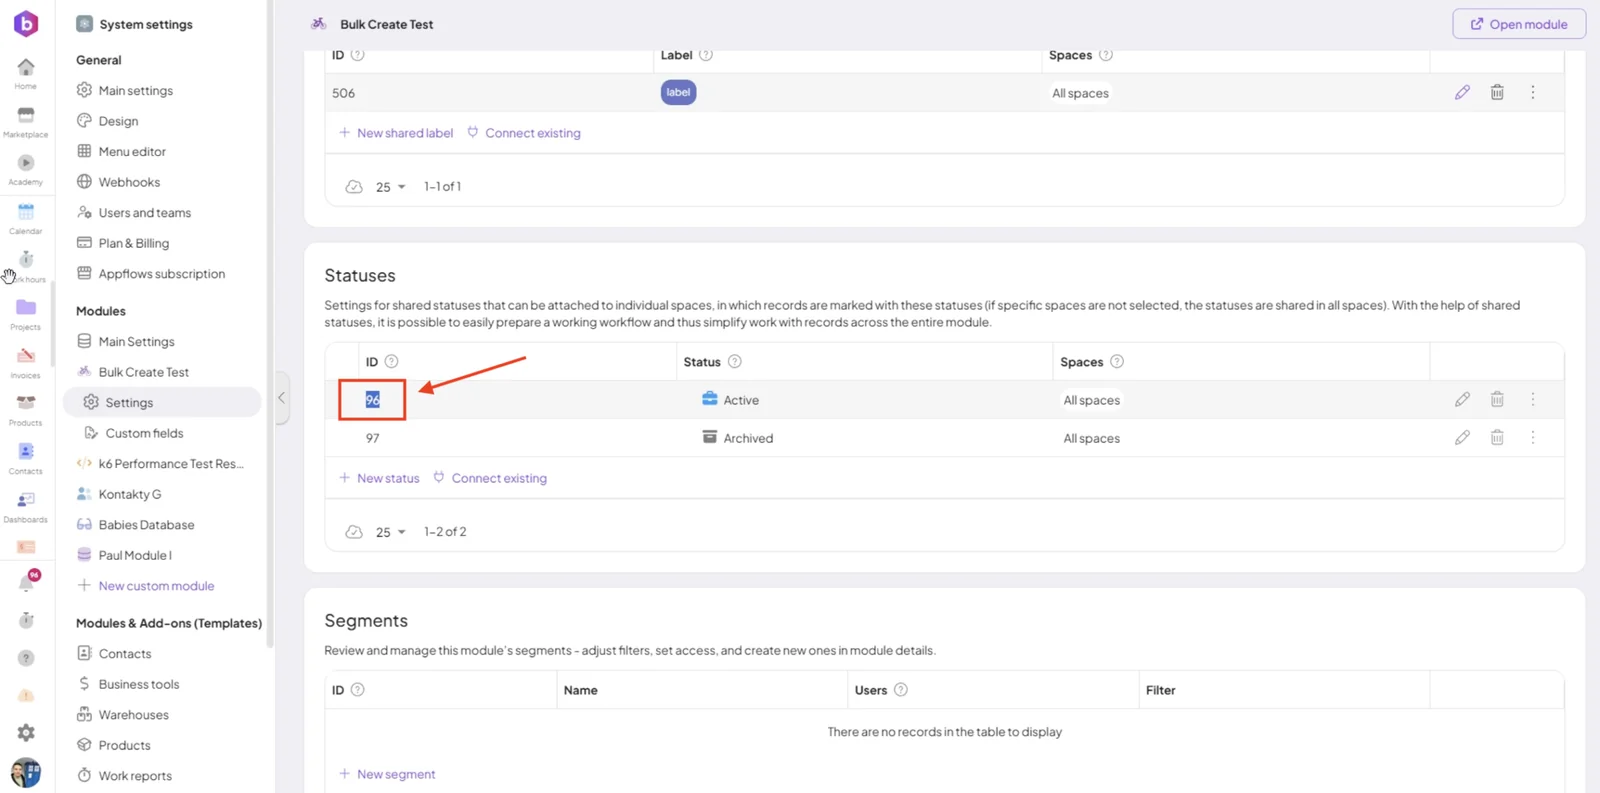
4. Paste it into JSON module.
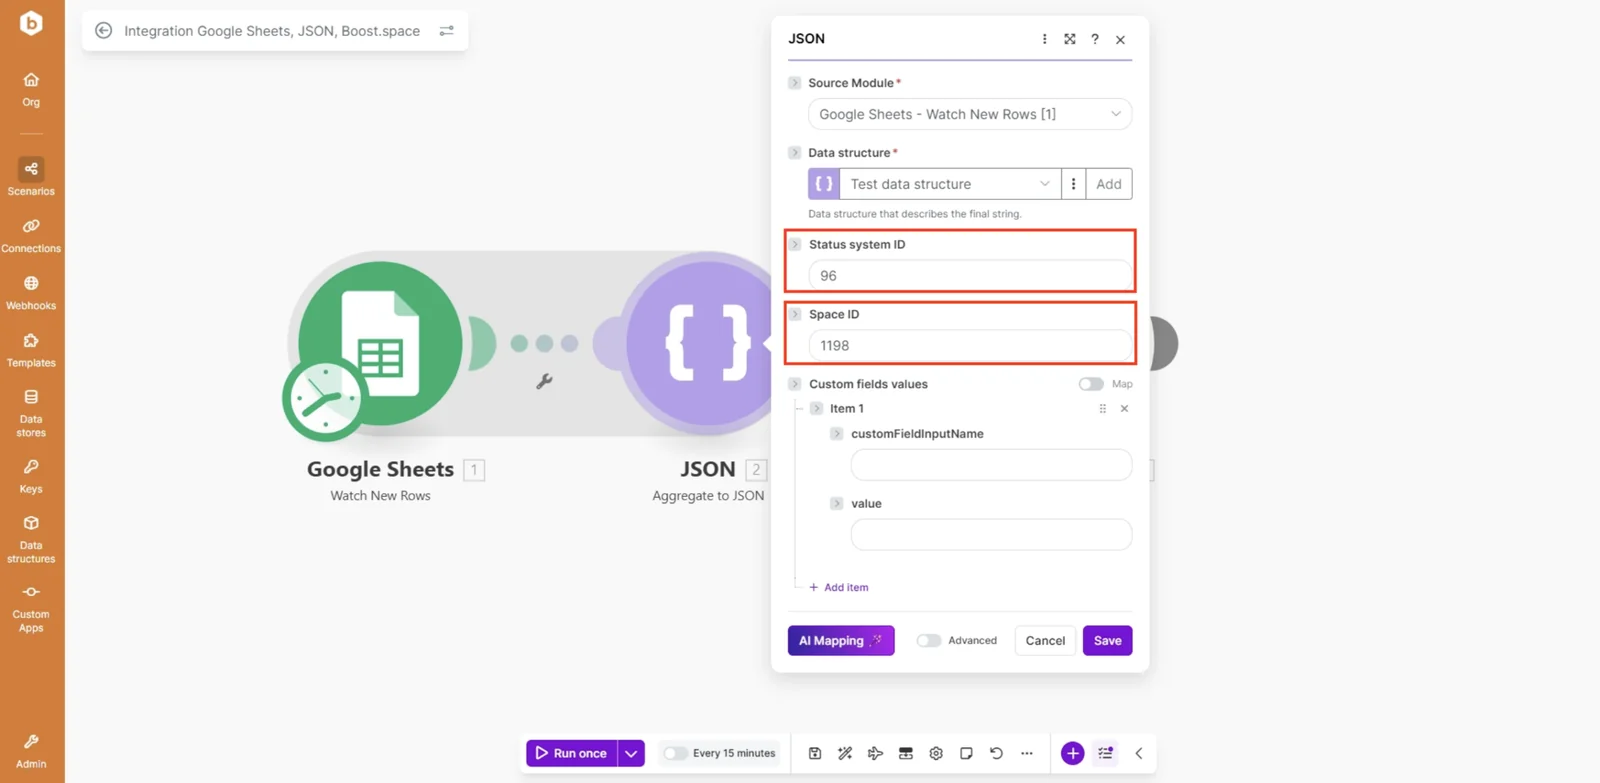
Step 6: Map Custom Fields
Map your source data to Boost.space fields.
Important
-
Each field requires:
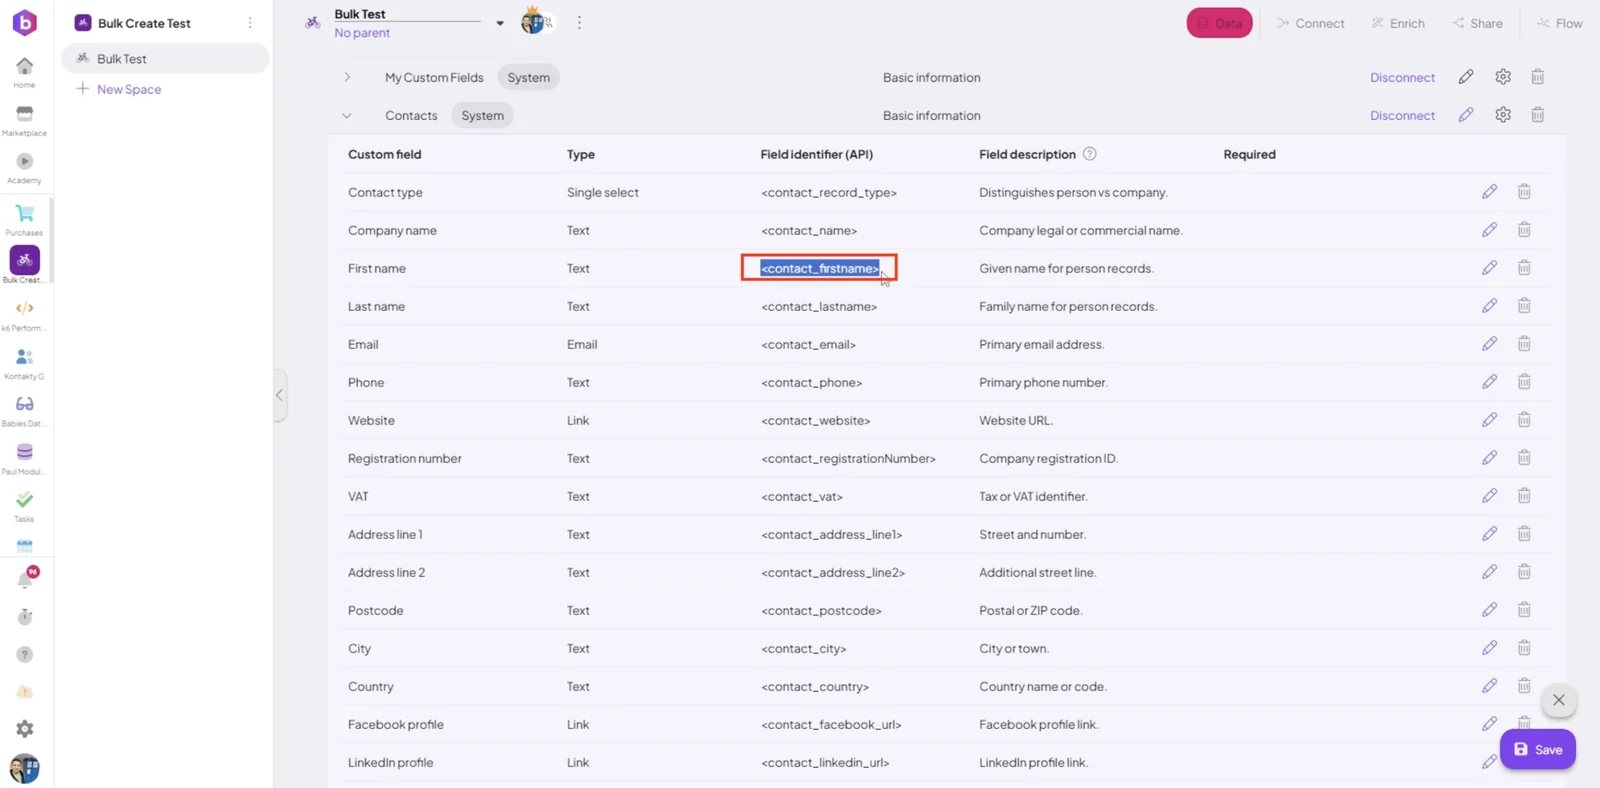
custom_field_input_namevalue
-
Field names must match your Boost.space custom fields
- Now, map it in the Integrator. The
valueparameter should be mapped from your source application.
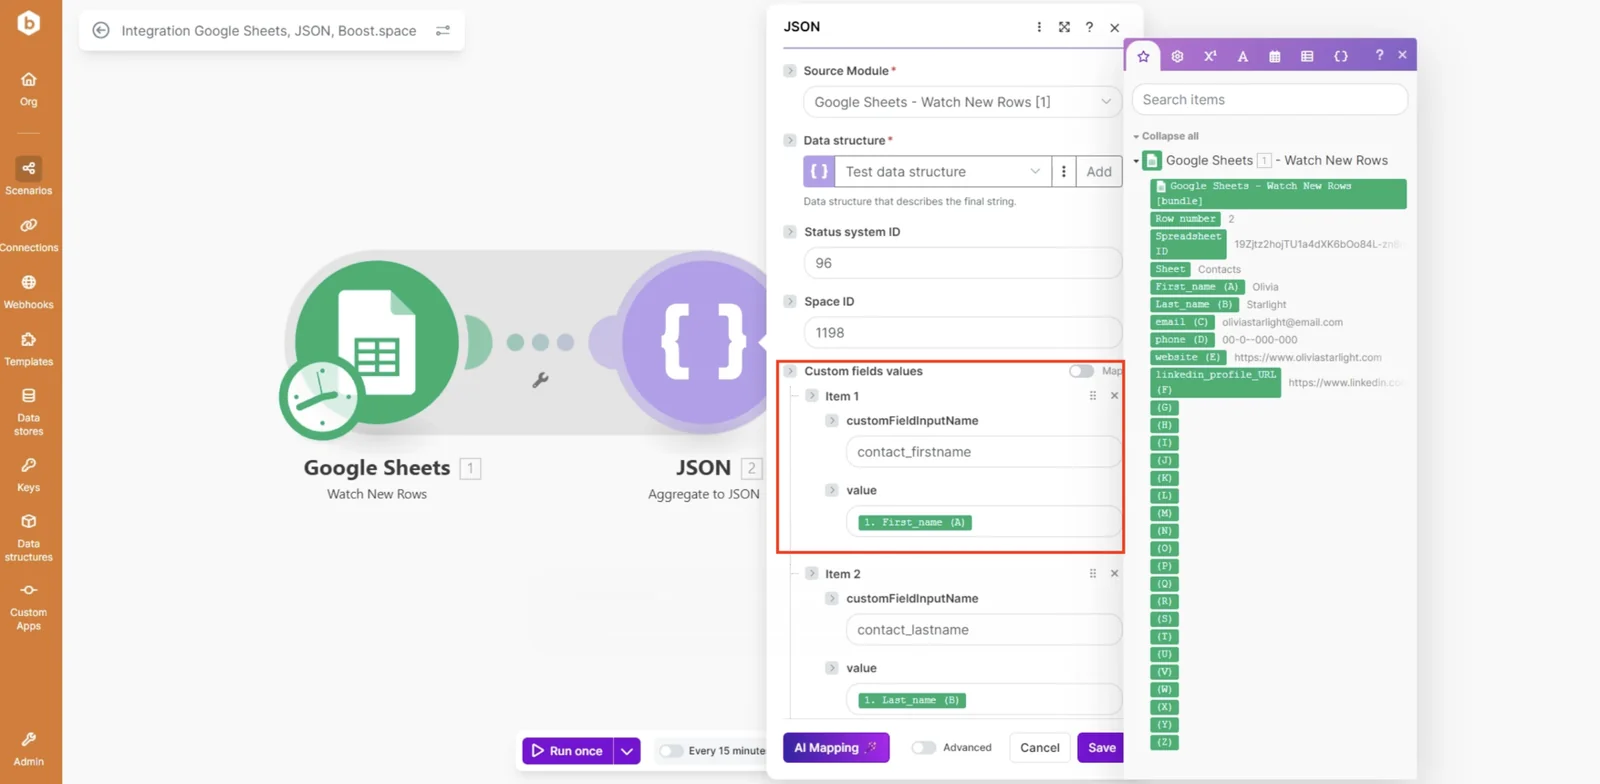
- After mapping all custom fields, click Save.
Step 7: Configure the Boost.space API Module
Set up the Boost.space API request:
- Endpoint:
/custom-module-item - Method:
POST - Content-Type:
application/json - Body: Map the JSON output from the Aggregate module
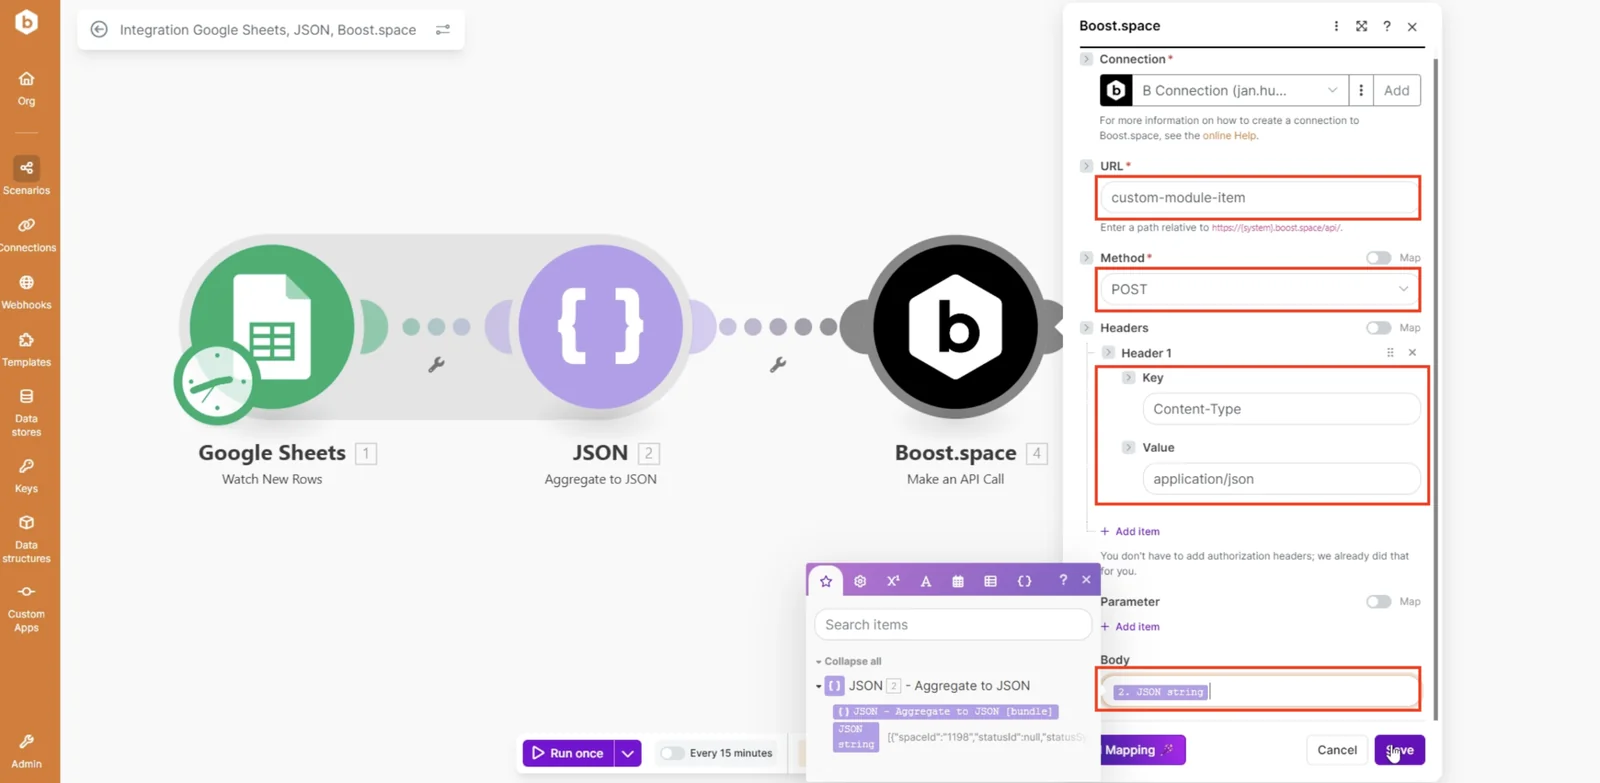
- Save the module and the scenario.
Step 8: Run the Scenario
1. Click Run Once
2. The system processes all records in bulk
Result
- Multiple records are imported in a single operation
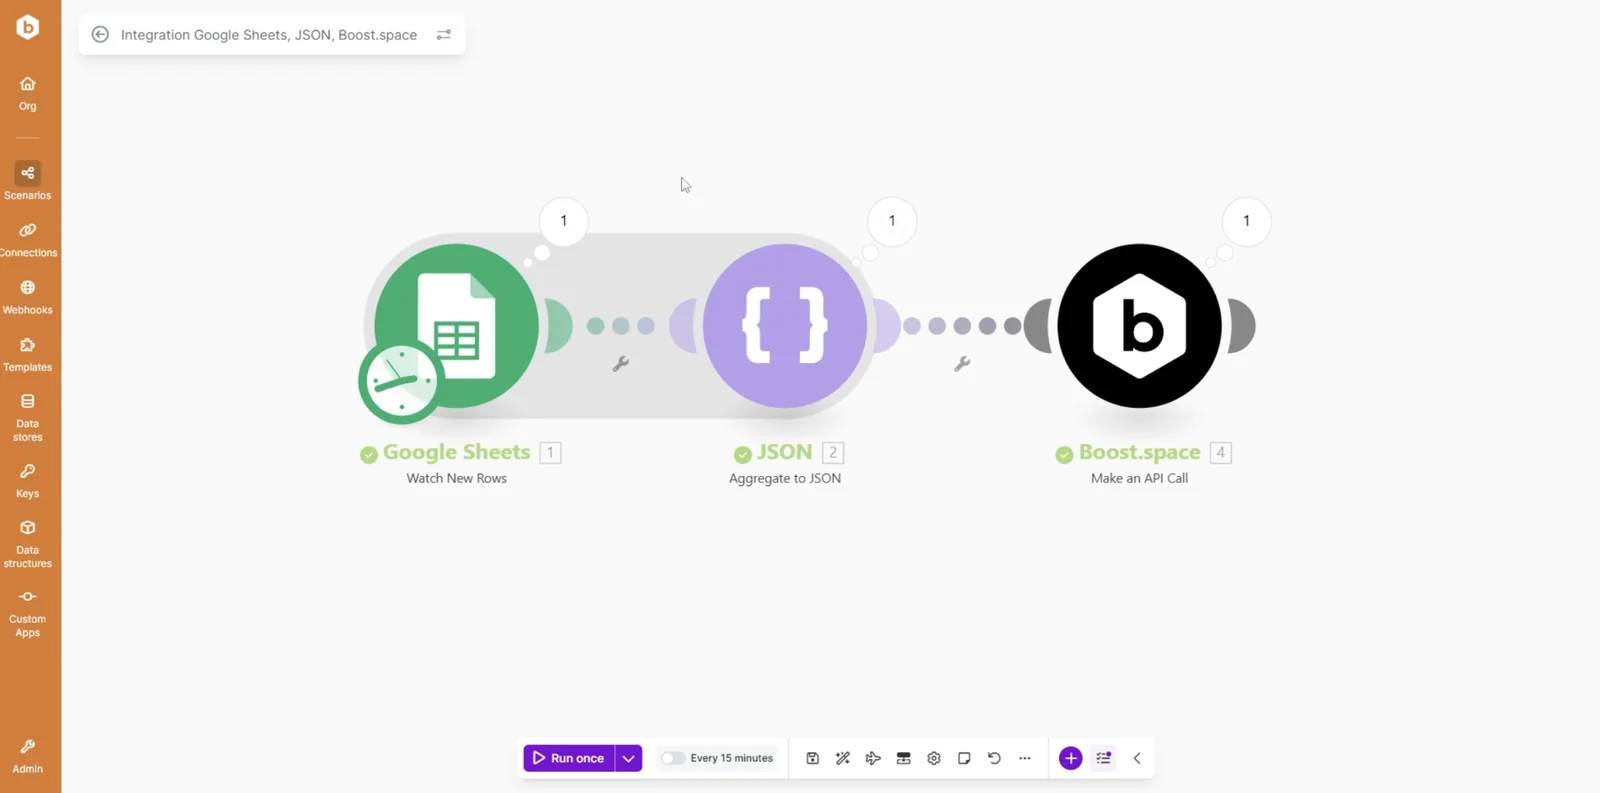
- Example: 5 records = 1 operation
Step 9: Verify Imported Data
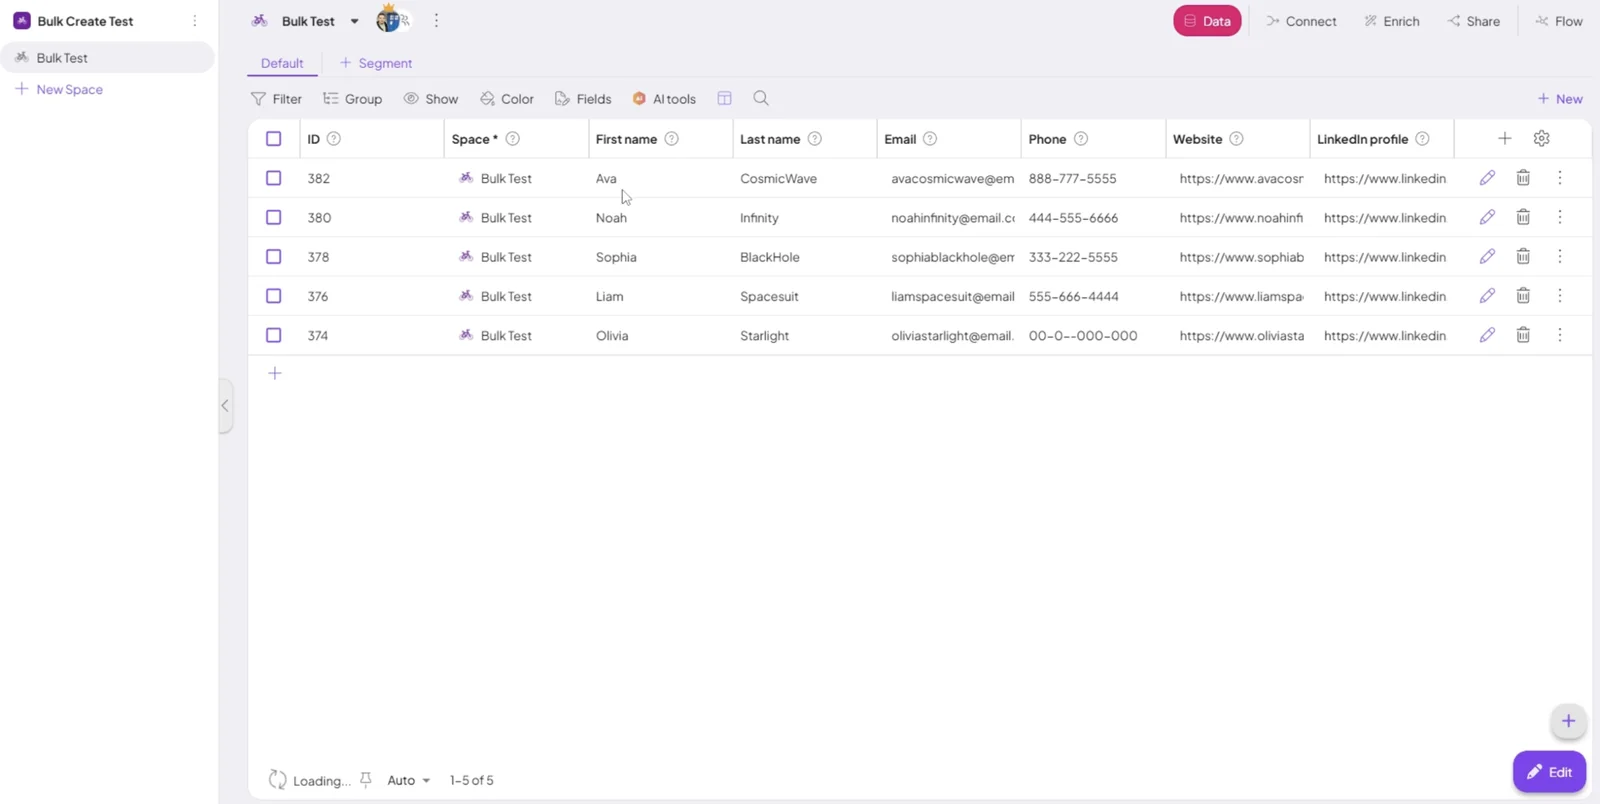
1. Open your Boost.space Space
2. Refresh the page
3. Confirm the records were imported successfully
By combining a data source, JSON aggregation, and the Boost.space API, you can import large volumes of data.

