Airtable
Any references to third-party products or services do not constitute Boost.space Product Documentation nor do they create any contractual obligations. This material is for informational purposes only and is subject to change without notice.
Boost.space does not warrant the availability, accuracy, reliability, completeness, or usefulness of any information regarding the subject of third-party services or systems.
The Airtable modules allow you to monitor records and submitted forms or search, retrieve, create, update, and delete records in your Airtable account.
To get started with Airtable, create an account at airtable.com/signup.
Refer to the Airtable REST API Documentation for a list of available endpoints.
Connect Airtable to Boost.space Integrator
You can connect Airtable apps in Boost.space Integrator in three ways:
-
Connect using API Key (deprecated January 2024)
Connect using OAuth
To connect Airtable using OAuth:
-
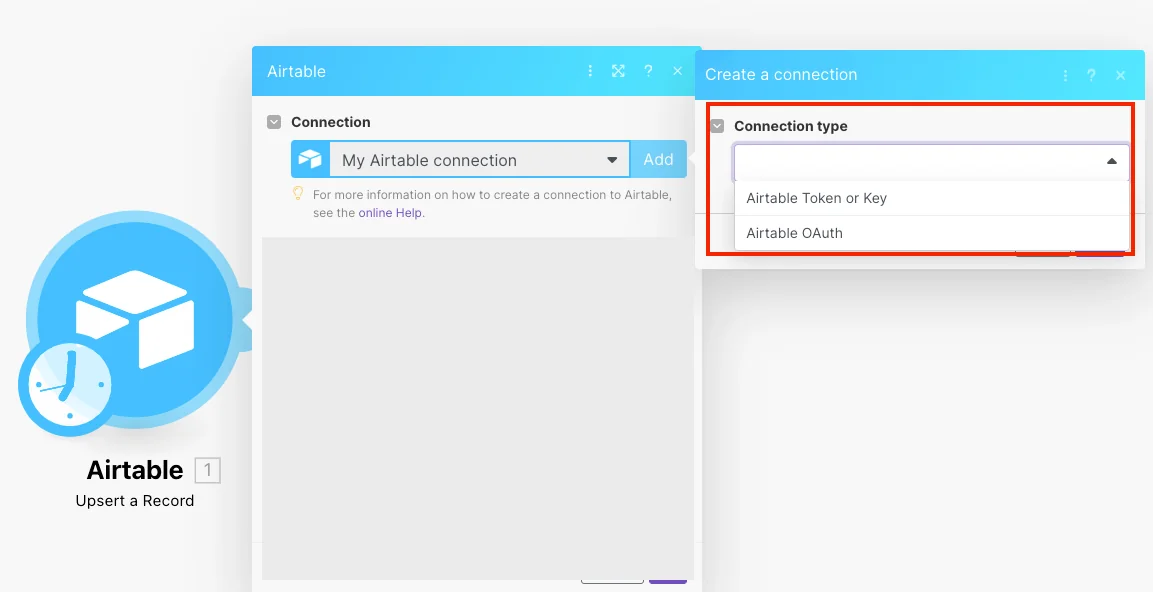
Log in to your Boost.space Integrator account, open the Airtable module scenario, click the Add button next to the Connection type field, and selectAirtable OAuth.
-
Optional: In the Connection name field, enter a name for the connection.
-
Optional: Click Show Advanced Settings and enter the client credentials created in the section, Obtain OAuth Credentials.
-
Click Save.
-
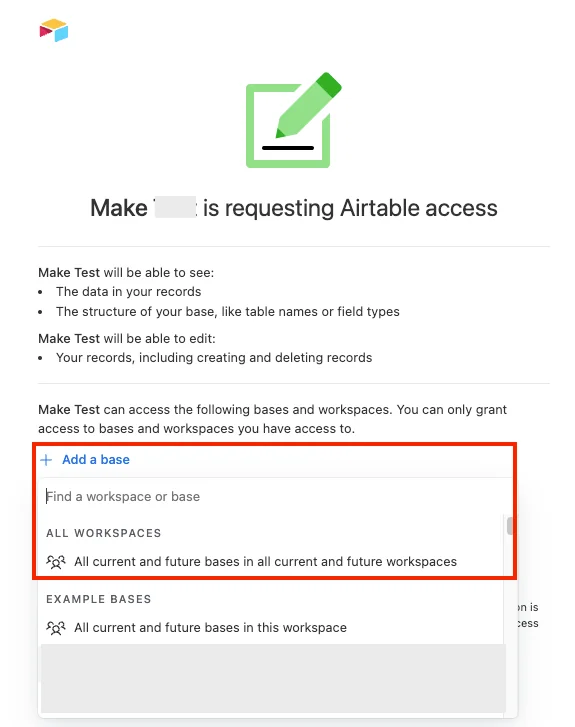
In the Authentication screen, click Add a base and select the base to which you want to grant access.
-
Click Grant access.
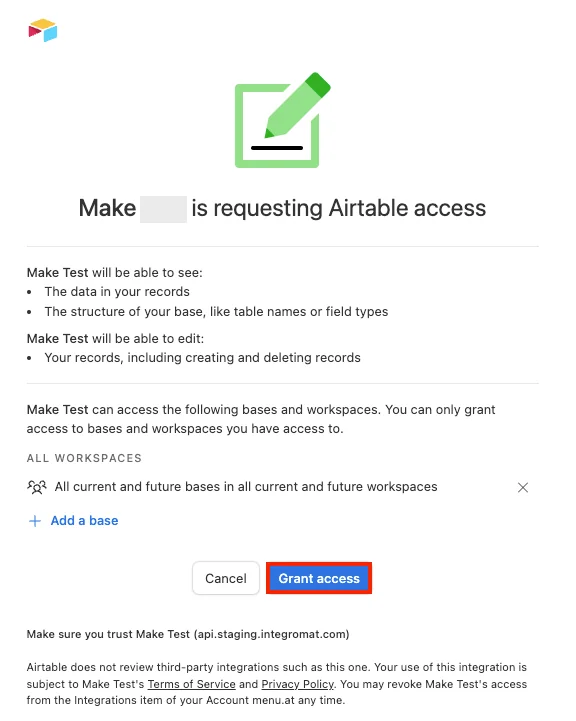
You have successfully connected the Airtable app with Boost.space Integrator.
Obtain OAuth Credentials
Providing OAuth credentials is optional.
When you select the connection type as OAuth, authorize your account without the need to provide OAuth credentials.
To obtain OAuth credentials:
-
Log in to your Airtable account.
-
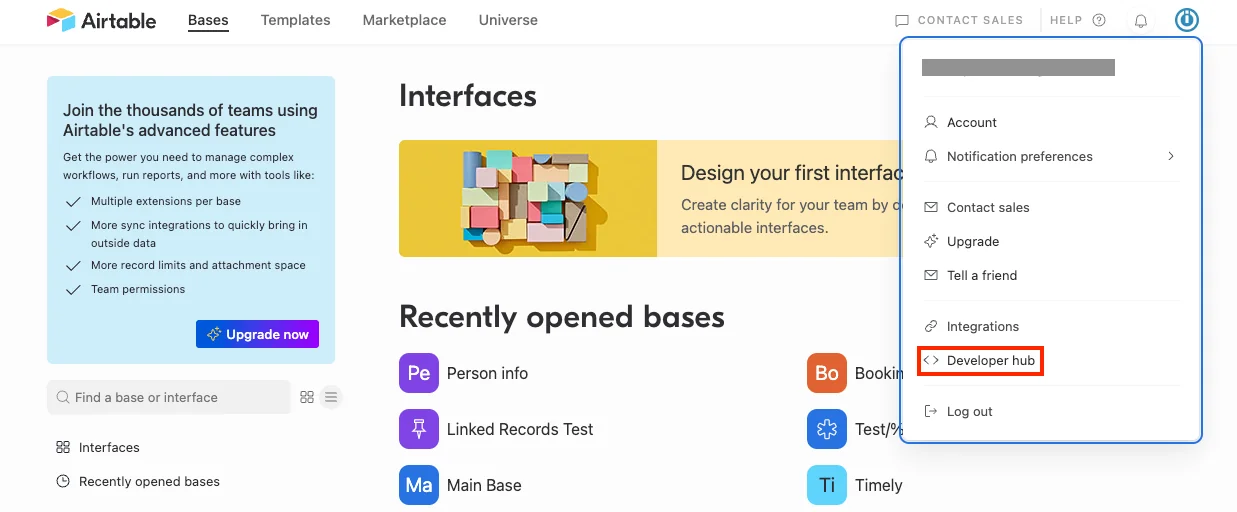
Click Profile > Developer hub.
-
Click OAuth integrations > Register new OAuth integration.

-
Enter the name for the integration and OAuth redirect URL as
https://integrator.boost.space/oauth/cb/airtable3.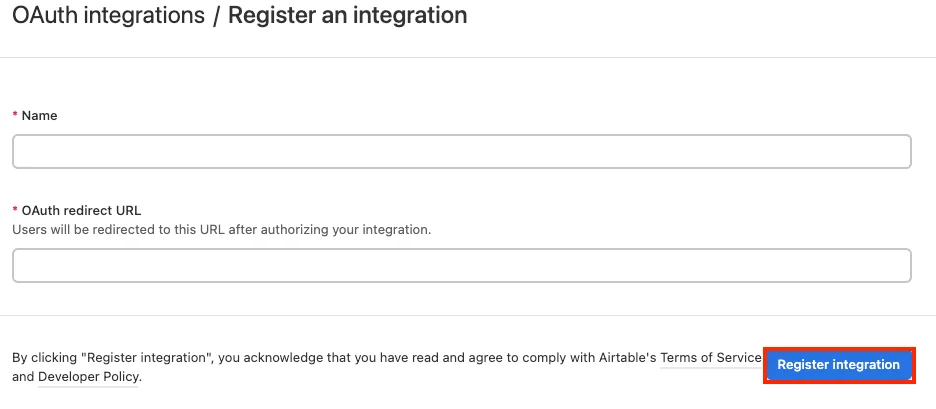
-
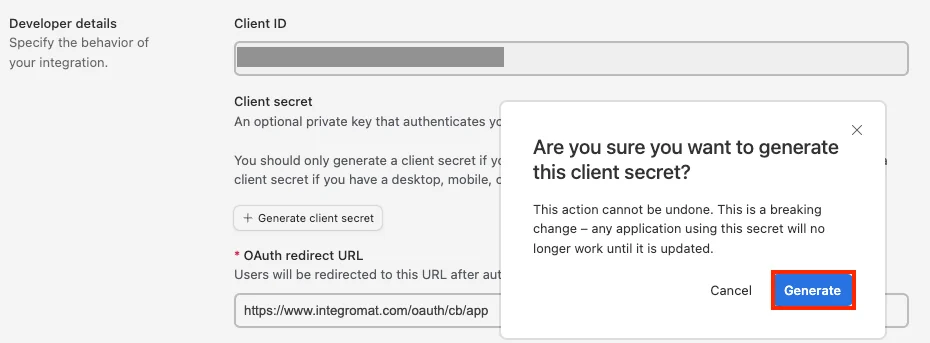
Click Generate client secret.
-
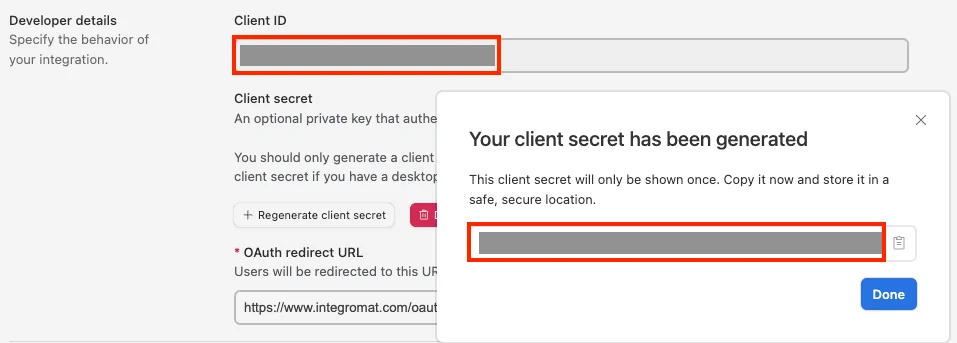
Copy the Client ID and Client Secret to a safe place.
-
Select the scopes, enter the support information, and click Save changes.
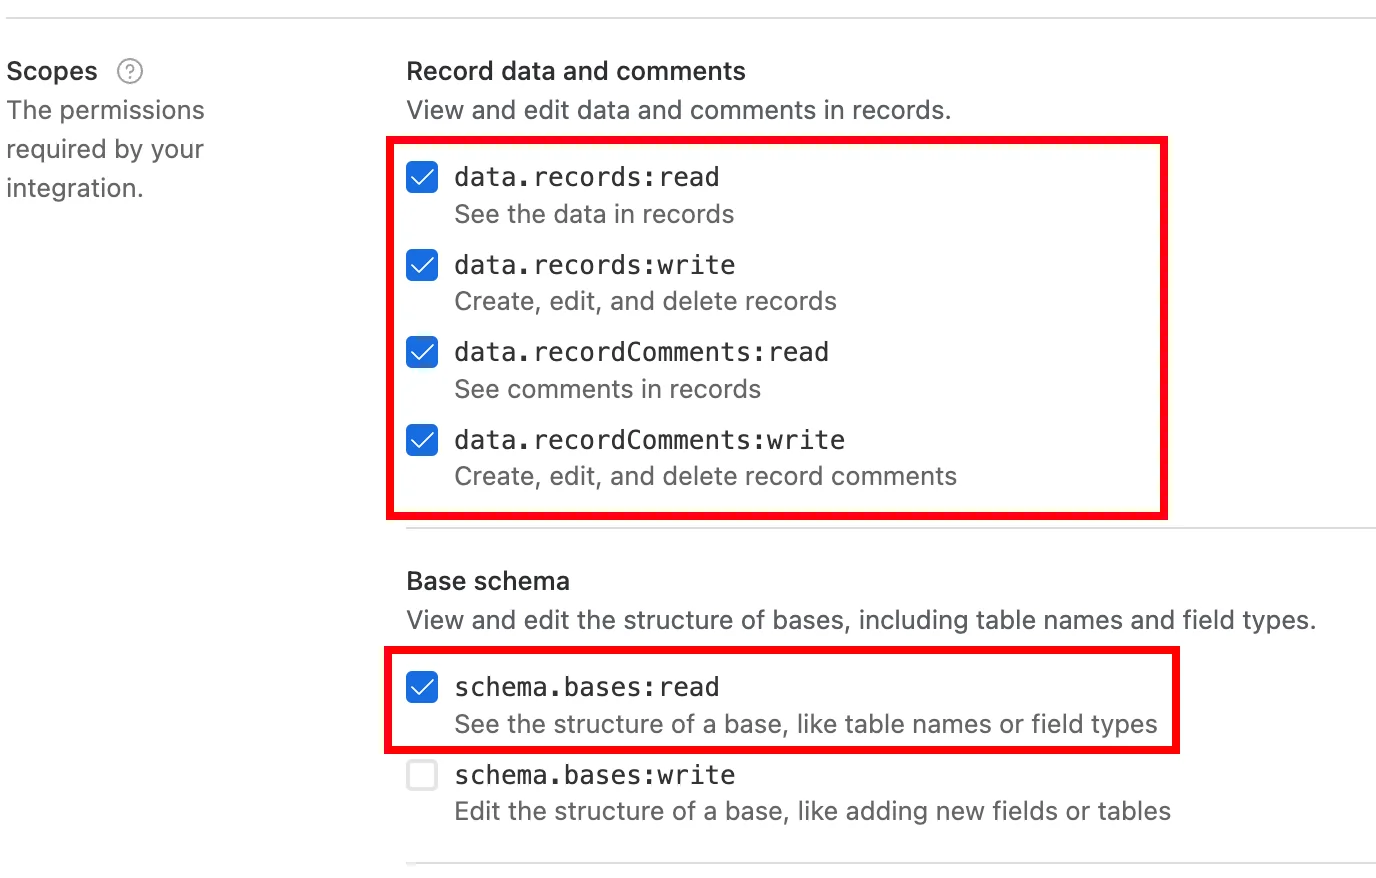
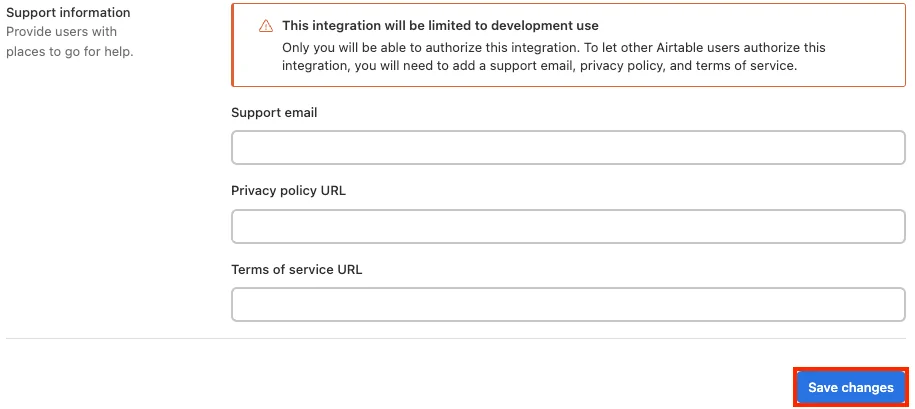
You have successfully created OAuth credentials.
Connect using Personal Access Token
You can connect Airtable apps using personal access token values from your Airtable account.
-
Log in to your Airtable account.
-
Click Your Profile Icon > Developer hub.
-
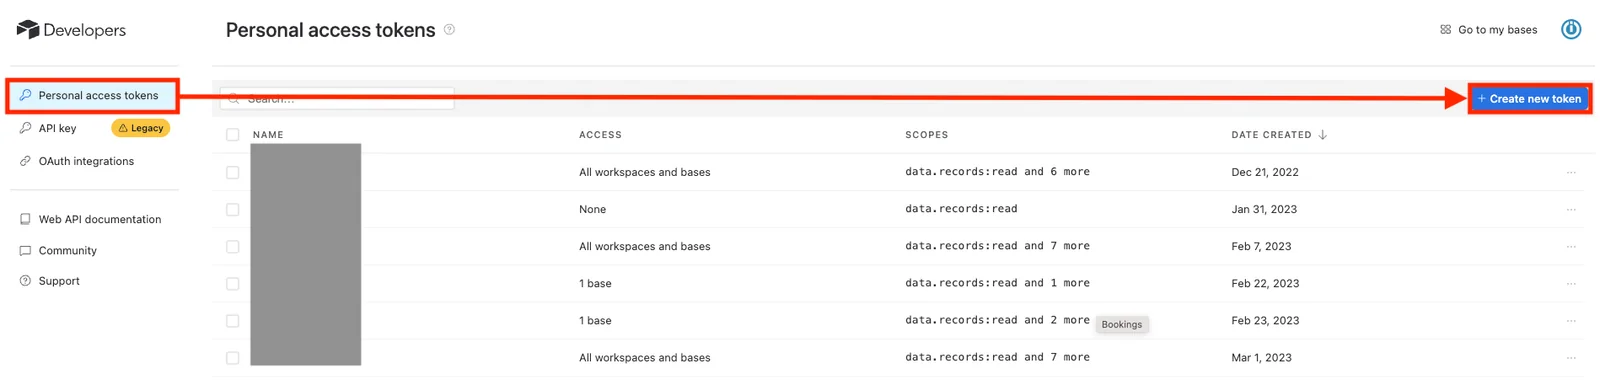
Click Personal access tokens > Create new token.
-
Enter a name for the access token, select the Scopes, Access, and click Create token.
Note: Users should choose at least the following most frequently required scopes:
data.records:read,data.records:write, andschema.bases:read -
Copy the Personal Access Token to a safe place, and click Done.
-
Log in to your Boost.space Integrator account, open the Airtable module scenario, click the Add button next to the Connection type field, and select the connection type as Airtable Token or Key.
-
Optional: In the Connection name field, enter a name for the connection.
-
Select the token type as Personal Access Token and enter the token copied in step 5 above.
-
Optional: Click Show Advanced Settingsand select the proxy service in the Proxyfield.
By choosing a Proxy, you understand and confirm that your Airtable data, including personal access tokens, will be routed through a third-party service.
- Click Save.
You have successfully established the connection. You can now edit your scenario and add more Airtable modules. If your connection needs reauthorization, follow the connection renewal steps here.
Connect using API Key
You can connect Airtable apps using an API Key from your Airtable account.
API keys will be deprecated by the end of January 2024. After this date, API keys will stop working, and you will have to migrate to personal access tokens.
-
Log in to your Airtable account.
-
Click Your Profile Icon > Developer hub.
-
Click API key and copy the API key to a safe place.
-
Log in to your Boost.space Integrator account, open the Airtable module scenario, click the Add button next to the Connection type field, and select the connection type as Airtable Token or Key.
-
Optional: In the Connection name field, enter a name for the connection.
-
Select the token type as API Key and enter the token copied in step 3 above.
-
Optional: Click Show Advanced Settingsand select the proxy service in the Proxyfield.
By choosing a Proxy, you understand and confirm that your Airtable data, including API keys, will be routed through a third-party service.
- Click Save.
You have successfully established the connection. You can now edit your scenario and add more Airtable modules. If your connection needs reauthorization, follow the connection renewal steps here.
Build Airtable Scenarios
After connecting the app, you can perform the following actions:
Records
You can watch, create, update, search, retrieve, upsert, delete records, and watch responses using the following modules.
Watch Records
Returns all newly created or updated records in a view (required Created Time or Last Modified Time fields).
Connection
Establish a connection to your Airtable account.
Base
Select the base that contains the table you want to watch for records.
Table
Select the table you want to watch for new records.
Trigger configuration
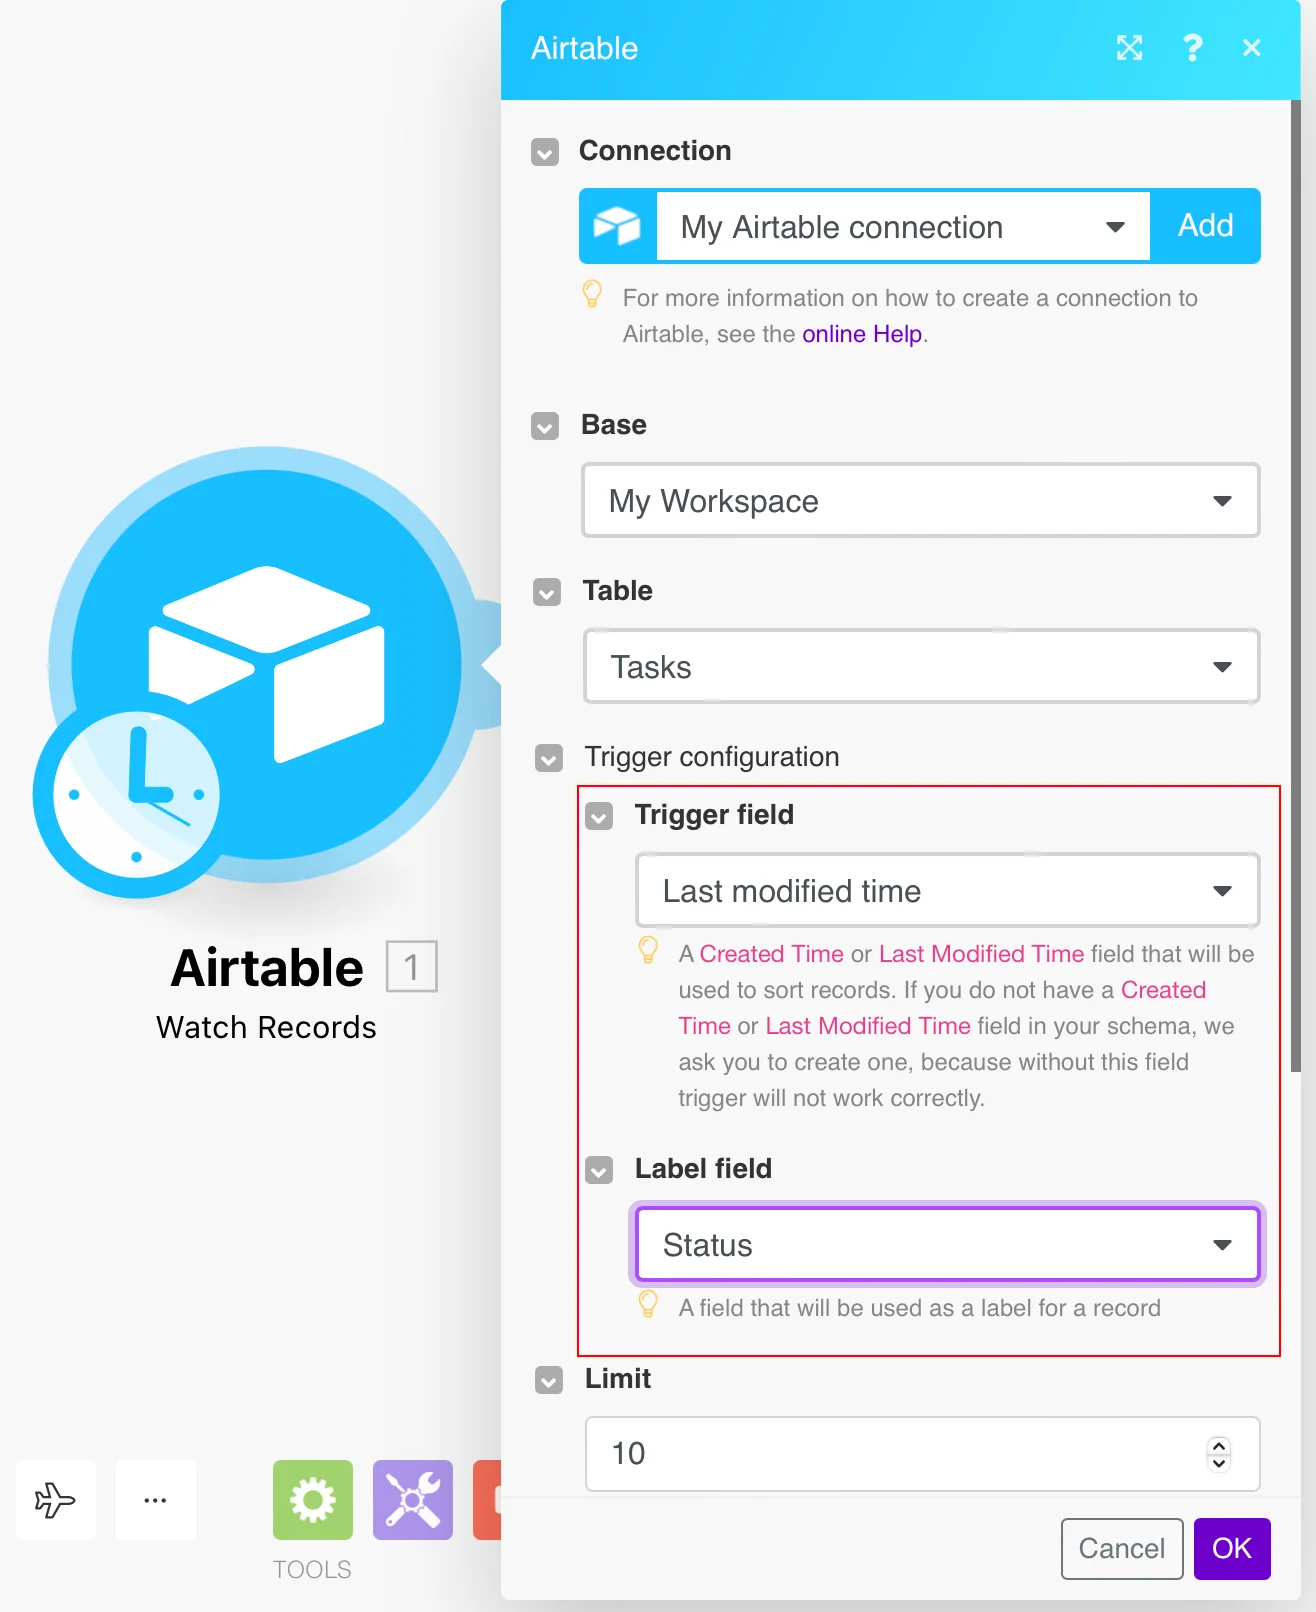
Trigger field
Select the Created Time option to watch for new records or the Last Modified Time option to watch for modified records.
If you do not have a Created Time or Last Modified Time field in your scheme, we ask you to create one. Without this field, the trigger will not work correctly.
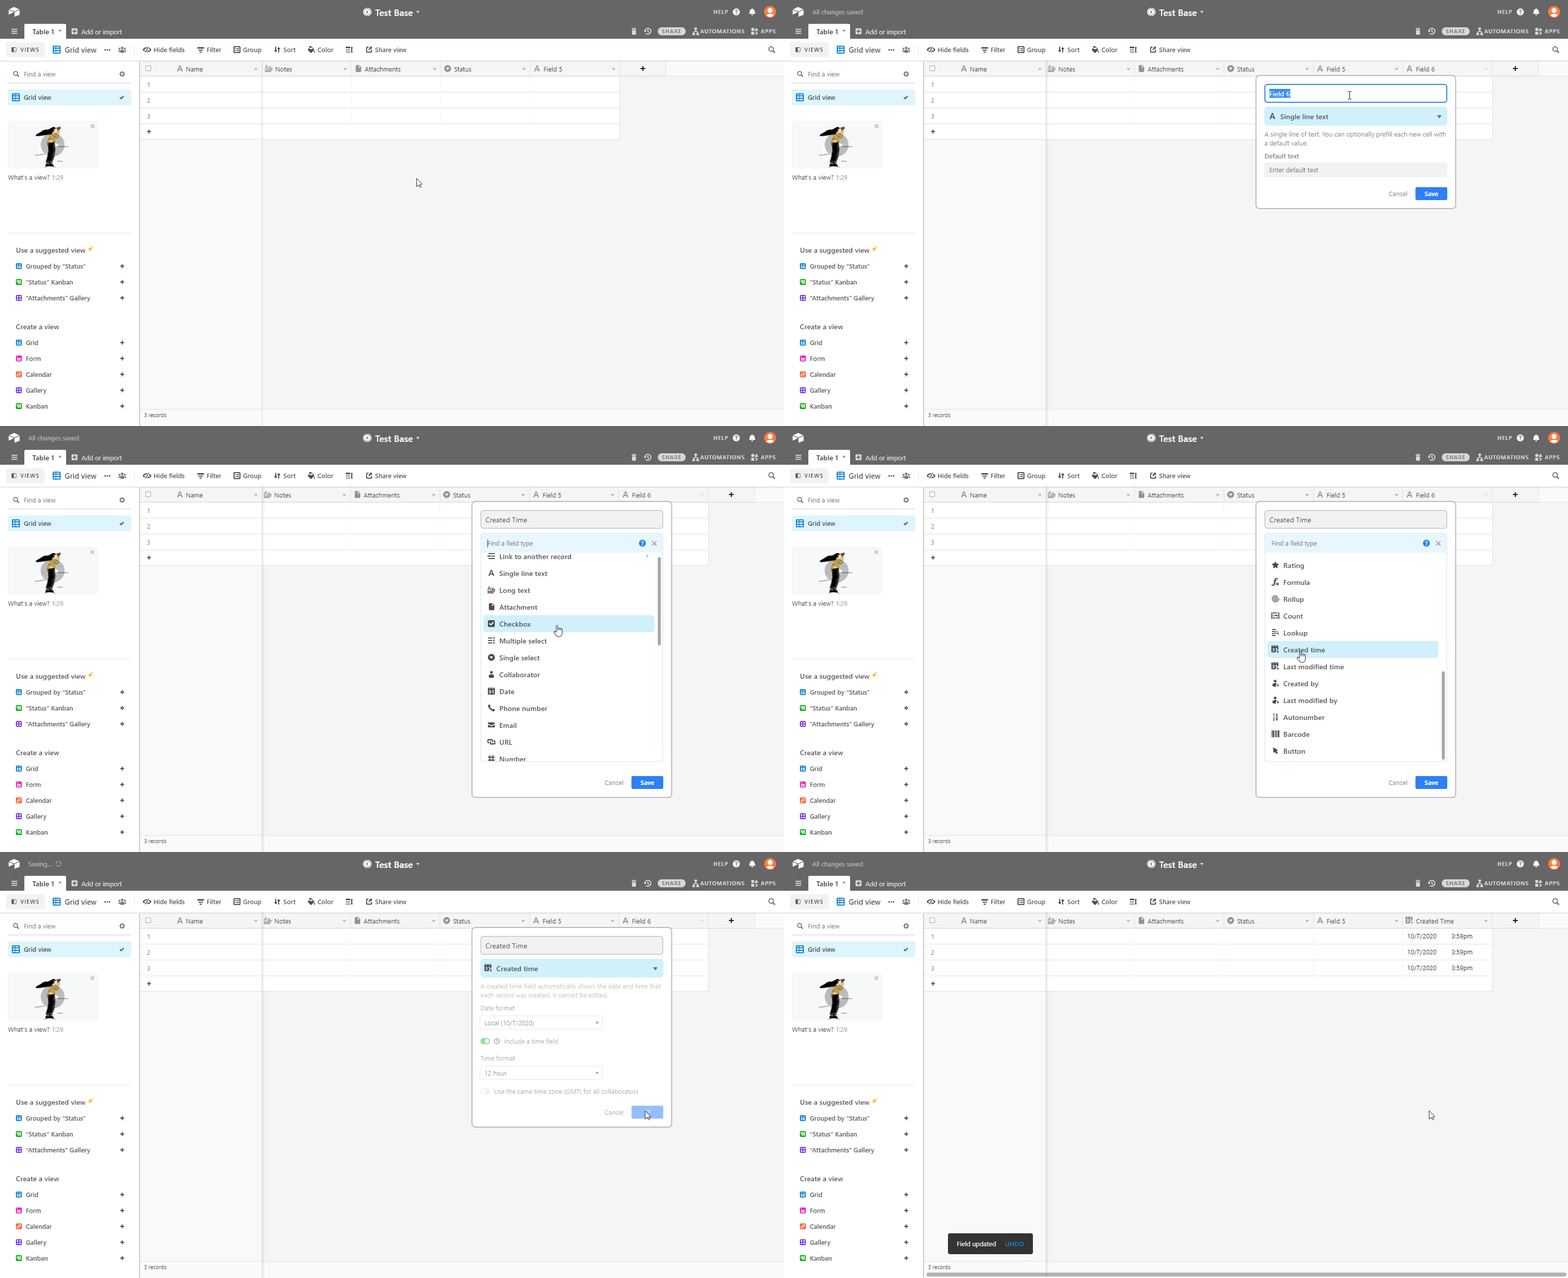
Label field: used as a label for a record. For example, Status dialog.
Limit
The maximum number of records Boost.space Integrator will return during one execution cycle.
View
Select the view to watch the records. If selected, it will return the records only in that view.
Formula
Enter the formula to filter records. For more details, refer to the Formula field reference documentation.
The formula will be evaluated for each record, and if the result is not 0, false, "", NaN, [], or #Error!, includes the record in the response.
If combined with the view parameter, it returns only records in that view that satisfy the formula.
For example, to only include records where Name isn’t empty, pass in NOT({Name} = '') as a parameter like this:
filterByFormula=NOT%28%7BName%7D%20%3D%20%27%27%29
Use Column ID
Select whether to use column ID instead of column name for mapping.
This enables persistence over the column name change. Enabling this option allows to replace entity keys in the response; instead of entity names specified as parameter keys, their identifiers will be specified. Changing this value will break all existing mappings in this scenario.
Watch Responses
Triggers when a new response is submitted.
Available for paid _Pro Plan_only. See the Airtable pricing page.
The webhook URL needs to be generated in Boost.space Integrator and added to the form configuration in the Airtable.
-

Add the Watch Responses module to your Boost.space Integratorscenario.
-
Generate and copy the webhook URL.
-

Log in to your Airtable account.
-
Open the Base and the table you want for the form and create a Form view.
-
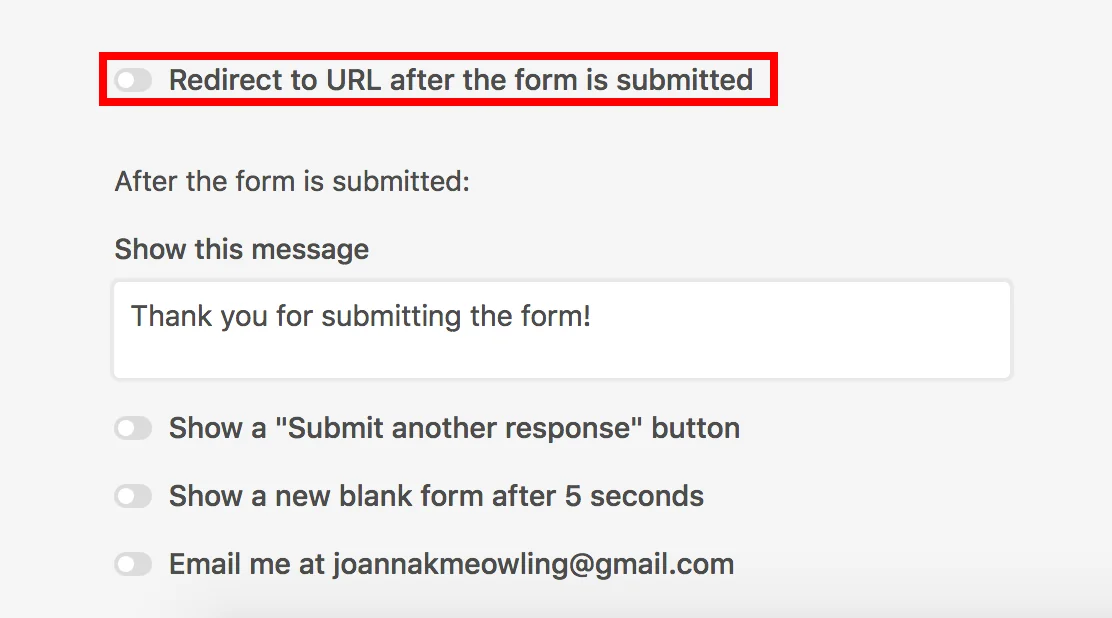
Set the form as needed, scroll down the form, and enable the Redirect to URL after the form is submitted option.
-
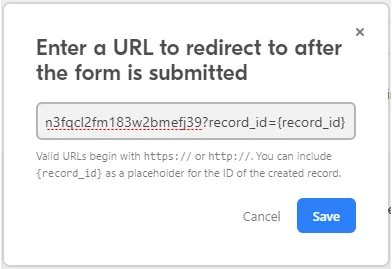
Enter the Webhook URL generated in step 2 to the displayed dialog box and add the _?record_id={record_id}_just after the webhook URL to include the Record ID in the module’s output, then click Save. The resulting URL will, for example, look like this:
https://hook.eu1.make.com/tgnp28pewooafbdgobvbh225hmocbn85?record\_id={record\_id}
-
Go back to your Boost.space Integratorscenario and run the Watch Responses module only to load the Record ID from Airtable and to be able to map that field into the other modules.
Note: Airtable only supports sending the
record_idparameter. -
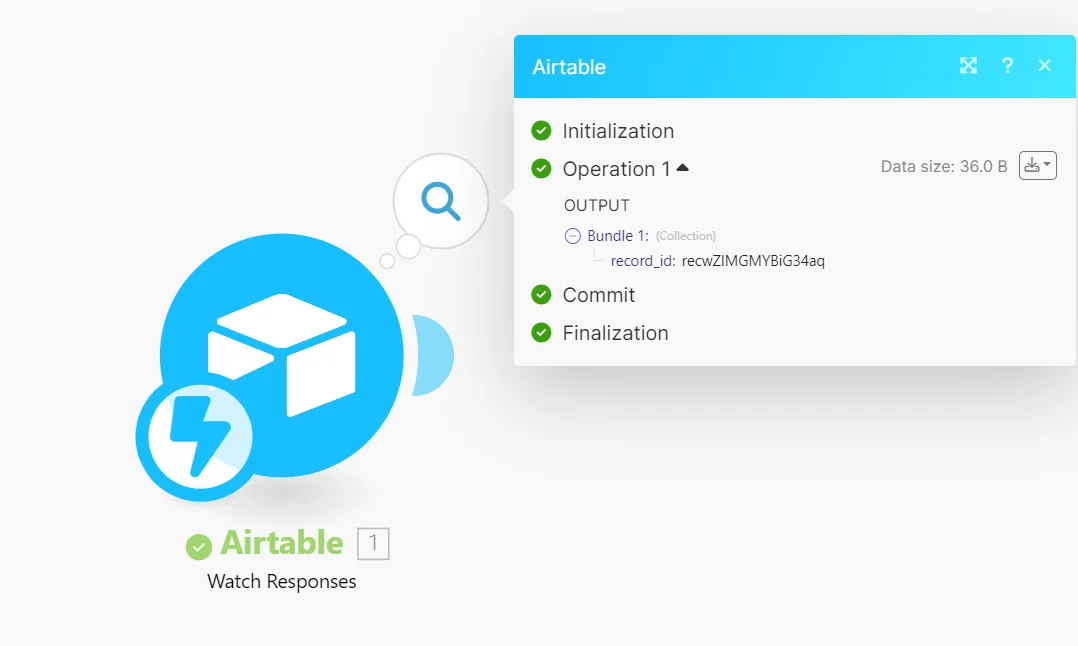
Submit the form in Airtable where the Redirect to URL after the form is submitted option is enabled and the Webhook URL is added (step 6 above).
The Watch Responses module is triggered and loads the Record ID.
-
Add the Airtable > Get a Record module just after the Airtable > Watch Responses module and map the record_id to the Record ID field.
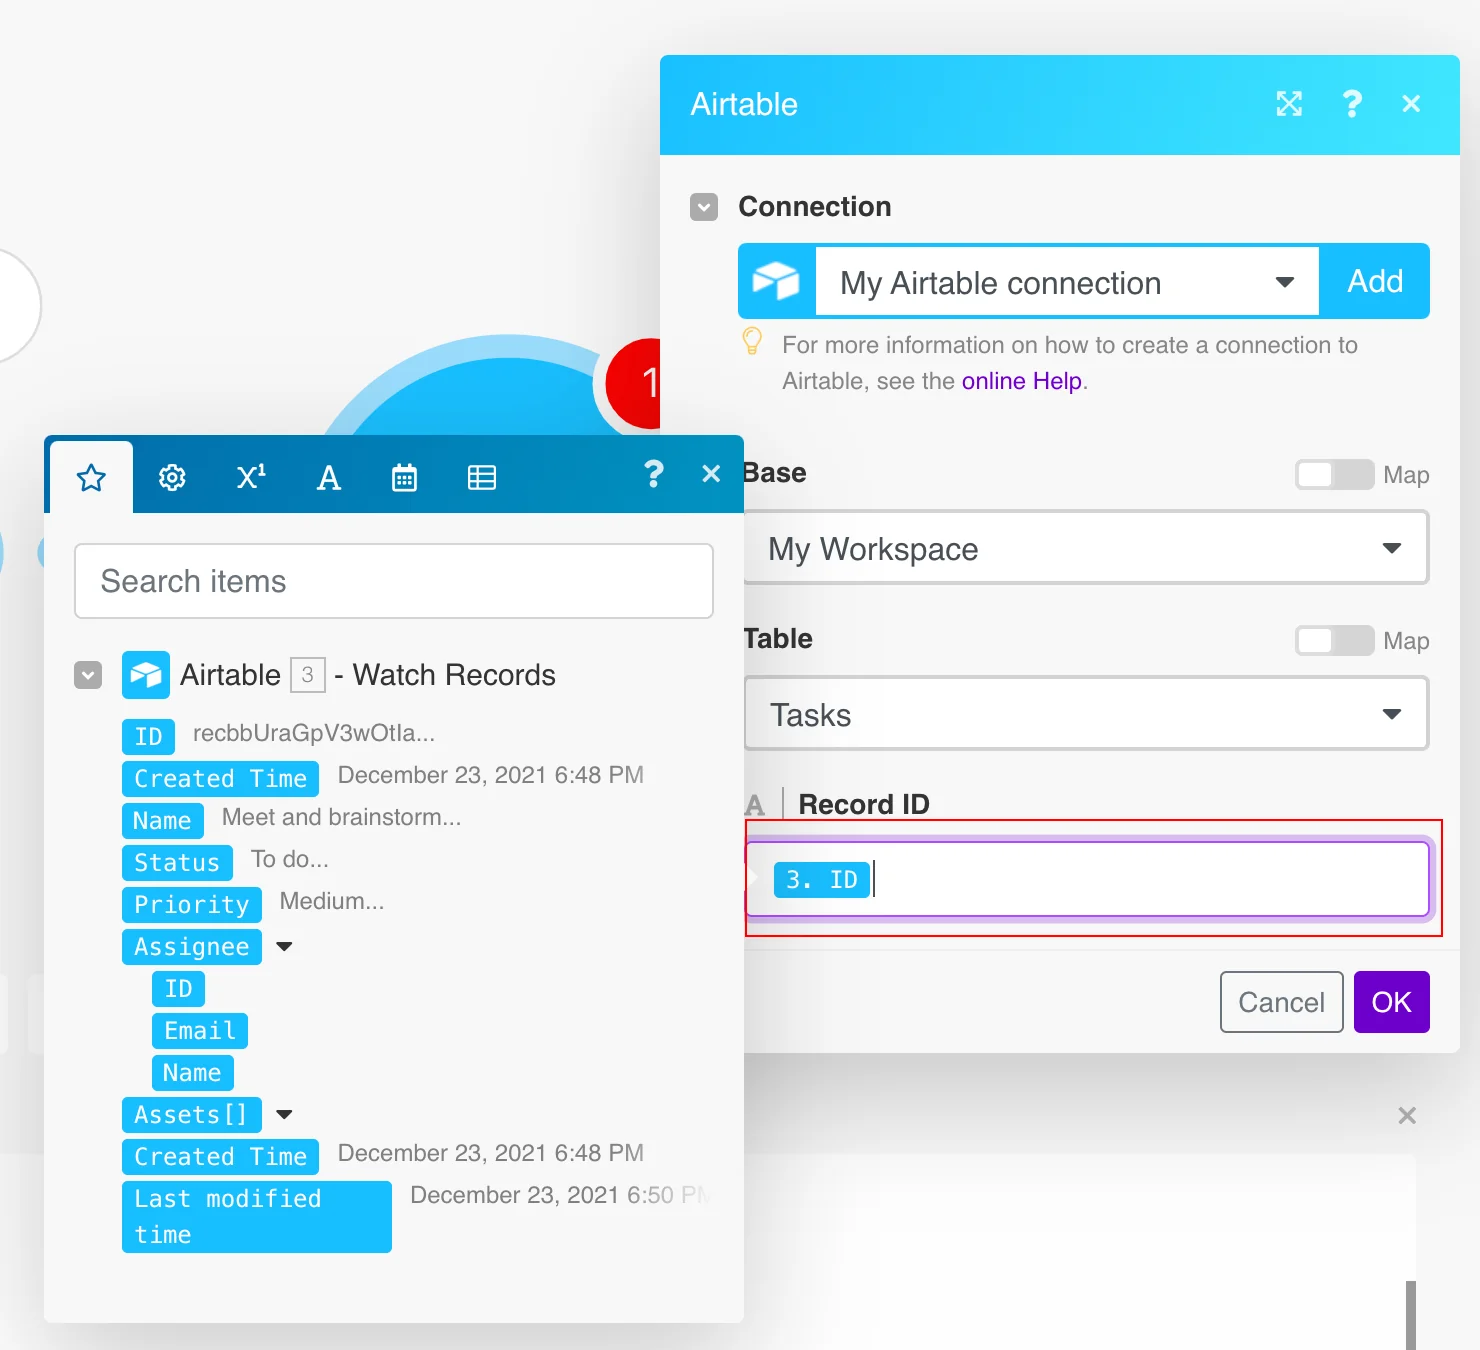
Every time the form is submitted, the Watch Responses module in your Boost.space Integratorscenario is triggered, and the Get a Record module returns the submitted form details.
Search Records
Searches for specific records or returns all records.
Connection
Establish a connection to your Airtable account.
Base
Select or map the base that contains the table you want to search for records.
Table
Select the table you want to search for records.
Formula
Enter the formula to filter records. For more details about formulae, refer to the Formula field reference documentation. The formula will be evaluated for each record, and if the result is not 0, false, "", NaN, [], or #Error!, includes the record in the response.
If combined with the view parameter, returns only the records in that view that satisfy the formula.
For example, to only include records where Name isn’t empty, pass in NOT({Name} = '') as a parameter like this:
filterByFormula=NOT%28%7BName%7D%20%3D%20%27%27%29
Sort
Specify sorting, if needed. The higher item in the list has precedence.
View
Select or map the view for the search results.
Output Fields
Add the fields you want to receive in the output. If no field is provided, all fields will be returned. It can be the field’s name, for example, Email, or the field’s ID, for example, fldzuOSozlM84fYV3.
Limit
Set the maximum number of records Boost.space Integrator will return during one execution cycle. The default value is 10.
Use Column ID
Select whether to use column ID instead of column name for mapping.
This enables persistence over the column name change. Enabling this option allows to replace entity keys in the response; instead of entity names specified as parameter keys, their identifiers will be specified. Changing this value will break all existing mappings in this scenario.
Get a Record
Retrieves a single record by its ID.
Connection
Establish a connection to your Airtable account.
Base
Select the base that contains the table with the record whose details you want to retrieve.
Table
Select the table that contains the record whose details you want to retrieve.
Record ID
Enter (map) the Record ID whose details you want to retrieve. Alternatively, you can use the search option to select the record.
Use Column ID
Select whether to use column ID instead of column name for mapping.
This enables persistence over the column name change. Enabling this option allows to replace entity keys in the response; instead of entity names specified as parameter keys, their identifiers will be specified. Changing this value will break all existing mappings in this scenario.
Create a Record
Creates a new record in a Airtable.
Connection
Establish a connection to your Airtable account.
Base
Select the base containing the table you want to create a record.
Table
Select the table in which you want to create a record.
Record
Enter values to the desired fields. See also Airtable’s guide to basic field types.
Smart links
Enable this option if you want to enter names instead of record IDs to fields that link to another table. The record is automatically created in the linked table if there is no match.
Use Column ID
Select whether to use column ID instead of column name for mapping.
This enables persistence over the column name change. Enabling this option allows to replace entity keys in the response; instead of entity names specified as parameter keys, their identifiers will be specified. Changing this value will break all existing mappings in this scenario.
Update a Record
Updates a record by its ID.
Connection
Establish a connection to your Airtable account.
Base
Select the base containing the table whose records you want to update.
Table
Select the table whose record you want to update.
Records ID
Enter (map) the Record ID you want to update. You can retrieve the ID, for example, using the Search Records or Watch Records module. Alternatively, you can use the Search button to select the Record ID.
Record
Enter values in the fields you want to update. See also Airtable’s guide to basic field types.
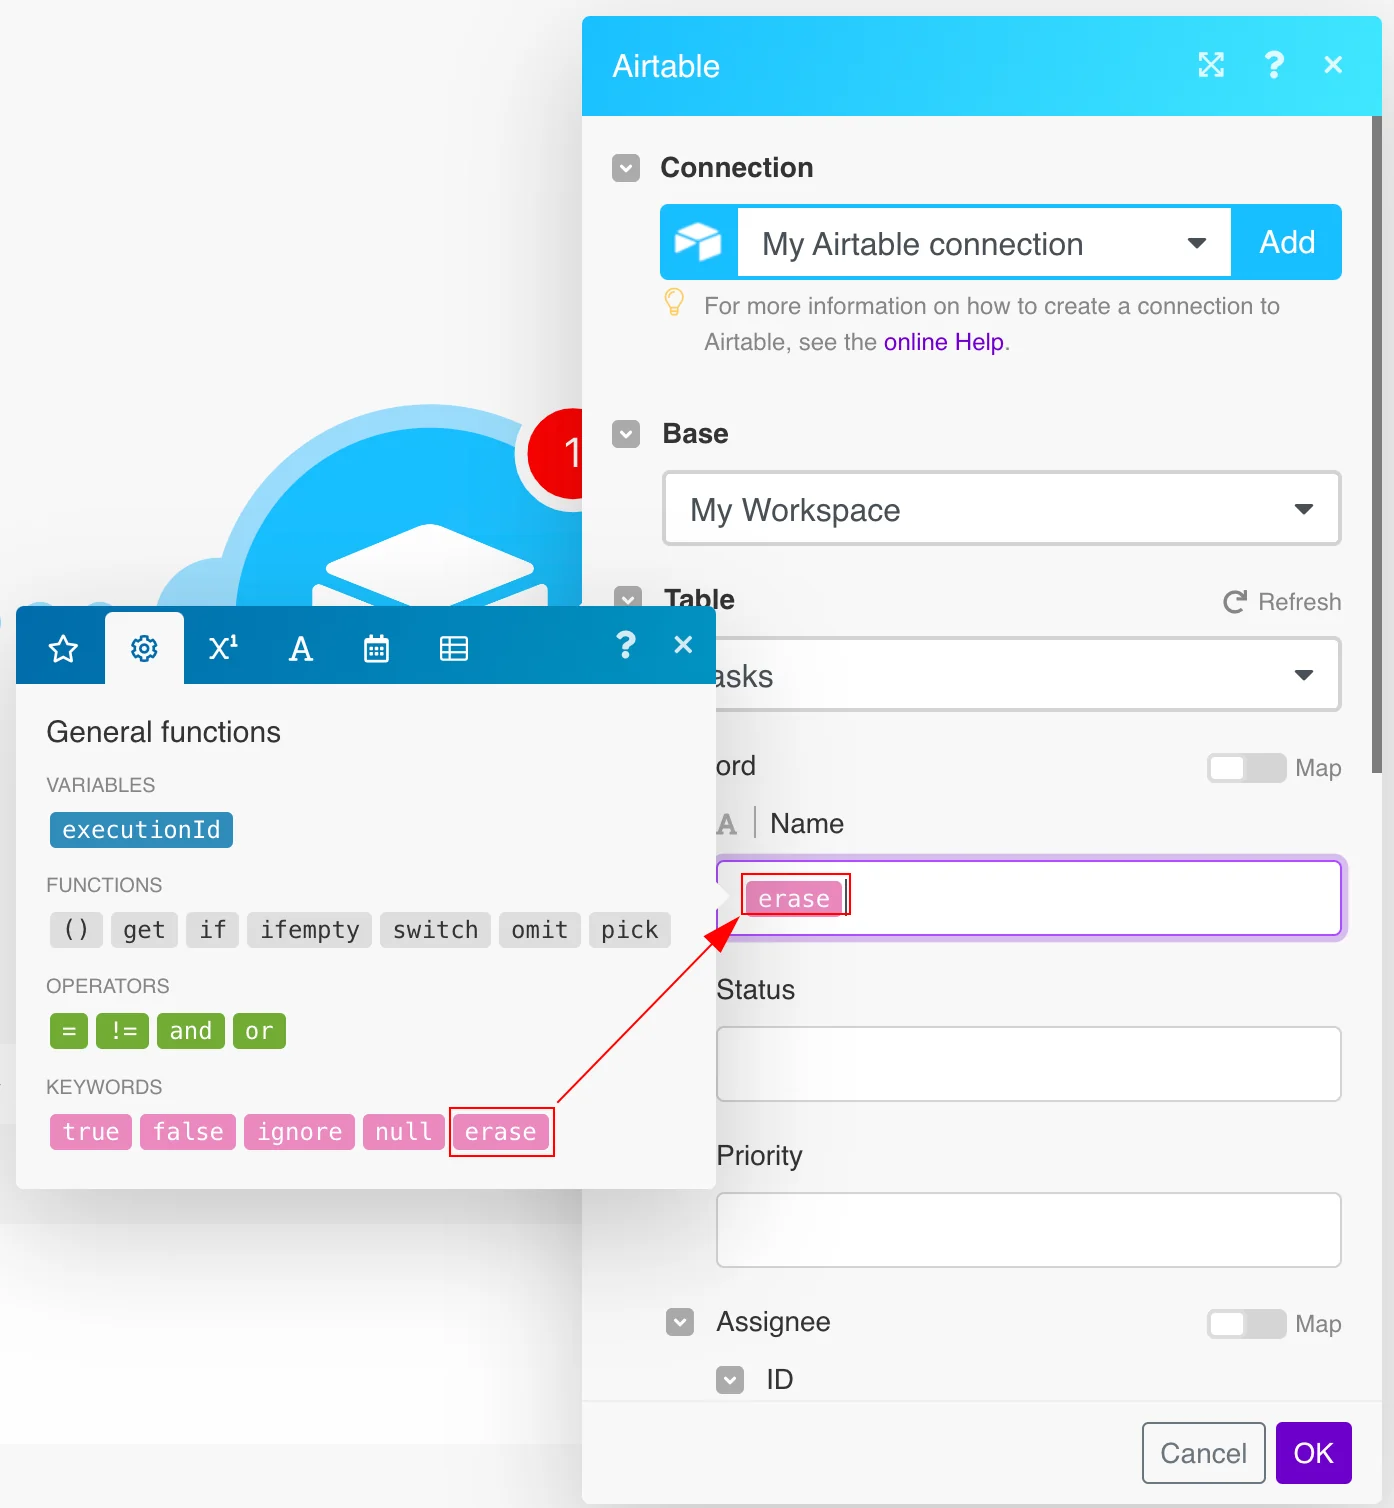
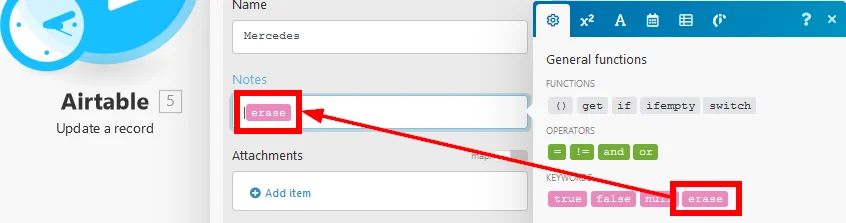
To delete the content of the field, use the erase function.
Smart links
Enable this option if you want to enter names instead of record IDs to fields that link to another table. The record is automatically created in the linked table if there is no match.
Use Column ID
Select whether to use column ID instead of column name for mapping.
This enables persistence over the column name change. Enabling this option allows to replace entity keys in the response; instead of entity names specified as parameter keys, their identifiers will be specified. Changing this value will break all existing mappings in this scenario.
Upsert a Record
Creates a new or updates an existing record.
Connection
Establish a connection to your Airtable account.
Base
Select the base containing the table you want to update or create a record.
Table
Select the table where you want to create or update a record.
Record ID
Enter (map) the ID of the record you want to update. If no ID is entered, it will create a new record. You can retrieve the ID, for example, using the Search Records or _Watch Records_module. Alternatively, you can use the Search button to select the Record ID.
If you enter an ID that does not exist, an error occurs, and no action is performed.
Record
Enter values in the fields you want to update or create. See also Airtable’s guide to basic field types.
Smart links
Enable this option if you want to enter names instead of record IDs to fields that link to another table. The record is automatically created in the linked table if there is no match.
Use Column ID
Select whether to use column ID instead of column name for mapping.
This enables persistence over the column name change. Enabling this option allows to replace entity keys in the response; instead of entity names specified as parameter keys, their identifiers will be specified. Changing this value will break all existing mappings in this scenario.
Delete a Record
Deletes a record by its ID.
Connection
Establish a connection to your Airtable account.
Base
Select the base that contains the table you want to delete a record from.
Table
Select the table you want to delete the record from.
Record ID
Enter the ID of the record you want to delete. You can retrieve the ID, for example, using the Search Records or Watch Records module. Alternatively, you can use the Search button to select the Record ID.
Bulk Create Records (advanced)
Creates multiple records.
Create Records in Bulk
Select the input method:
-
Enter manually
-
Select from the list
Base
Select the base that contains the table you want to create records in.
Table
Select the table in which you want to create the records.
Records
Enter values in the fields you want to create. See also Airtable’s guide to basic field types.
Bulk Update Records (advanced)
Updates multiple existing records.
Update Records in Bulk
Select the input method:
-
Enter manually
-
Select from the list
Base
Select the base containing the table whose records you want to update.
Table
Select the table in which you want to update the records.
Records
Enter values in the fields you want to update. See also Airtable’s guide to basic field types.
Bulk Upsert Records (advanced)
Upserts multiple records.
Upsert Records in Bulk
Select the input method:
-
Enter manually
-
Select from the list
Base
Select the base that contains the table you want to delete a record from.
Table
Select the table from which you want to delete the record.
Fields to Merge on
Enter at least one and at most three field names or IDs to uniquely identify a single record.
Records
Enter values in the fields you want to update or create. See also Airtable’s guide to basic field types.
Bulk Delete Records (advanced)
Deletes multiple records.
Connection
Establish a connection to your Airtable account.
Delete Records in Bulk
Select the input method:
-
Enter manually
-
Select from the list
Base
Select the base that contains the table you want to delete the records from.
Table
Select the table from which you want to delete the records.
Record ID
Enter the IDs of the record you want to delete. You can retrieve the IDs, for example, using the Search Records or Watch Records module. Alternatively, you can use the Search button to select the Record IDs.
Other
You can list bases, table schemas, and call APIs using the following modules.
Make an API Call
Allows you to perform a custom API call.
Connection
Establish a connection to your Airtable account.
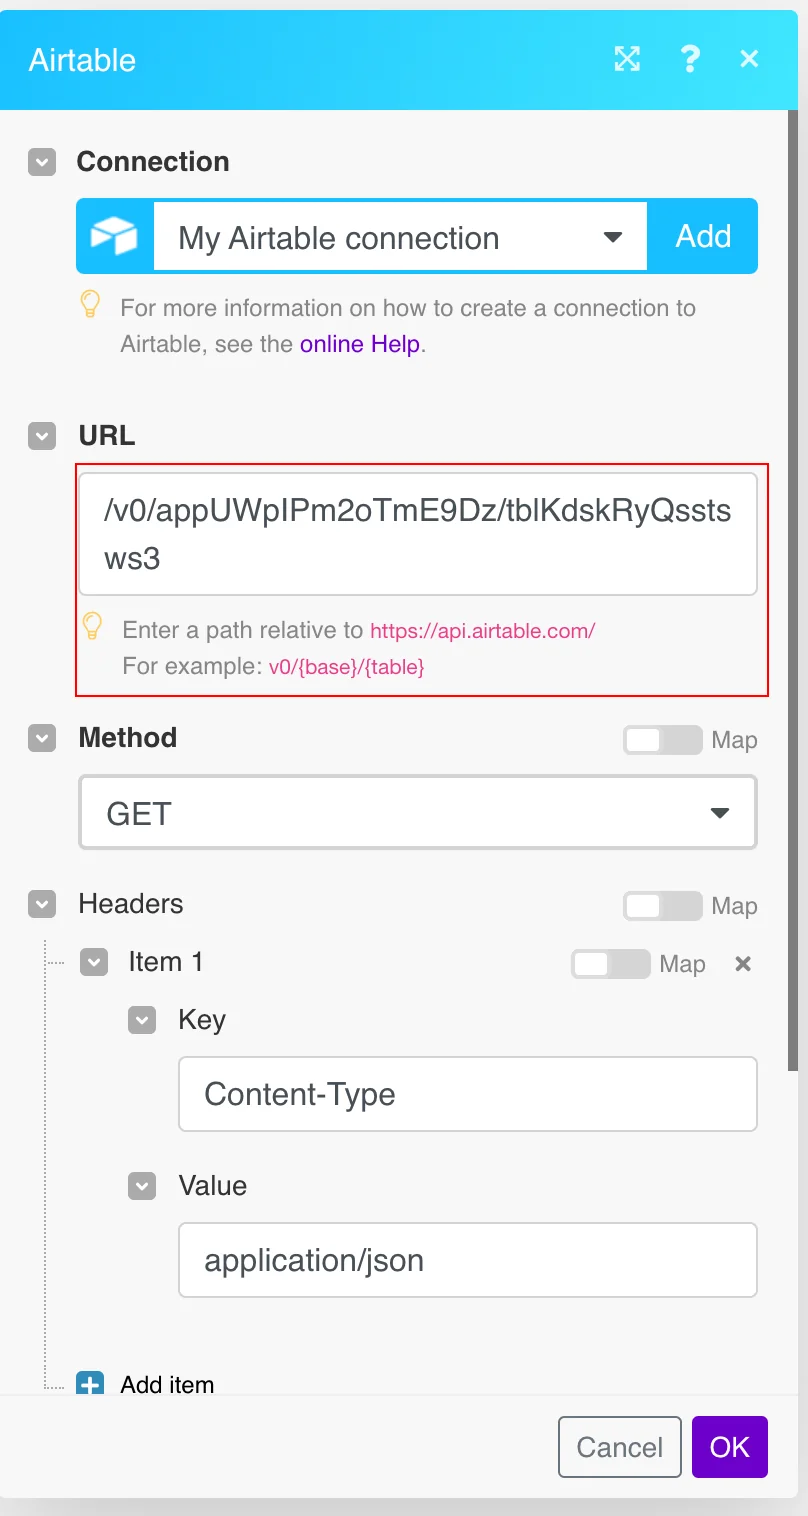
URL
Enter a path relative to https://api.airtable.com/. For example, /v0/{base_id}/{table_id}.
For the list of available endpoints, refer to the Airtable REST API Documentation.
Method
Select the HTTP method you want to use:
-
GET
to retrieve information for an entry.
-
POST
to create a new entry.
-
PUT
to update/replace an existing entry.
-
PATCH
to make a partial entry update.
-
DELETE
to delete an entry.
Headers
Enter the desired request headers. You don’t have to add authorization headers; we already did that for you.
Query String
Enter the request query string.
Body
Enter the body content for your API call.
Example of Use – List Records
The following API call returns all records in the specified table in your Airtable account:
URL:
/v0/{base_id}/{table_id}
Method:
GET
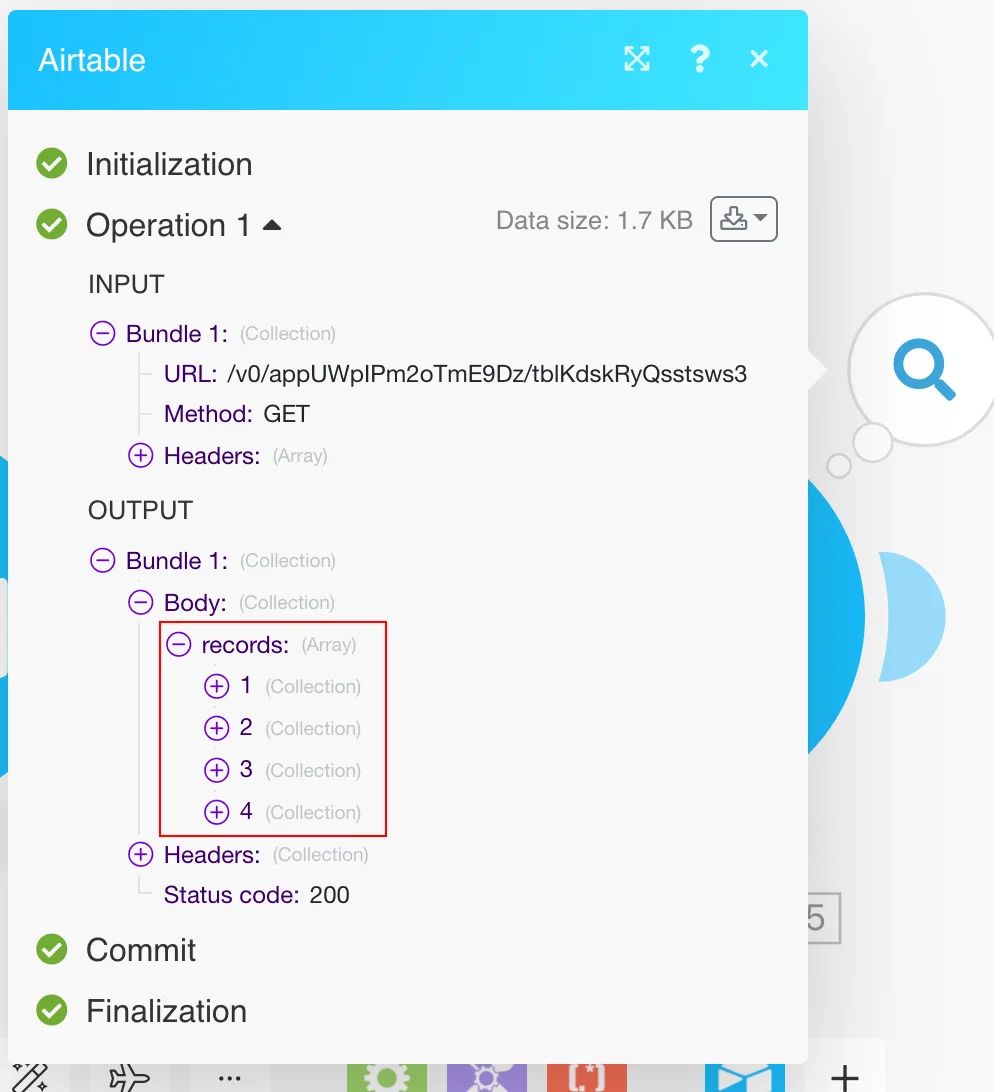
Search results can be found in the module’s Output under Bundle > Body > records.
In our example, 4 records were returned:
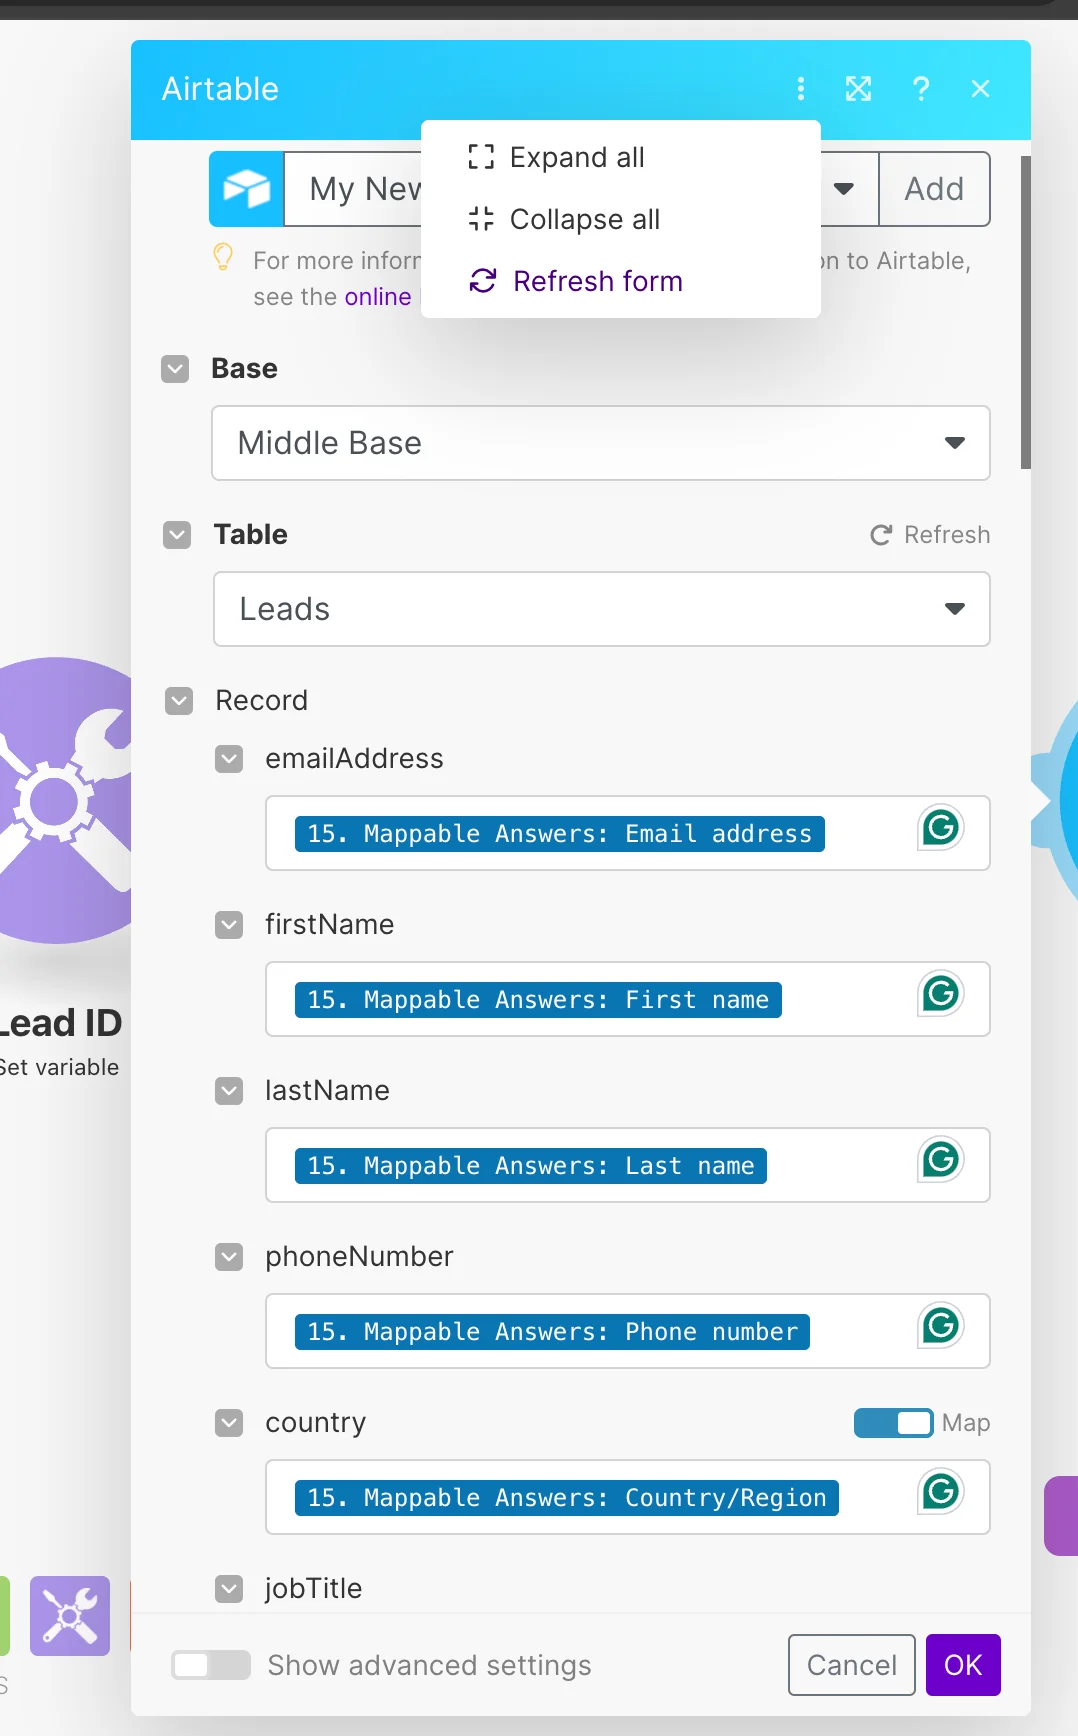
When changing data types for fields, please perform a hard refresh of the form to ensure that the new data types will be displayed.
To perform a hard refresh, click the three dots at the upper right of the module and select Refresh form.
Legacy article, imported from the original Boost.space knowledge base (/knowledge-base/applications/database/airtable/).

