WP Webhooks
The WP Webhooks modules enable you to receive data from other services to, for example, create a user or a post on your WordPress website, as well as it can send data for you for certain actions.
Getting Started with WP Webhooks
Prerequisites
- A WP Webhooks plugin installed
In order to use WP Webhooks with Boost.space Integrator, it is necessary to have a WP Webhooks WordPress plugin installed and activated.
The module dialog fields that are displayed in bold (in the Boost.space Integrator scenario, not in this documentation article) are mandatory!
Connecting WP Webhooks to Boost.space Integrator
Follow these steps to connect your WP Webhooks to Boost.space Integrator:
-
Log in to your WordPress administration.
-
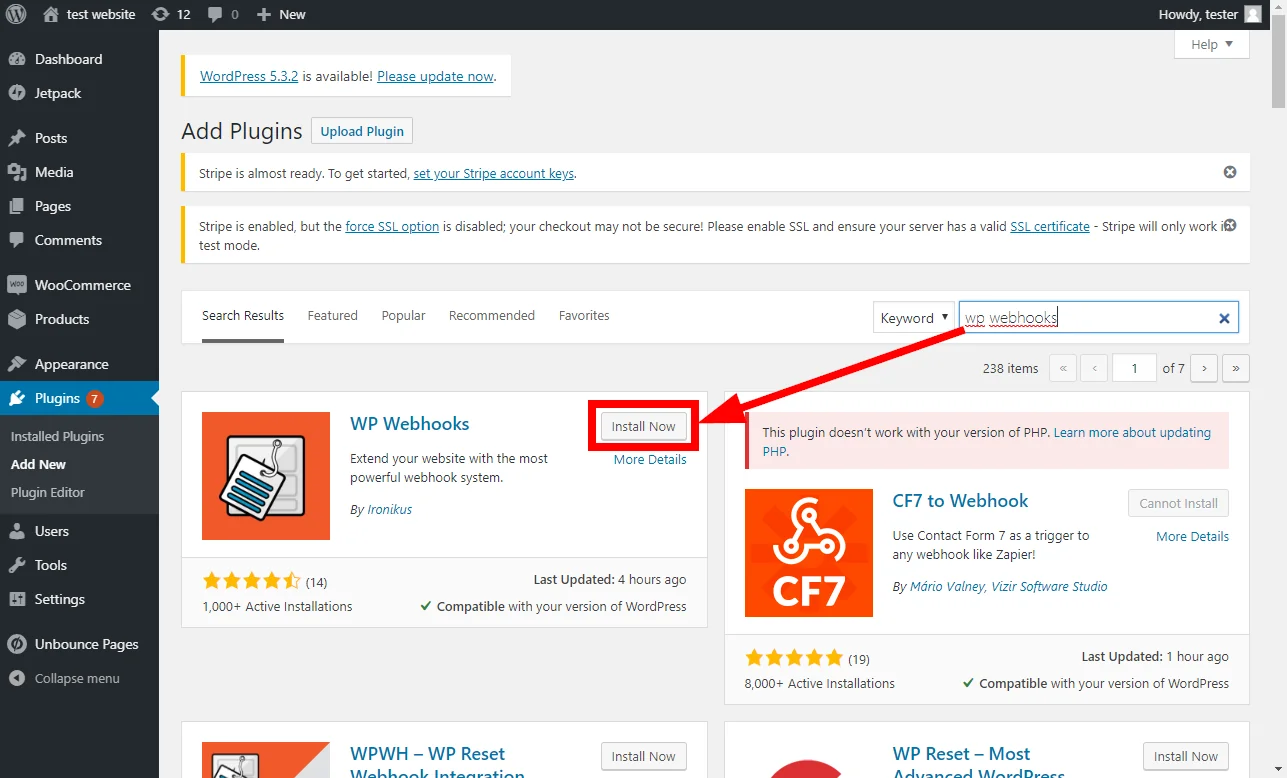
Install and activate the WP Webhooks plugin.
-
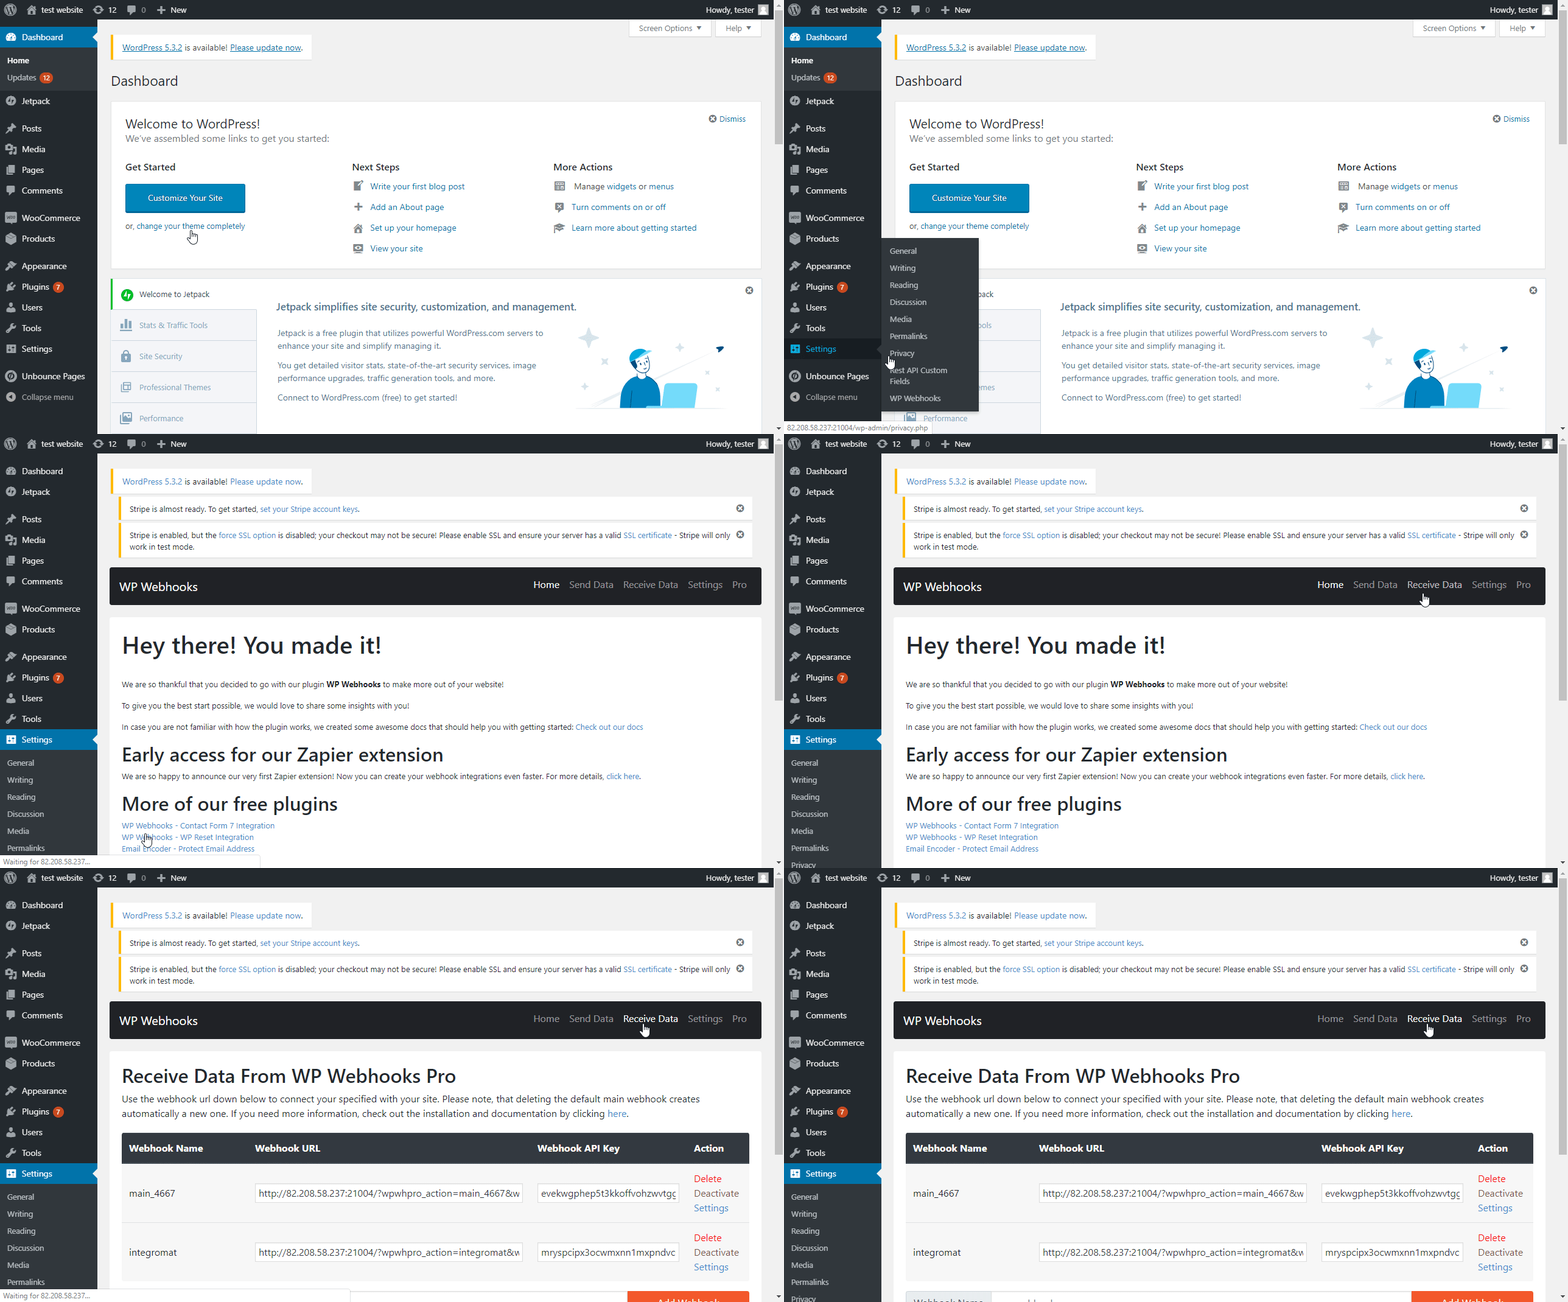
Go to Settings > WP Webhooks > Receive Data.
-
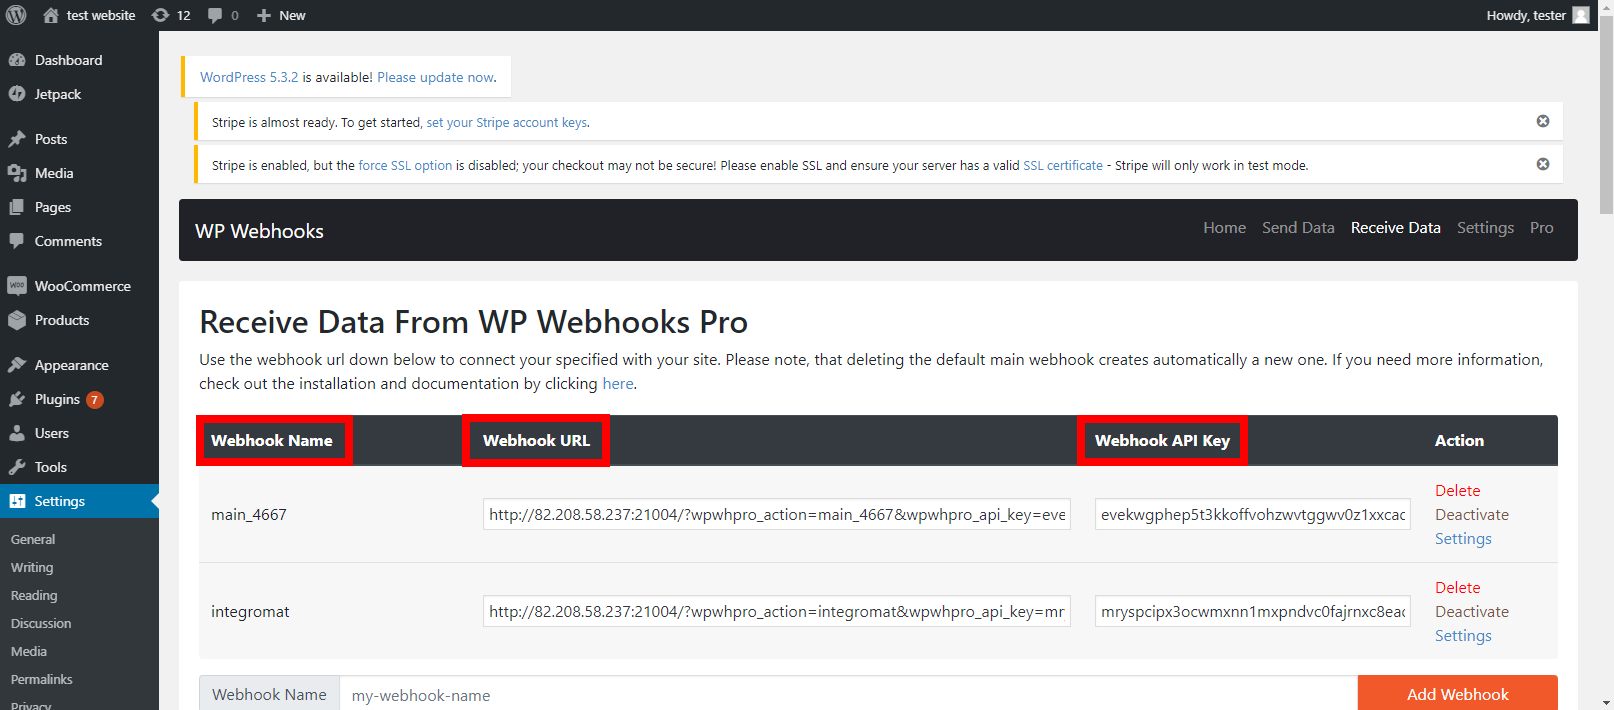
Find here all information needed to establish a connection – Webhook URL, Webhook Name and Webhook API Key
-
Go to Boost.space Integrator and open the WB Webhooks module’s Create a connection dialog.
-
Enter the values that you found in step 3 to the respective fields and click the Continue button to establish the connection.
The connection has been established and you can proceed to set up the module.
Webhook Action
Use this module to send data to your WordPress.
Connection
Establish a connection to your WP Webhooks plugin.
Webhook Action
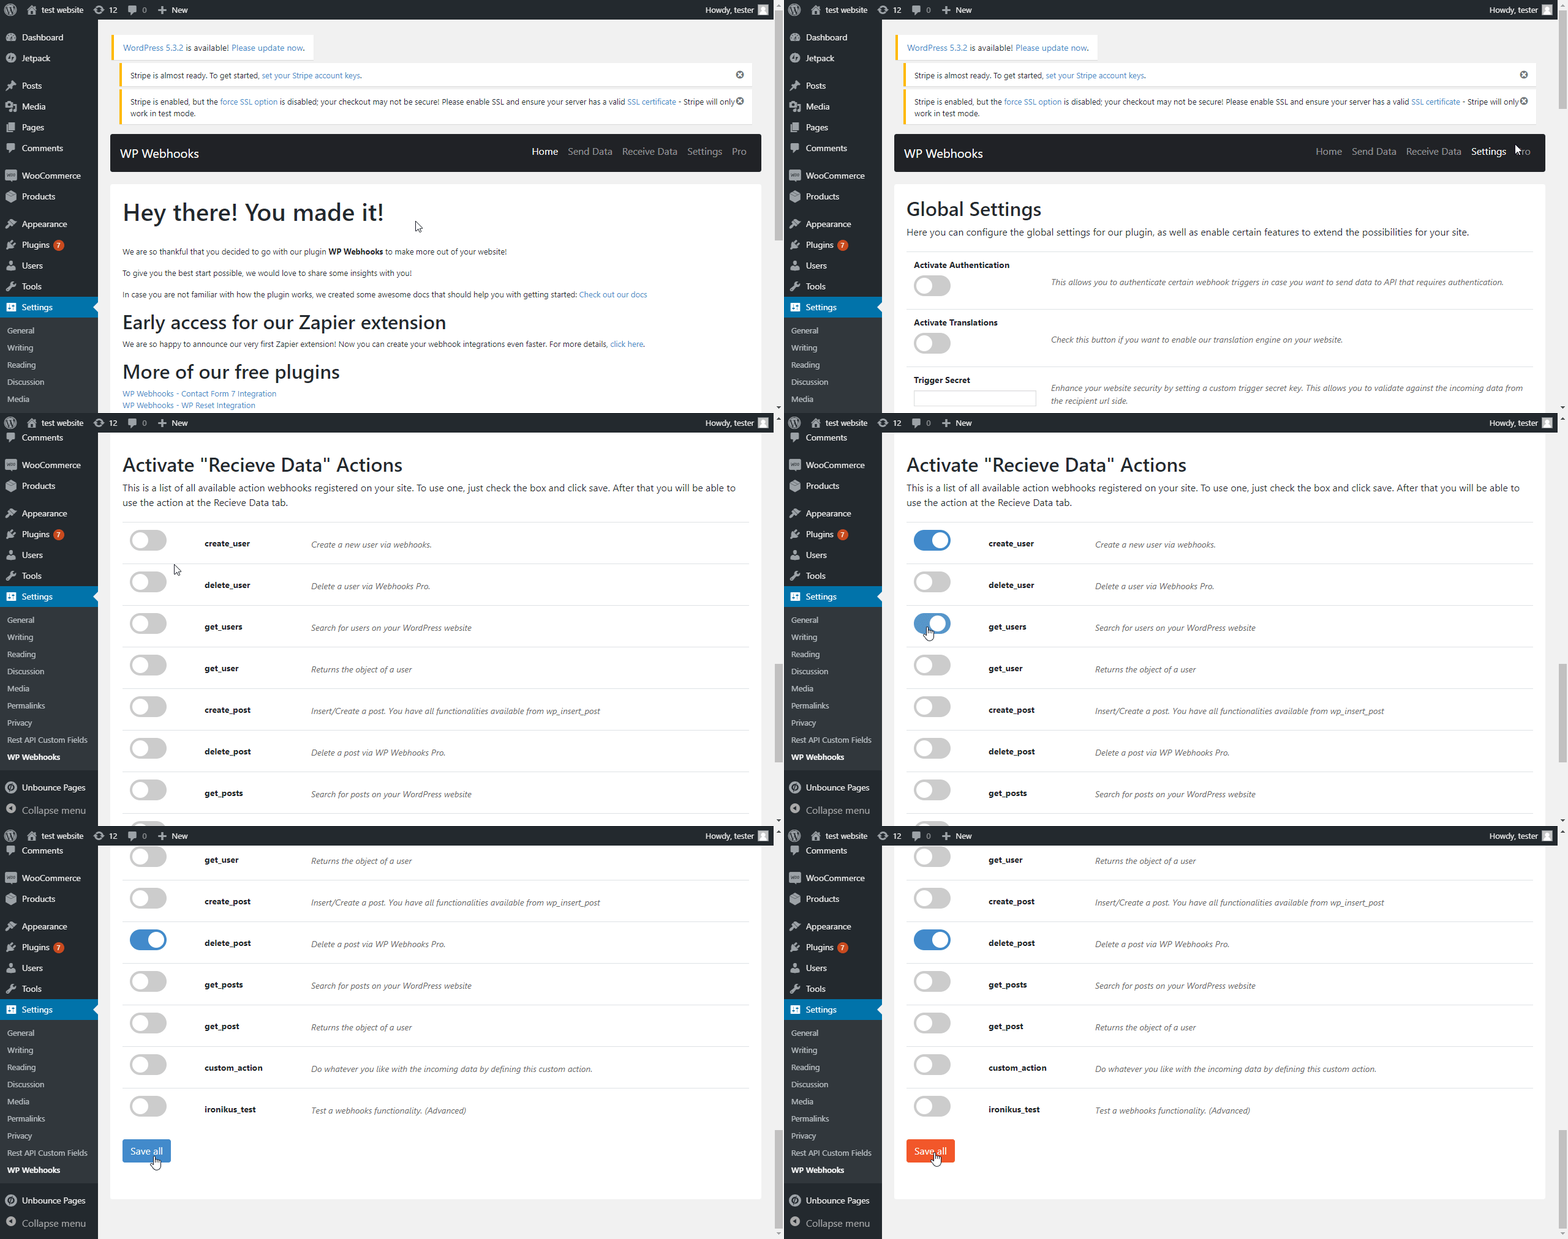
Enter the name of the action you want to perform using the module.
You must activate desired actions first. It can be done under:
Settings > WP Webhooks > Settings:
Arguments
Enter the argument and value.
The list of arguments for each action can be found under:
Settings > WP Webhooks > Receive Data > Available Webhook Actions
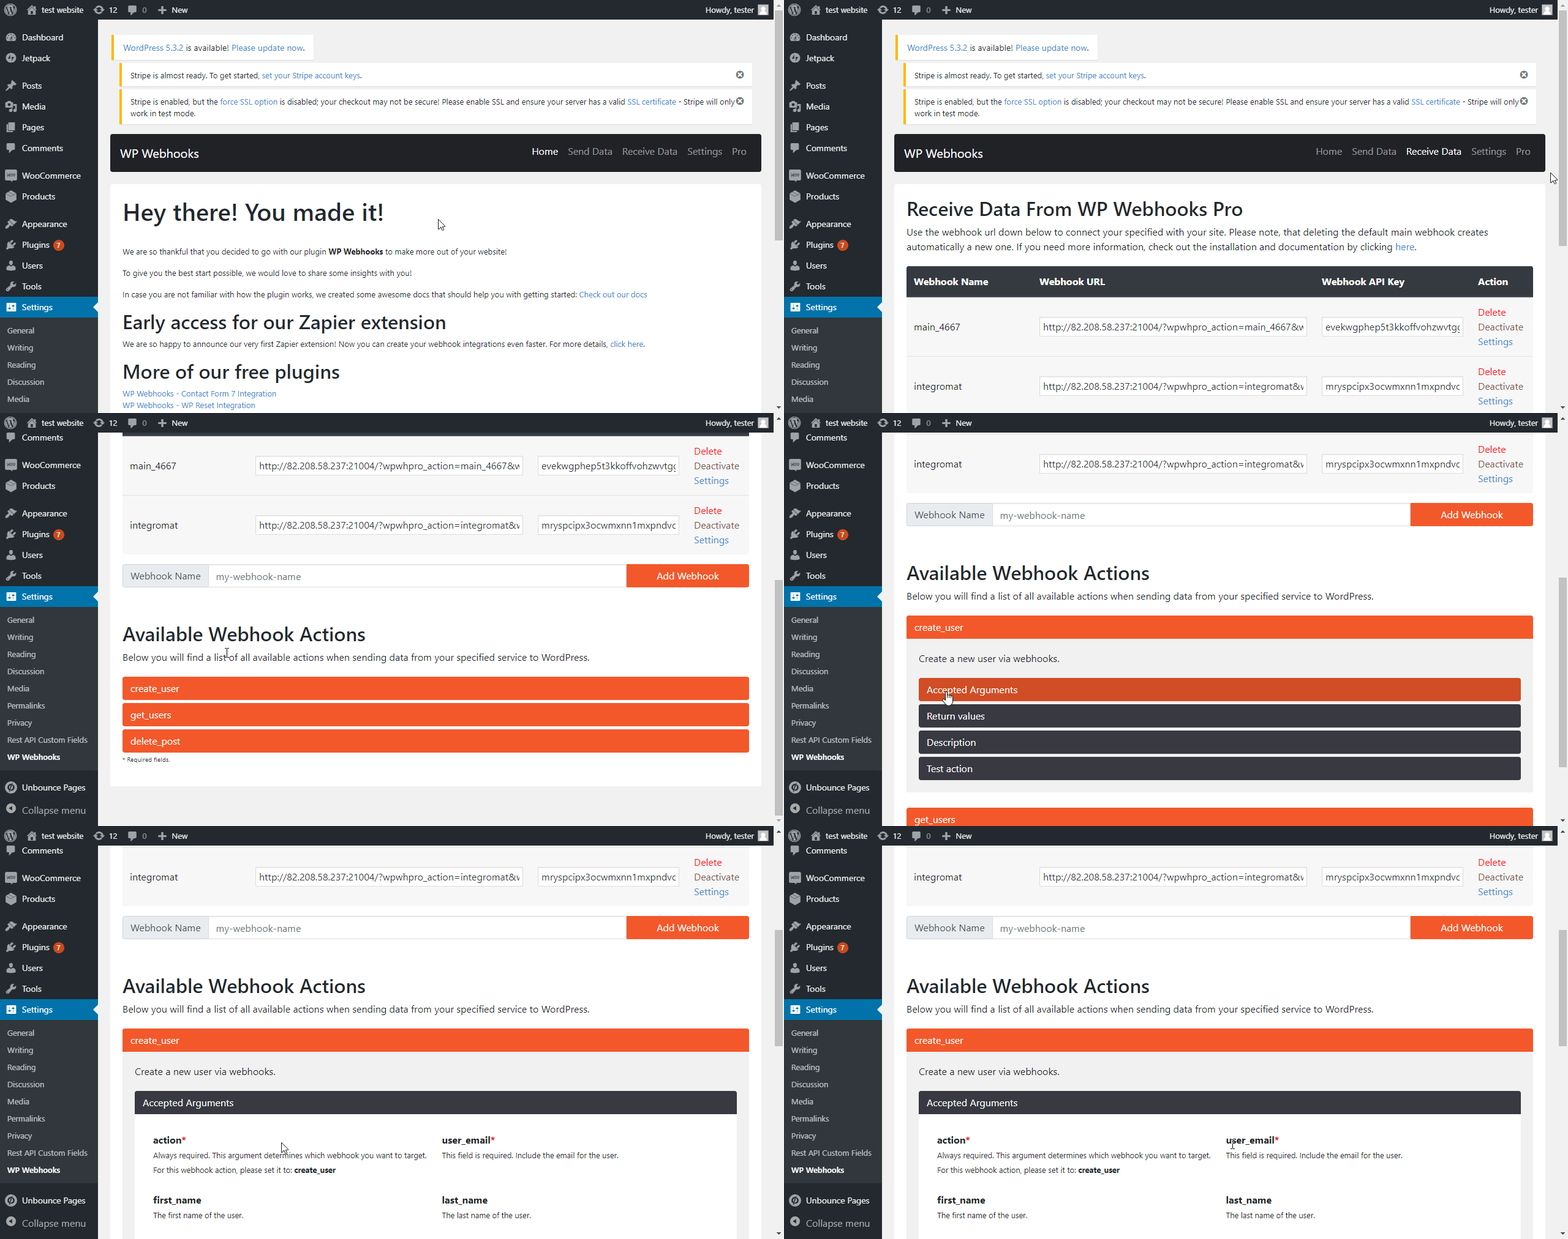
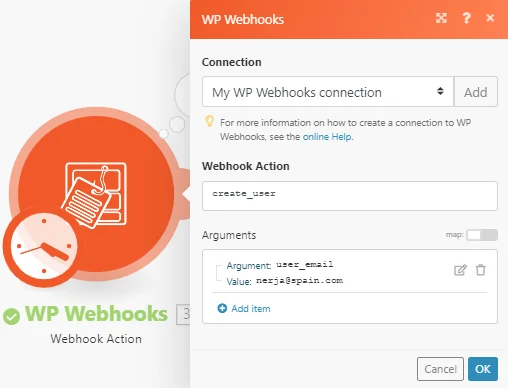
Example – Create a User:
Webhook Action
create_user
Arguments
Argument
user_mail
Value
email address of the new email
Legacy article, imported from the original Boost.space knowledge base (/knowledge-base/applications/website-building/wp-webhooks/).

