HappyFox Help Desk
The HappyFox Help Desk modules allow you to monitor, create, and search the tickets, staff, and users in your HappyFox Help Desk account.
Getting Started with Happyfox Help Desk
Prerequisites
- A Happyfox Help Desk account – create an account at happyfox.com/.
The module dialog fields that are displayed in bold (in the Boost.space Integrator scenario, not in this documentation article) are mandatory!
Connect Happyfox Help Desk to Boost.space Integrator
To connect your Happyfox Help Desk account to Boost.space Integrator you need to obtain the Key, and Website ID from your Happyfox Help Desk account and insert it in the Create a connection dialog in the Boost.space Integrator module.
1. Log in to your HappyFox Help Desk account.
2. Click Apps > My Apps > API > Manage > New API Key.
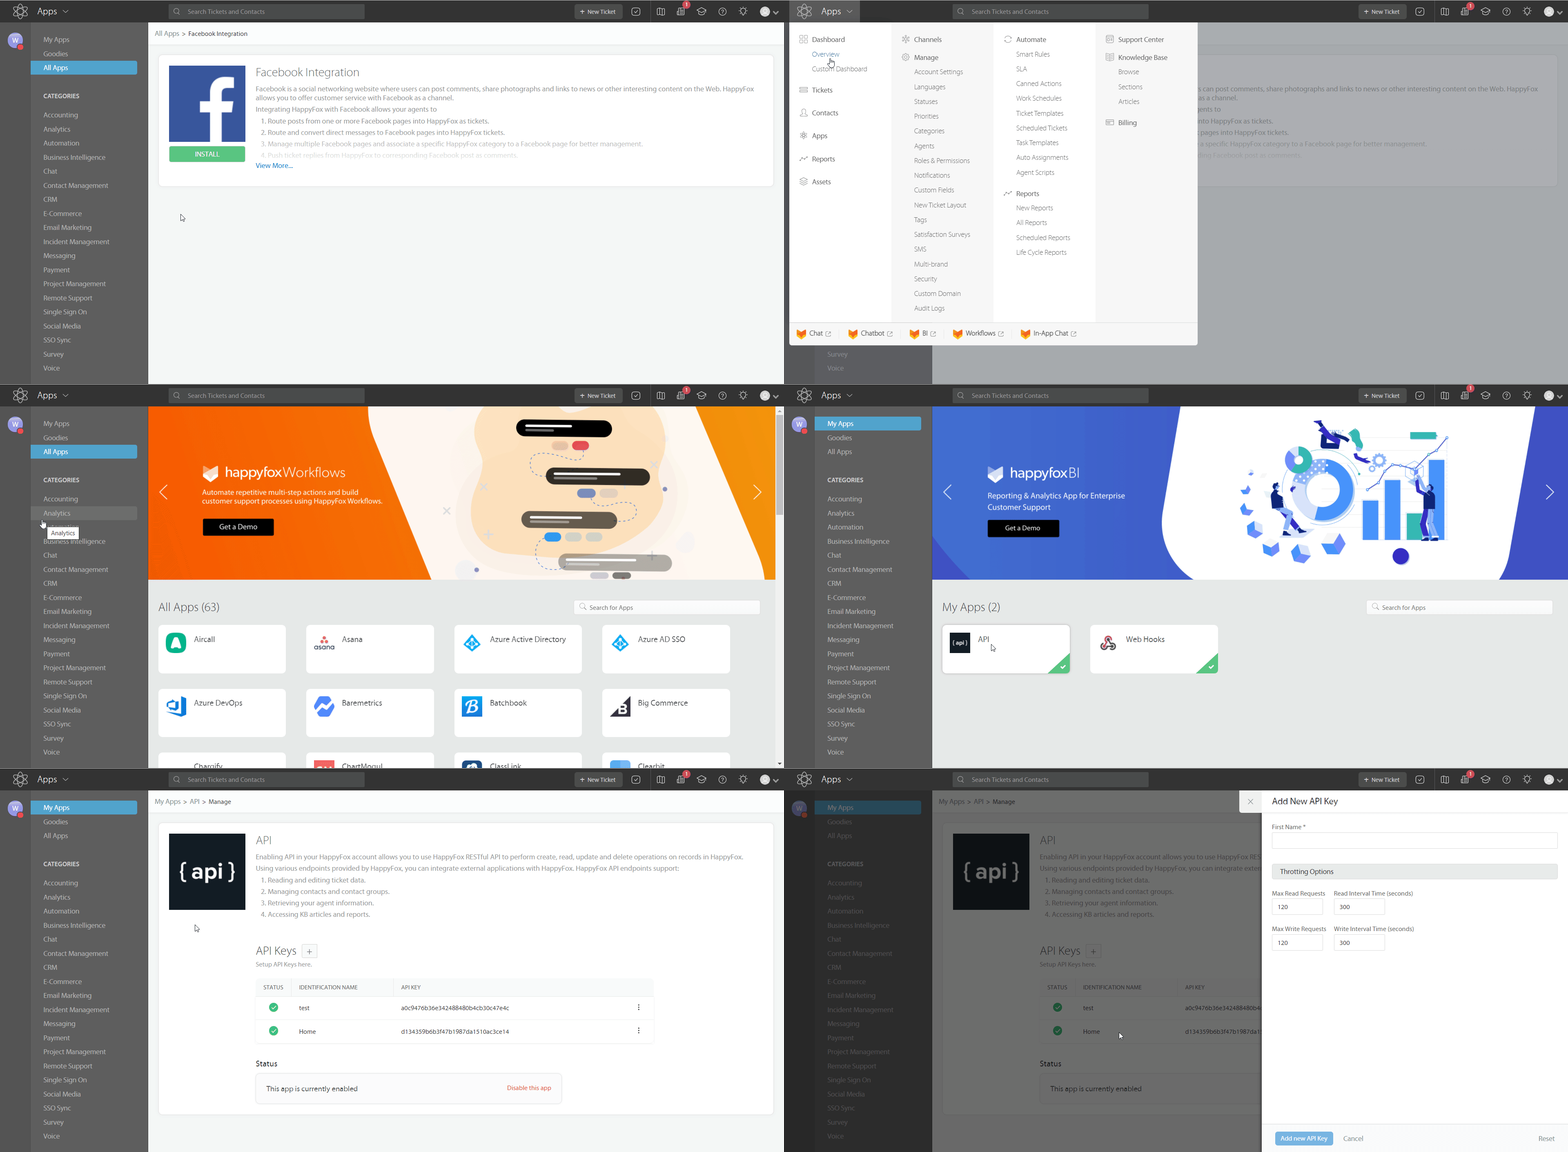
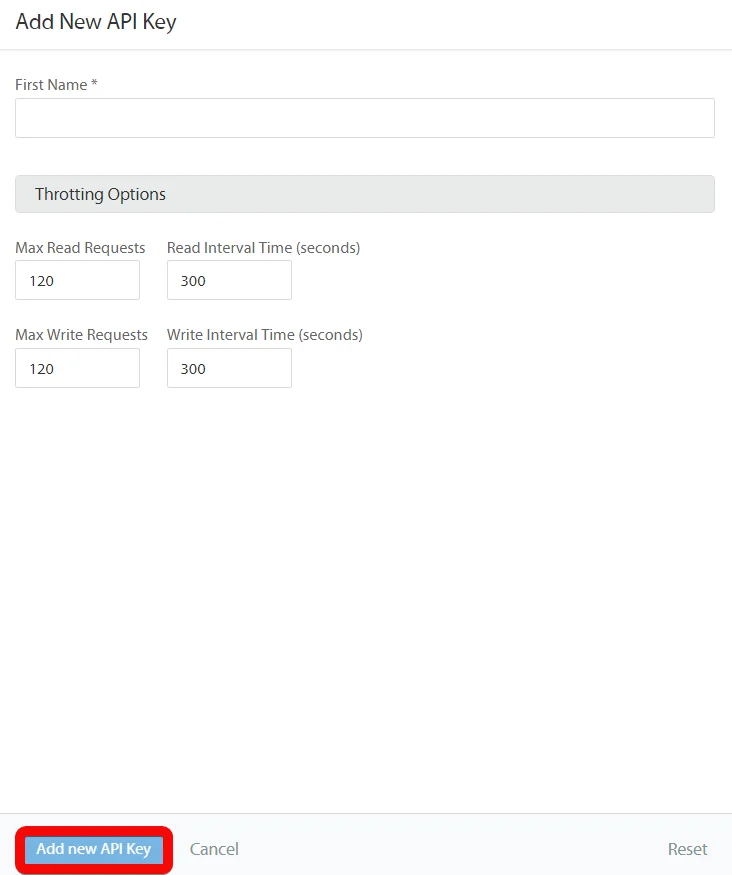
3. In the First Name field, enter a name for the API key, select the _throttling options_and click Add new API Key.

4. Copy the API key Auth key to your clipboard.
5. Go to Boost.space Integrator and open the HappyFox Help Desk module’s Create a connection dialog.

6. In the Connection name field, enter a name for the connection.
7. In the API Key and Auth Code field, enter the detail copied in step 4.
8. In the Domain field, enter your account URL address. For example, your account URL is https://www.xyz.happyfox.com then your domain is xyz.
9. Click Continue.
The connection has been established.
Tickets

Watch New Ticket
Triggers when a new ticket has been created.
Webhook Name
Enter a name for the webhook.
Connection
Establish a connection to your HappyFox Help Desk account.
See Setting Up HappyFox Help Desk Webhooks to add webhooks in your HappyFox Help Desk account.
Search Ticket
Searches for tickets.
Connection
Establish a connection to your HappyFox Help Desk account.
Search By
Select or map the option and select the field to search the tickets. For example, Assignee.
Limit
Set the maximum number of Tickets Boost.space Integrator should return during one execution cycle.
Get a Ticket
Gets a ticket.
Connection
Establish a connection to your HappyFox Help Desk account.
Ticket ID
Select or map the Ticket ID whose details you want to retrieve.
Create a Ticket
Creates a ticket.
Connection
Establish a connection to your HappyFox Help Desk account.
Subject
Enter (map) the ticket’s subject line.
Text
Enter (map) the ticket details.
Specify the user by
Select or map the option to choose the user for the ticket:
-
Email and Name
-
User ID
Enter (map) the email address of the user.
Name
Enter (map) the user name.
User ID
Select or map the user to whom you want to assign the ticket.
Category
Select or map the Category ID and details of the ticket.
Priority
Select or map the ticket’s priority:
-
Critical
-
High
-
Low
-
Medium
Staff
Add a Staff Private Note
Adds a staff private note.
Connection
Establish a connection to your HappyFox Help Desk account.
Ticket ID
Select or map the Ticket ID for which you want to add a staff update.
Text
Select or map the Staff ID to whom you want to send an update.
Staff
Select or map the Staff ID to whom you want to send an update.
Alert to
Select or map the user to whom you want to send an alert about the note.
Assignee
Select or map the user to whom the ticket is assigned.
Priority
Select or map the ticket’s priority. For example, high.
Status
Select or map the status of the ticket:
-
New
-
In Progress
-
On Hold
-
Closed
Add a Staff Update
Adds a staff update.
Connection
Establish a connection to your HappyFox Help Desk account.
Ticket ID
Select or map the Ticket ID for which you want to add a staff update.
Staff
Select or map the Staff ID to whom you want to send an update.
Due Date
Enter (map) a date by when the update should be completed. See the list of supported date and time formats.
Assignee
Select or map the user to whom the ticket is assigned.
Notify User
Select whether you want to notify the user after posting this update.
Priority
Select the priority of the ticket. For example, high.
Status
Select or map the status of the ticket:
-
New
-
In Progress
-
On Hold
-
Closed
Text
Enter (map) the update text.
Time Spent
Enter (map) the time spent in seconds on the ticket.
Users
Add a User Reply
Adds a user reply.
Connection
Establish a connection to your HappyFox Help Desk account.
Ticket ID
Select or map the Ticket ID for which you want to add the user reply.
Text
Enter (map) the reply text.
CC to
Add the email addresses that you want to copy in the reply message.
BCC to
Add the email addresses that you want to blind copy in the reply message.
Other
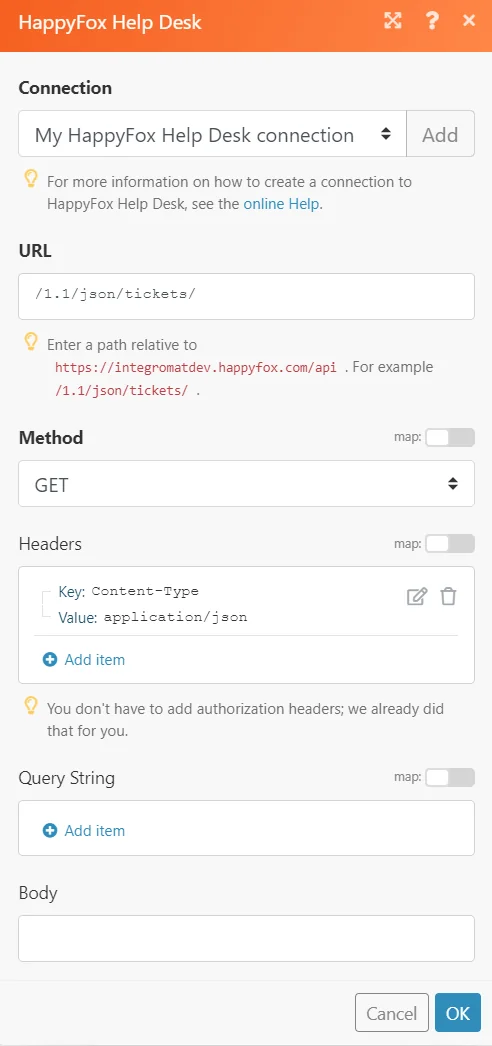
Make an API Call
Performs an arbitrary authorized API call.
Connection
Establish a connection to your HappyFox Help Desk account.
URL
Enter a path relative to https://<domain>.happyfox.com/api For example: /1.1/json/tickets/
For the list of available endpoints, refer to the HappyFox Help Desk API Documentation.
Method
Select the HTTP method you want to use:
GET to retrieve information for an entry.
POST to create a new entry.
PUT to update/replace an existing entry.
PATCH to make a partial entry update.
DELETE to delete an entry.
Headers
Enter the desired request headers. You don’t have to add authorization headers; we already did that for you.
Query String
Enter the request query string.
Body
Enter the body content for your API call.
Example of Use – List Tickets
The following API call returns all the tickets from your HappyFox Help Desk account:
URL: /1.1/json/tickets/
Method: GET
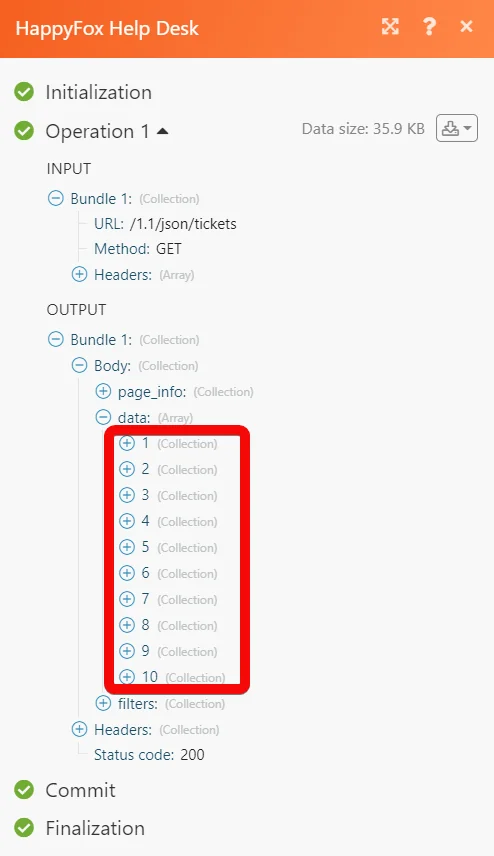
Matches of the search can be found in the module’s Output under Bundle > Body > data. In our example, 10 tickets were returned:
Setting Up HappyFox Help Desk Webhooks
1. Open the Watch module, establish the connection, click Save and copy the URL address to your clipboard. Click OK and save the trigger.
2. Log in to your HappyFox account.
3. Click Apps > My Apps > Webhooks > Manage > Webhook and enter the details.
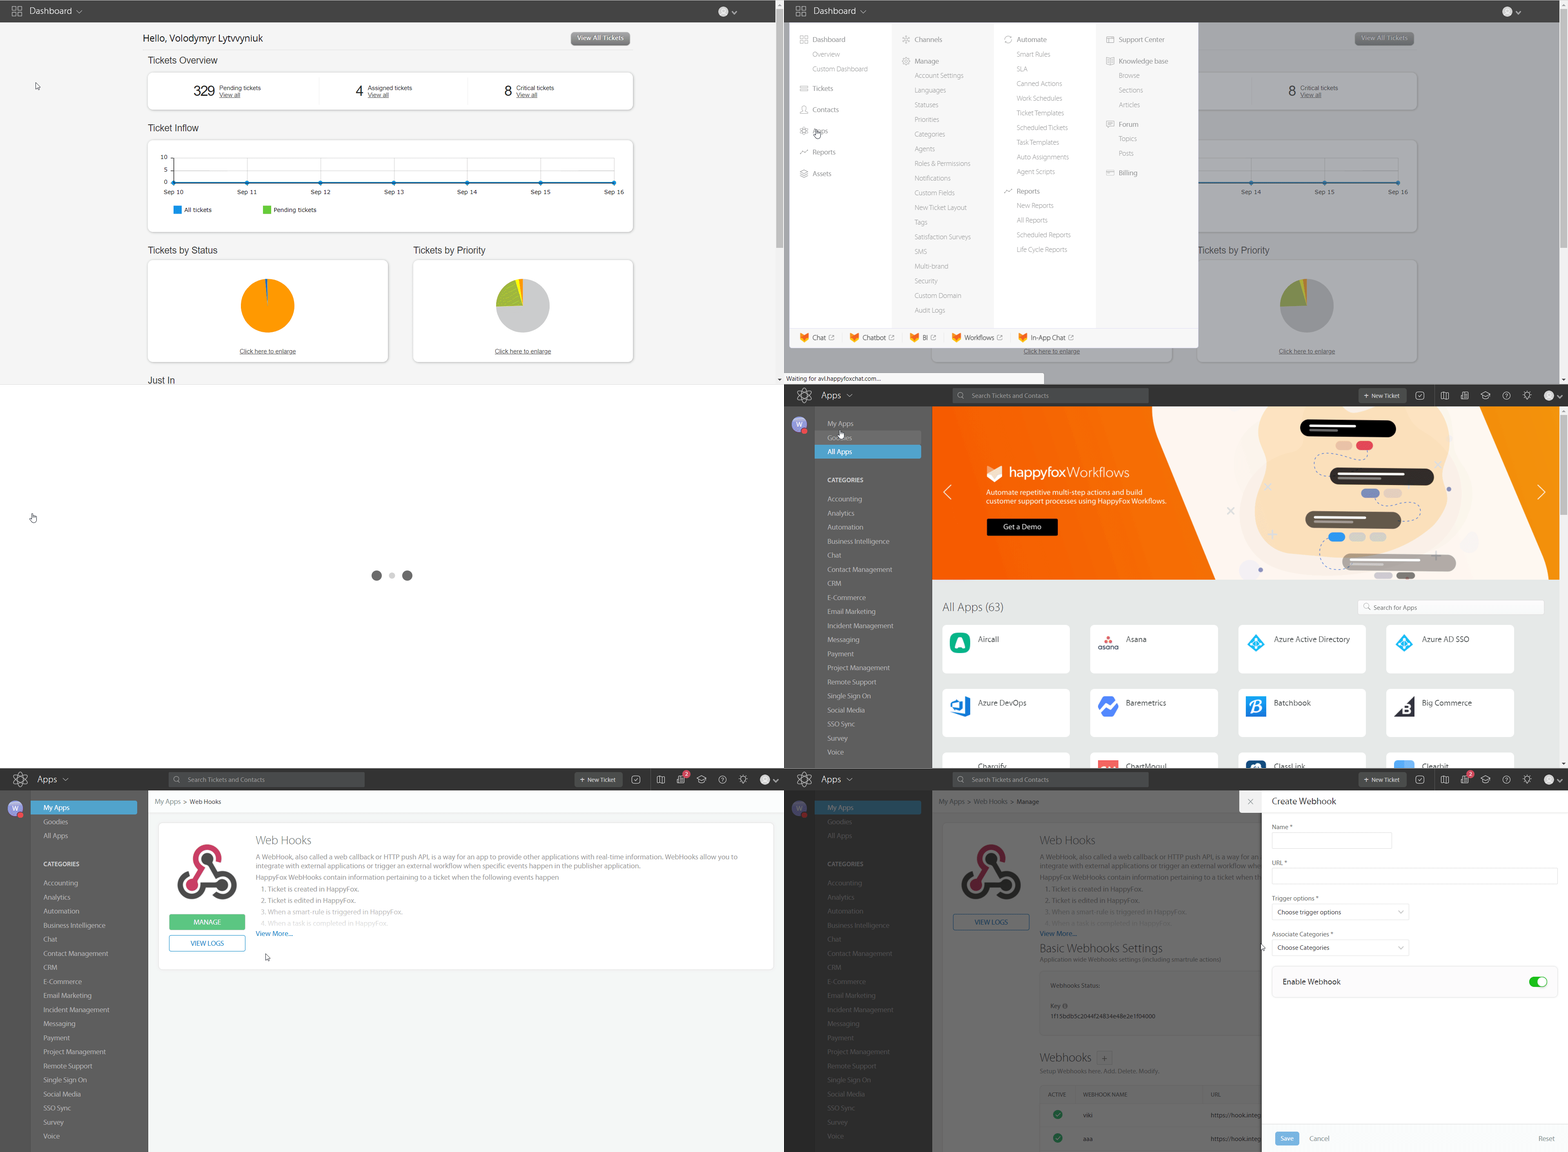
Name
Enter a name for the webhook.
URL
Enter the URL address copied in step 1.
Trigger Options
Select the options for which you want to receive the alerts:
-
Trigger when a ticket is created
-
Trigger when a ticket is updated
-
Trigger when a task is completed
Associate Categories
Select the category to which you want to associate the trigger.
Enable Webhook
Move the toggle to enable the webhook.
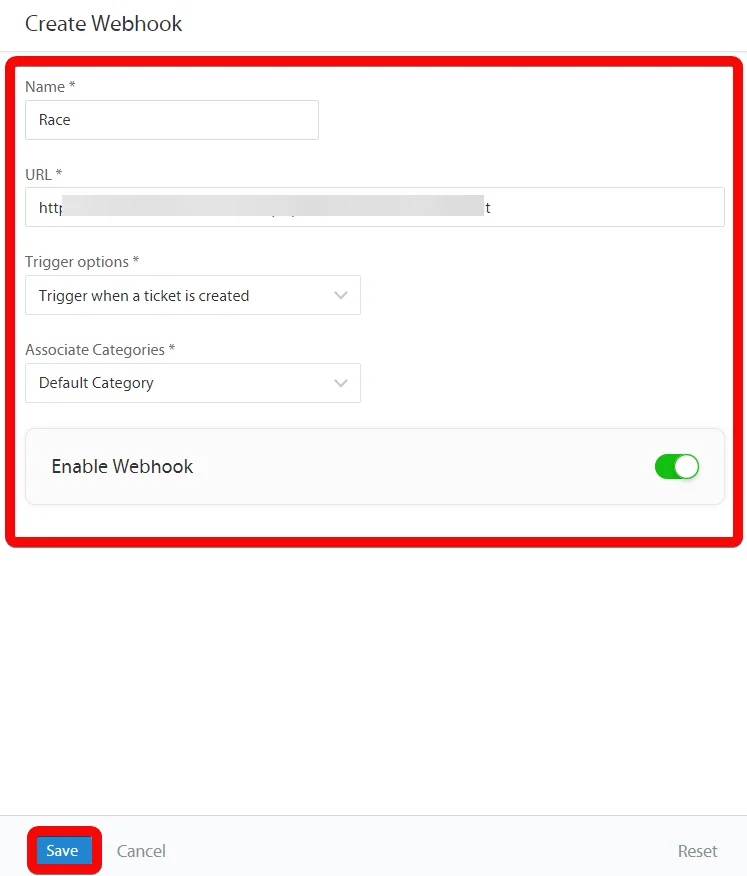
Click Save.
You have successfully added the webhook.
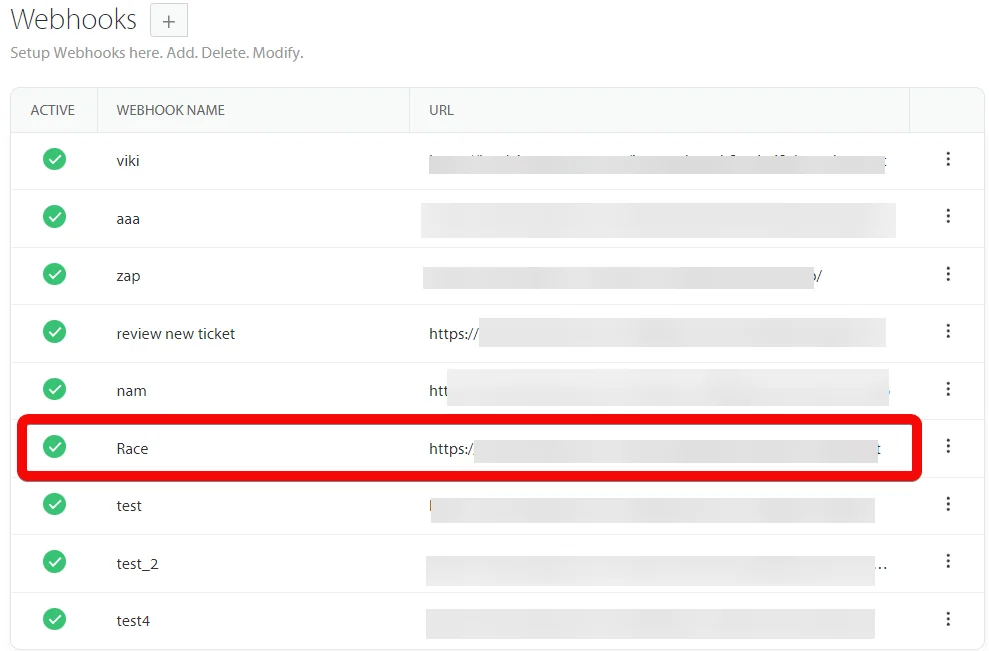
Go back to your Boost.space Integrator account and run the webhook scenario to receive alerts when the specified event occurs.
Legacy article, imported from the original Boost.space knowledge base (/knowledge-base/applications/customer-support/happyfox-help-desk/).

