eSignatures.io
From creating contracts to keeping track of the signed ones, the eSignatures.io modules enable you to easily automate your contract sending process from start to finish.
Getting Started with eSignatures.io
Prerequisites
- An eSignatures.io account
In order to use eSignatures.io with Boost.space Integrator, it is necessary to have an eSignatures.io account. If you do not have one, you can create an eSignatures.io account at esignatures.io.
The module dialog fields that are displayed in bold (in the Boost.space Integrator scenario, not in this documentation article) are mandatory!
Connecting eSignatures.io to Boost.space Integrator
To connect your eSignatures.io account to Boost.space Integrator you need to obtain the Secret Token from your eSignatures.io account and insert it in the Create a connection dialog in the Boost.space Integrator module.
1. Log in to your eSignatures.io account.
2. Go to API settings in the top-right corner.
3. Copy the Secret Token to your clipboard.
4. Go to Boost.space Integrator and open the eSignatures.io module’s_Create a connection_ dialog.
5. In the Connection name field, enter a name for the connection.
6. In the_Secret Token_ field, enter the token details copied in step 3, and click Continue.
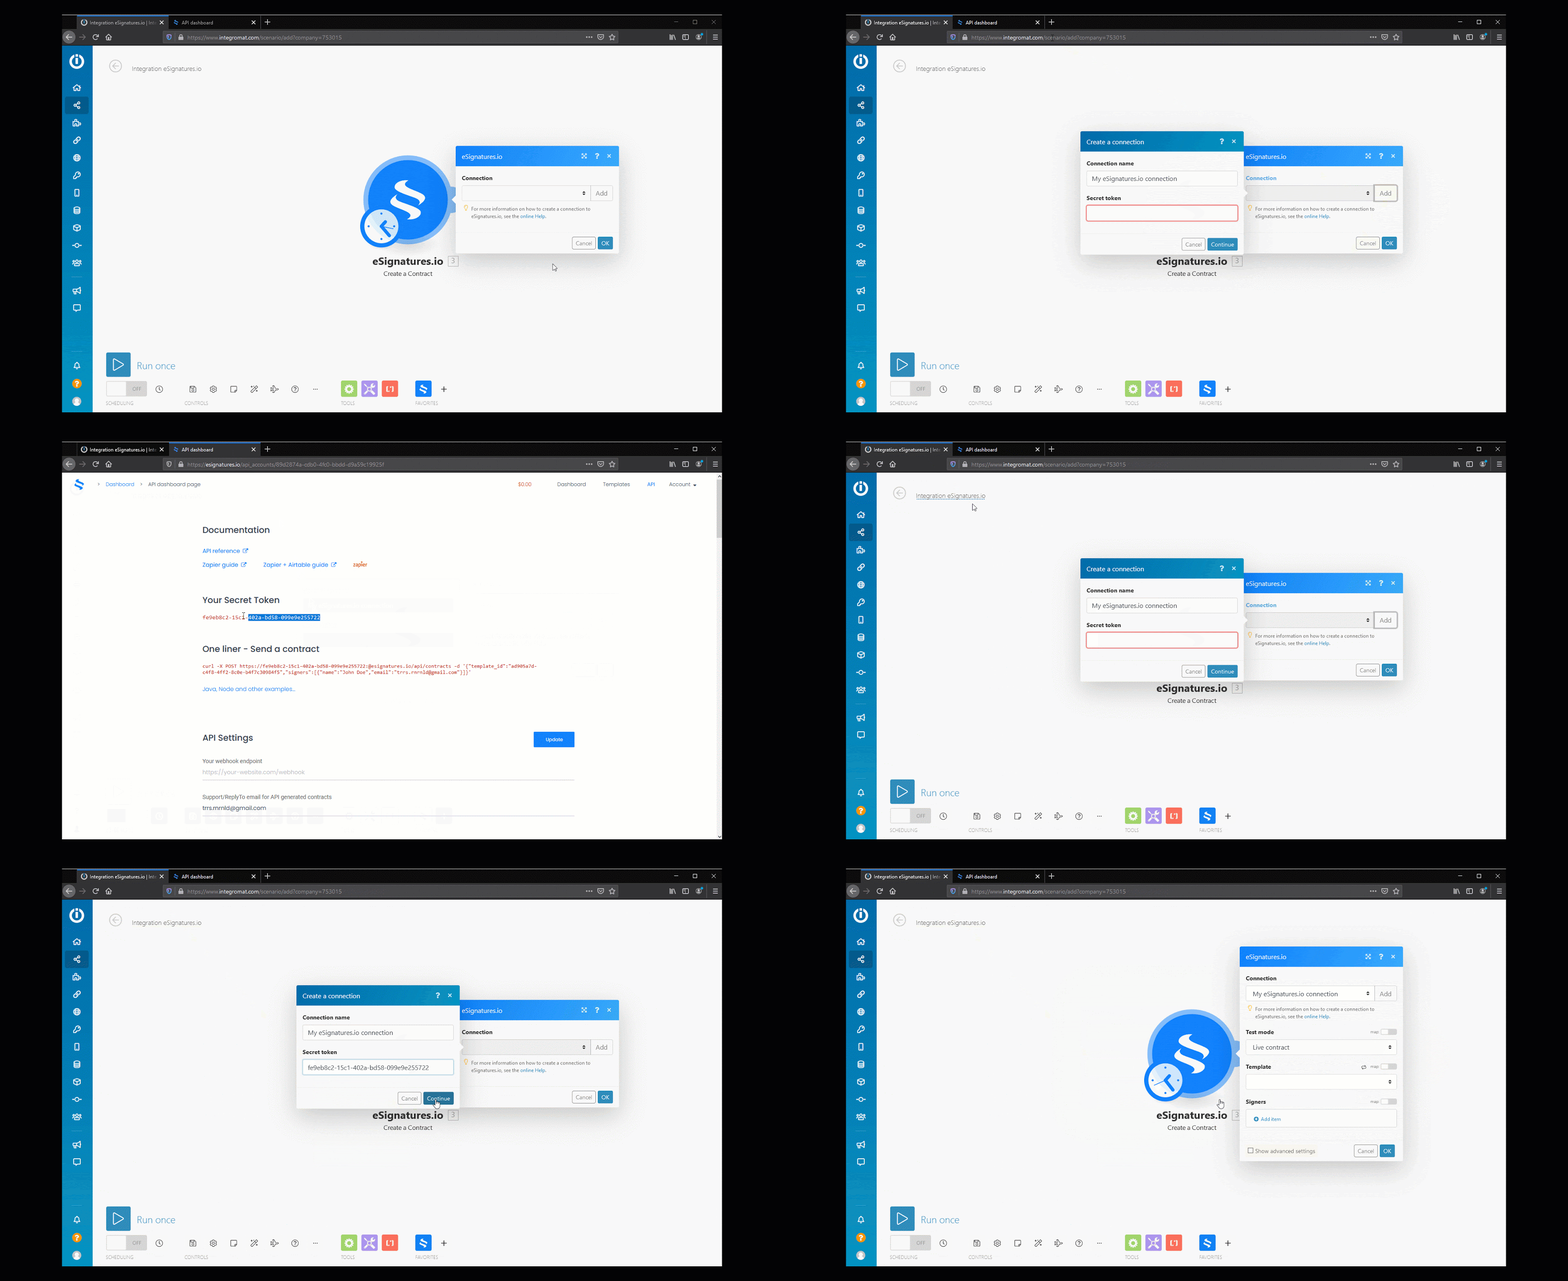
The connection has been established.
Triggers
All triggers need a webhook in order for them to function. In your eSignatures.io module, choose any of the triggers then generate a webhook. This will automatically connect the webhook from Boost.space Integrator to your eSignatures.io account.
Trigger Options
Description
Watch Contract Sent To Signer
Triggered when the contract is sent to a signer.
Watch Contract Signed
Triggered when all signers have signed the contract.
Watch Contract Signed By A Signer
Triggered when each individual signer has signed the contract.
Watch Webhook Error Notifications
Triggered when an error has occurred (eg. delivery issue).
Actions
Create a Contract
Creates a new contract.
Connection
Establish a connection to your eSignatures.io account.
Test Mode
Choose between sending a Live contract or a Test contract.
Template
Select the template you want to use for the contract.
Placeholder
fields
Specify Placeholders in the template to be replaced with your custom data.
Signers
API key
this is a Placeholder name as specified in the template editor.
Value
data that would replace the Placeholder.
Add and specify signers of the contract.
Name
name of the signer.
email address of the signer (for identification).
Mobile
mobile number of the signer (for identification).
Ticking the box beside Show advanced settings in the Signer field allows you to add.
Company Name
company name of the signer.
Redirect URL
the URL that the signer will be redirected to after signing the. contract.
Auto Sign
enable this option to automatically add the signer’s signature to the contract.
Signing Order
to specify the order of signers. When the same number is used for two or more signers, they will receive the signature request at the same time.
(Advanced settings) Contract Title
Enter the unique title of the contract (the template name is used when not specified). It appears in emails, generated documents, and dashboard pages.
(Advanced settings) Metadata
Add your own custom information (eg. your own record ID).
(Advanced settings) Language
Select the signer page/email language.
Legacy article, imported from the original Boost.space knowledge base (/knowledge-base/applications/file-and-document-management/esignatures-io/).

