Files.com
The Files.com modules allow you to watch, create, update, list, delete, and retrieve the users, groups, and permissions in your Files.com account.
Getting Started with Files.com
Prerequisites
- A Files.com account
In order to use Files.com with Boost.space Integrator, it is necessary to have a Files.com account. If you do not have one, you can create a Files.com account at brickftp.com.
The module dialog fields that are displayed in bold (in the Boost.space Integrator scenario, not in this documentation article) are mandatory!
Connecting Files.com to Boost.space Integrator
To connect your Files.com account to Boost.space Integrator you need to obtain the API Key from your Files.com account and insert it in the Create a connection dialog in the Boost.space Integrator module.
-
Log in to your Files.com account.
-
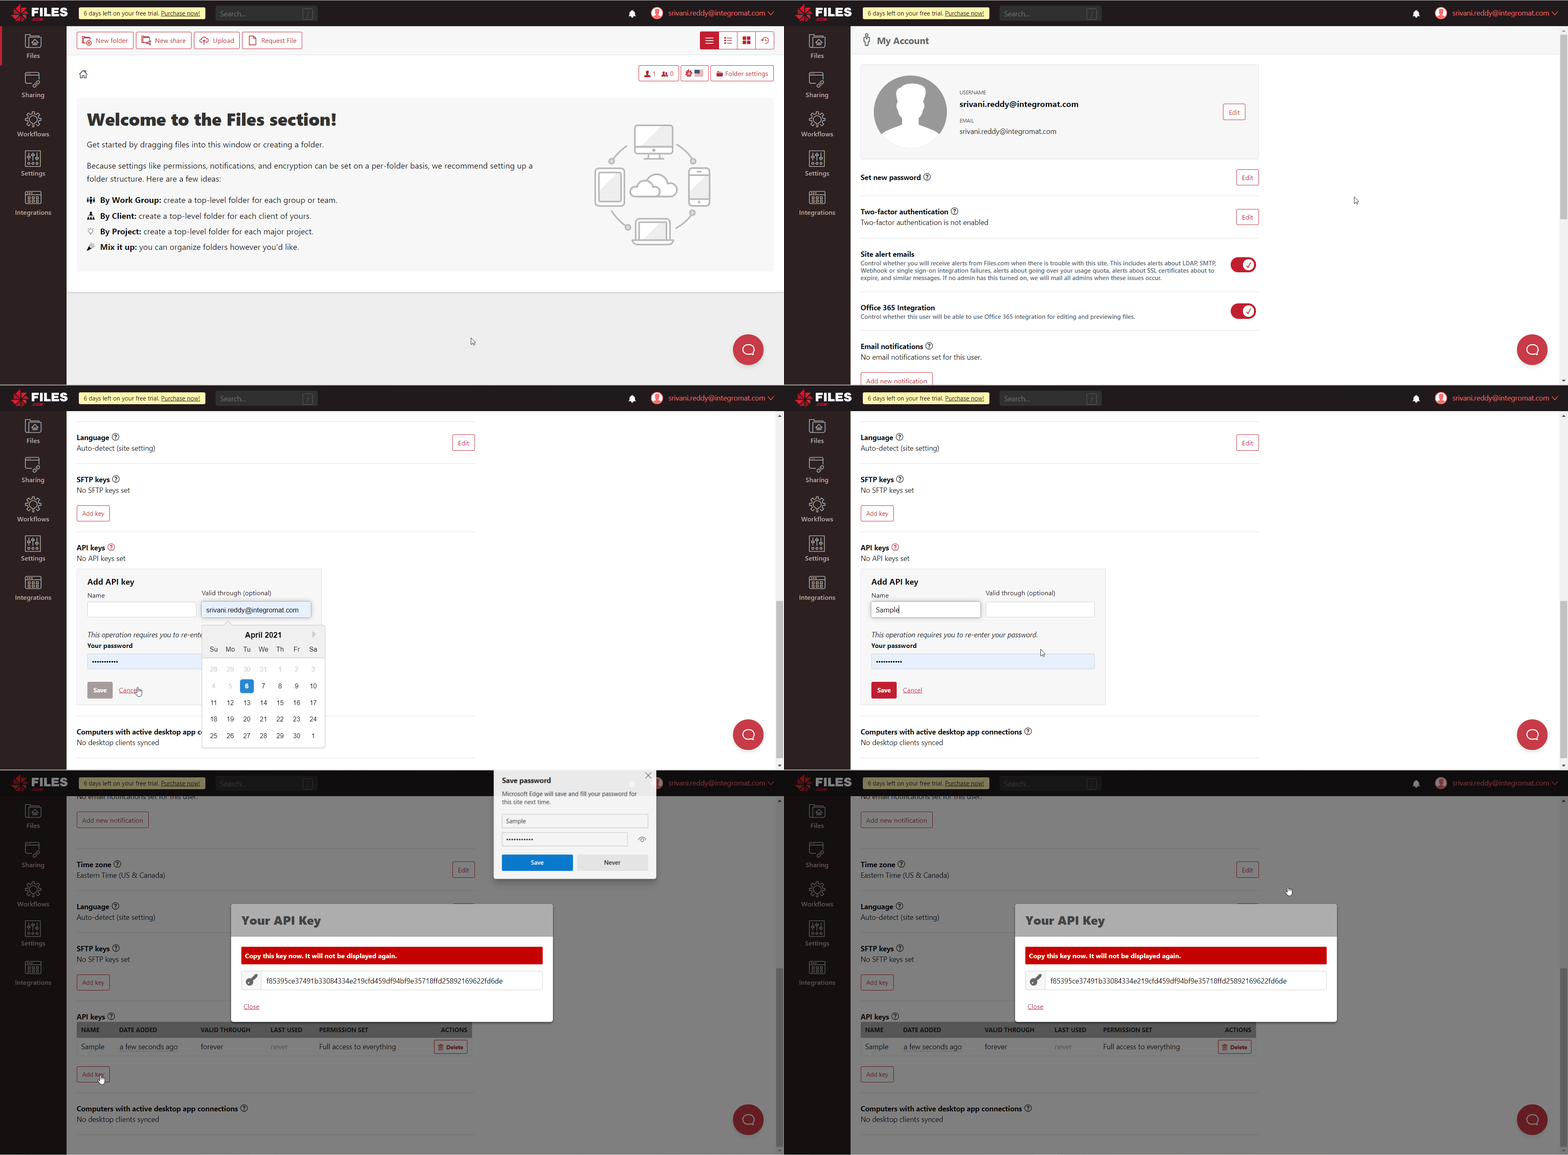
Click Your Profile Icon > My account.
-
Navigate to API keys section and click Add key. Enter a name for the API key, enter your account’s password, and click Save.
-
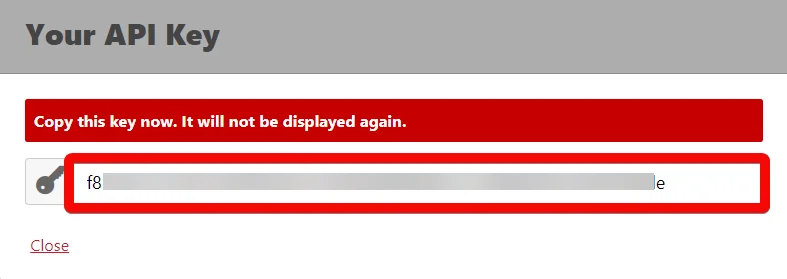
Copy the API Key to your clipboard.
-

Go toBoost.space Integrator and open the Files.com module’s Create a connection dialog.
-
In the Connection name field, enter a name for the connection.
-
In the Your Files.com API Key field, enter the API key copied in step 4, and click Continue.
The connection has been established.
Users
Watch Users
Triggers when a new user is created.
Connection
Establish a connection to your Files.com account.
Limit
Set the maximum number of users Boost.space Integrator should return during one scenario execution cycle.
Get a User
Gets a user’s details by ID.
Connection
Establish a connection to your Files.com account.
User ID
Select or map the User ID whose details you want to retrieve.
Create a User
Creates a new user.
Connection
Establish a connection to your Files.com account.
Username
Enter the user’s username.
PAssword
Enter the user’s account password.
Source File
Avatar Name
Enter the name of the avatar file.
Avatar Data
Enter (map) the data of the avatar file.
Disabled
Select whether the user is disabled. Disabled users cannot log in, and do not count for billing purposes. Users can be automatically disabled after an inactivity period via a Site setting.
Bypass Inactive Disable
Select whether you want to always keep the user active. When selected yes, prevents the user from being disabled due to inactivity.
Authentication Method
Select or map the authentication method for the user. For example, password, SSO.
Password Validity Dates
Enter (map) the number of days the user can use the same password.
Require Password Change On Login
Select whether you want to force the user to change the password on their next login.
Enter the user’s email address.
Group IDs
Add the Group IDs to which you want to add the user.
Site Admin
Select whether you want to mark the user as site admin.
Self-Managed
Does this user manage its own credentials or is it a shared/bot user?
Notes
Enter (map) any additional information about the user you want to save internally.
FTP Permission
Select whether the user can access the files using FTP.
REST API Permission
Select whether the user has access to the REST API.
SFTP Permission
Select whether the user can access the files using SFTP.
Allowed IPs
Add the IP addresses which are allowed to this user. When left blank, allows the user to connect to all the IPs. The format should be 192.168.1.0/27.
FTP Root Folder
Select or map the FTP Root Folder to show as the root when this user logs in through the FTP interface.
Ensure this folder exists, as it will not be automatically created. Does not apply to the web interface. This should not contain a leading slash but must contain a trailing slash. For example, Users/jenny/.
Grant Permissions On Root Folder
Select or map the user permissions you want to grant to the root folder:
-
Read/Write/Delete
-
Read Only
-
Write Only
-
Preview Only
-
History
Update a User
Updates a user by ID.
Connection
Establish a connection to your Files.com account.
User ID
Select or map the User ID whose details you want to update.
Username
Enter the user’s username.
PAssword
Enter the user’s account password.
Source File
Avatar Name
Enter the name of the avatar file.
Avatar Data
Enter (map) the data of the avatar file.
Disabled
Select whether the user is disabled. Disabled users cannot log in, and do not count for billing purposes. Users can be automatically disabled after an inactivity period via a Site setting.
Bypass Inactive Disable
Select whether you want to always keep the user active. When selected yes, prevents the user from being disabled due to inactivity.
Authentication Method
Select or map the authentication method for the user. For example, password, SSO.
Password Validity Dates
Enter (map) the number of days the user can use the same password.
Require Password Change On Login
Select whether you want to force the user to change the password on their next login.
Enter the user’s email address.
Group IDs
Add the Group IDs to which you want to add the user.
Site Admin
Select whether you want to mark the user as site admin.
Self-Managed
Select whether this user manages their own credentials or is it a shared/bot user.
Notes
Enter (map) any additional information about the user you want to save internally.
FTP Permission
Select whether the user can access the files using FTP.
REST API Permission
Select whether the user has access to the REST API.
SFTP Permission
Select whether the user can access the files using SFTP.
Allowed IPs
Add the IP addresses which are allowed to this user. When left blank, allows the user to connect to all the IPs. The format should be 192.168.1.0/27.
FTP Root Folder
Select or map the FTP Root Folder to show as the root when this user logs in through the FTP interface.
Ensure this folder exists, as it will not be automatically created. Does not apply to the web interface. This should not contain a leading slash but must contain a trailing slash. For example, Users/jenny/.
Grant Permissions On Root Folder
Select or map the user permissions you want to grant to the root folder:
-
Read/Write/Delete
-
Read Only
-
Write Only
-
Preview Only
-
History
Delete a User
Deletes a user by ID.
Connection
Establish a connection to your Files.com account.
User ID
Select or map the User ID you want to delete.
Search Users
Searches for specific users or lists them all.
Connection
Establish a connection to your Files.com account.
Search
Enter (map) the name, email, or username of the user you want to search for.
Limit
Set the maximum number of users Boost.space Integrator should return during one scenario execution cycle.
Groups
Watch Groups
Triggers when a new group is created.
Connection
Establish a connection to your Files.com account.
Limit
Set the maximum number of groups Boost.space Integrator should return during one scenario execution cycle.
Get a Group
Gets a single group by ID.
Connection
Establish a connection to your Files.com account.
Group ID
Select or map the Group ID whose details you want to retrieve.
Create a Group
Creates a new group.
Connection
Establish a connection to your Files.com account.
Name
Enter (map) the name of the group.
Notes
Enter (map) the additional information about the group which you want to save.
User IDs
Add the User IDs which you want to add to the group.
Have a Teams Power plan or higher?
Select whether the group has a power plan or a higher plan to it.
Update a Group
Updates a group by ID.
Connection
Establish a connection to your Files.com account.
Group ID
Select or map the Group ID whose details you want to update.
Name
Enter (map) the name of the group.
Notes
Enter (map) the additional information about the group which you want to save.
User IDs
Add the User IDs which you want to add to the group.
Have a Teams Power plan or higher?
Select whether the group has a power plan or a higher plan to it.
Delete a Group
Deletes a group by ID.
Connection
Establish a connection to your Files.com account.
Group ID
Select or map the Group ID you want to delete.
Search Groups
Searches for specific groups or lists them all.
Connection
Establish a connection to your Files.com account.
Group IDs
Add the Group IDs you want to list.
Limit
Set the maximum number of groups Boost.space Integrator should return during one scenario execution cycle.
Permissions
Create Permission
Creates new permission.
Connection
Establish a connection to your Files.com account.
Type
Select or map the permissions you want to create:
-
Group Permission
-
User Permission
Group ID
Select or map the Group ID to which you want to grant the permission.
User ID
Select or map the User ID to whom you want to grant the permission.
Permission
Select or map the permission level for the user:
-
Full
-
Read Only
-
Write Only
-
Preview Only
-
History
-
Admin
Folder Path
Enter the folder path to which you want to give permission to the user.
Recursive
Select whether you want to apply the same permissions to the subfolders.
Delete a Permission
Deletes permission by ID.
Connection
Establish a connection to your Files.com account.
Permission ID
Select or map the Permission ID you want to delete.
Search Permission
Searches for specific permissions or lists them all.
Connection
Establish a connection to your Files.com account.
Filter By
Select or map the option to filter the records.
Path
Select or map the path whose permissions you want to search.
Group ID
Select or map the Group ID whose permissions you want to search.
User ID
Select or map the User ID whose permissions you want to search.
Include Groups
Select whether you want to include user’s permissions that are inherited from its groups.
Limit
Set the maximum number of permissions Boost.space Integrator should return during one scenario execution cycle.
Files
Watch File Uploads
Triggers when a new file is uploaded to a specific folder.
Connection
Establish a connection to your Files.com account.
Folder ID
Select or map the Folder ID whose uploads you want to watch.
Limit
Set the maximum number of file uploads Boost.space Integrator should return during one scenario execution.
Upload a File
Uploads a file.
Connection
Establish a connection to your Files.com account.
File Name
Enter (map) the file name with extension. For example, sample.png.
File Data
Enter (map) the data of the file.
Folder ID
Select or map the Folder ID to which you want to upload
Other
Make an API Call
Performs an arbitrary authorized API call.
Connection
Establish a connection to your Files.com account.
URL
Enter a path relative to https://app.files.com/api/rest. For example: /v1/files
For the list of available endpoints, refer to the Files.com API Documentation.
Method
Select the HTTP method you want to use:
GET
to retrieve information for an entry**.**
POST
to create a new entry.
PUT
to update/replace an existing entry.
PATCH
to make a partial entry update.
DELETE
to delete an entry.
Headers
Enter the desired request headers. You don’t have to add authorization headers; we already did that for you.
Query String
Enter the request query string.
Body
Enter the body content for your API call.
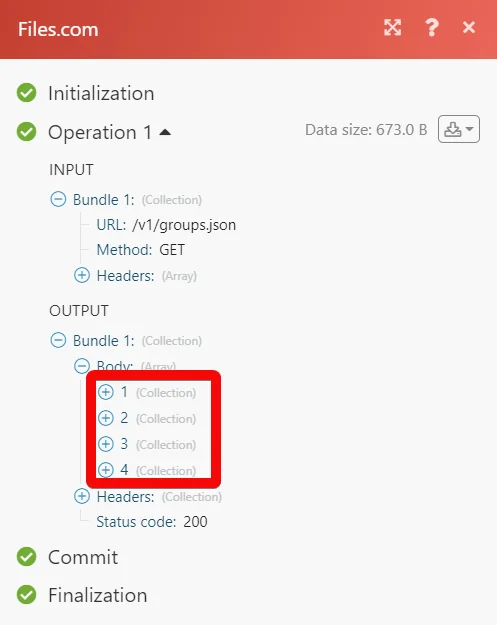
Example of Use – List Groups
The following API call returns all the groups from your Files.com account:
URL:
/v1/groups.json
Method:
GET
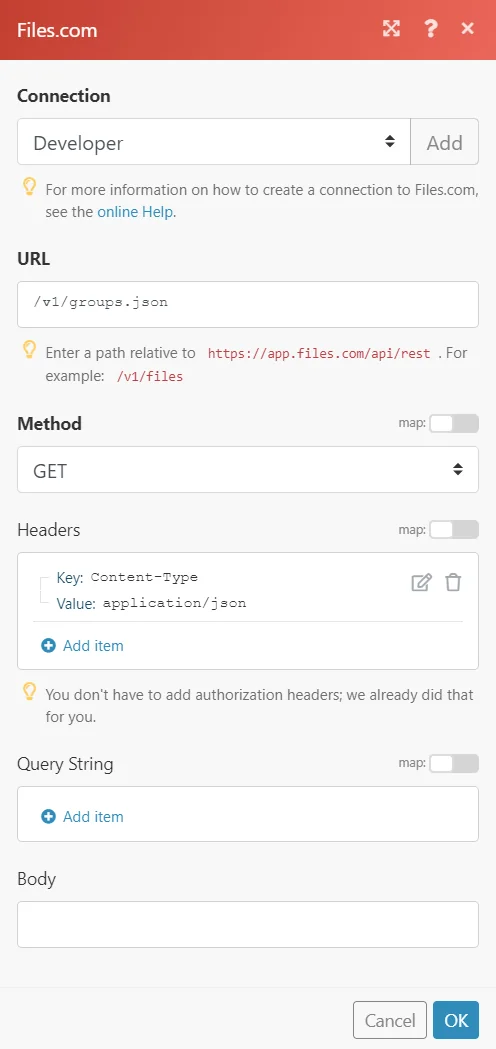
Matches of the search can be found in the module’s Output under Bundle > Body.
In our example, 4 groups were returned:
Legacy article, imported from the original Boost.space knowledge base (/knowledge-base/applications/file-and-document-management/files-com/).

