How to import records into stock receipts in Boost.space?
Importing Records into Stock Receipts in Boost.space: Step-by-Step Guide
In this article, you will find a step-by-step guide helping you to import a mass of records into the Stock receipt. Import template – Stock receipt
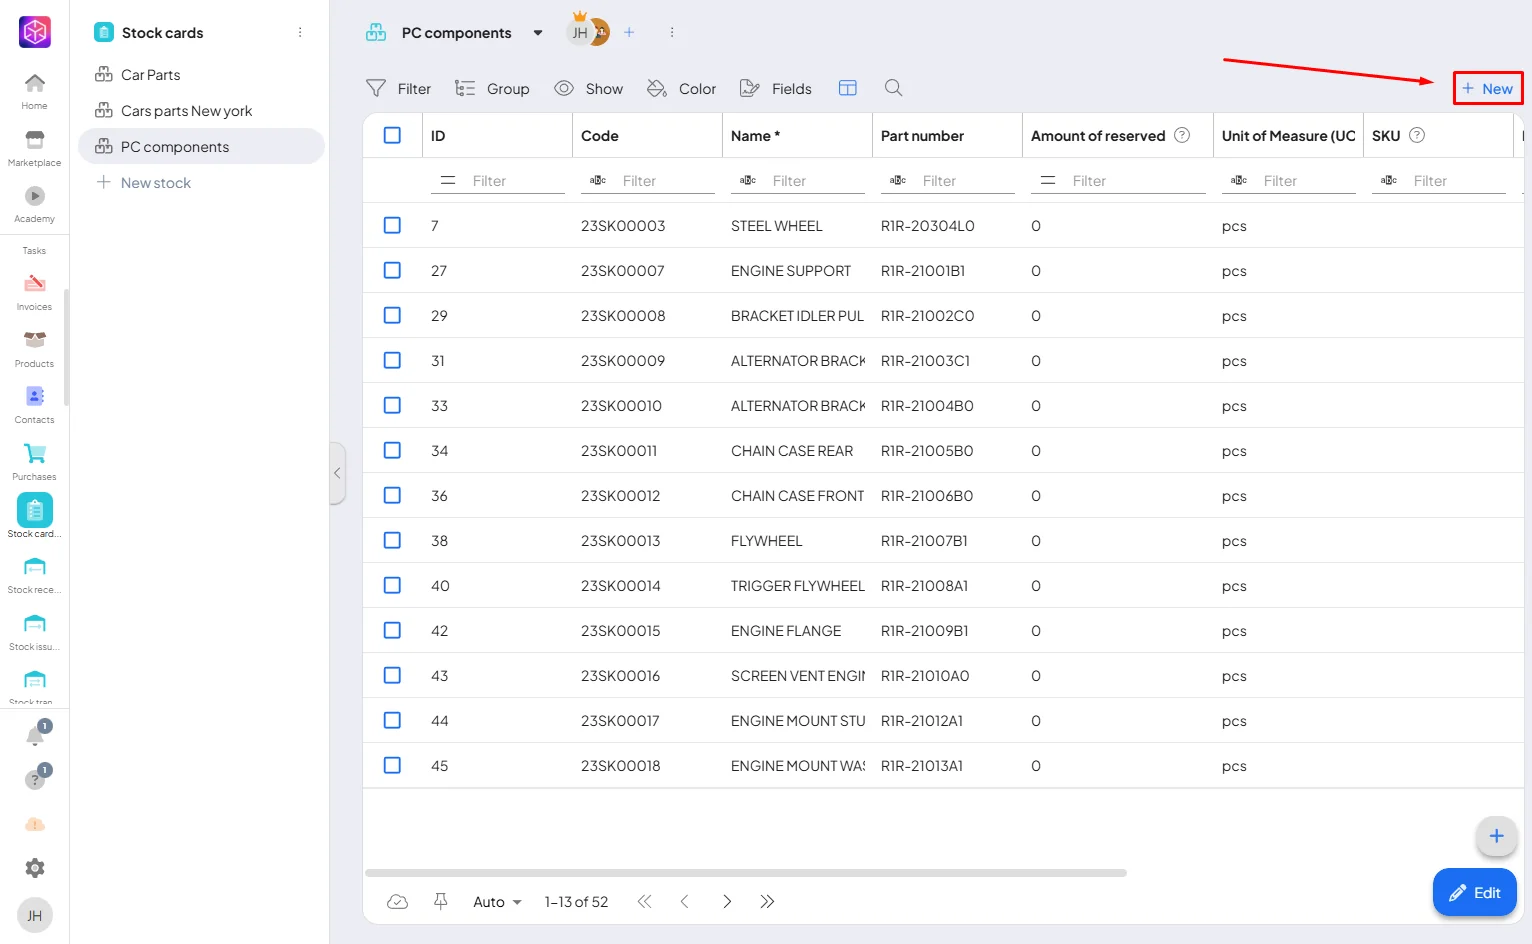
1. To create a receipt, you need to have a stock card for the records you want to import. To create a new stock card, click on “+ New”.
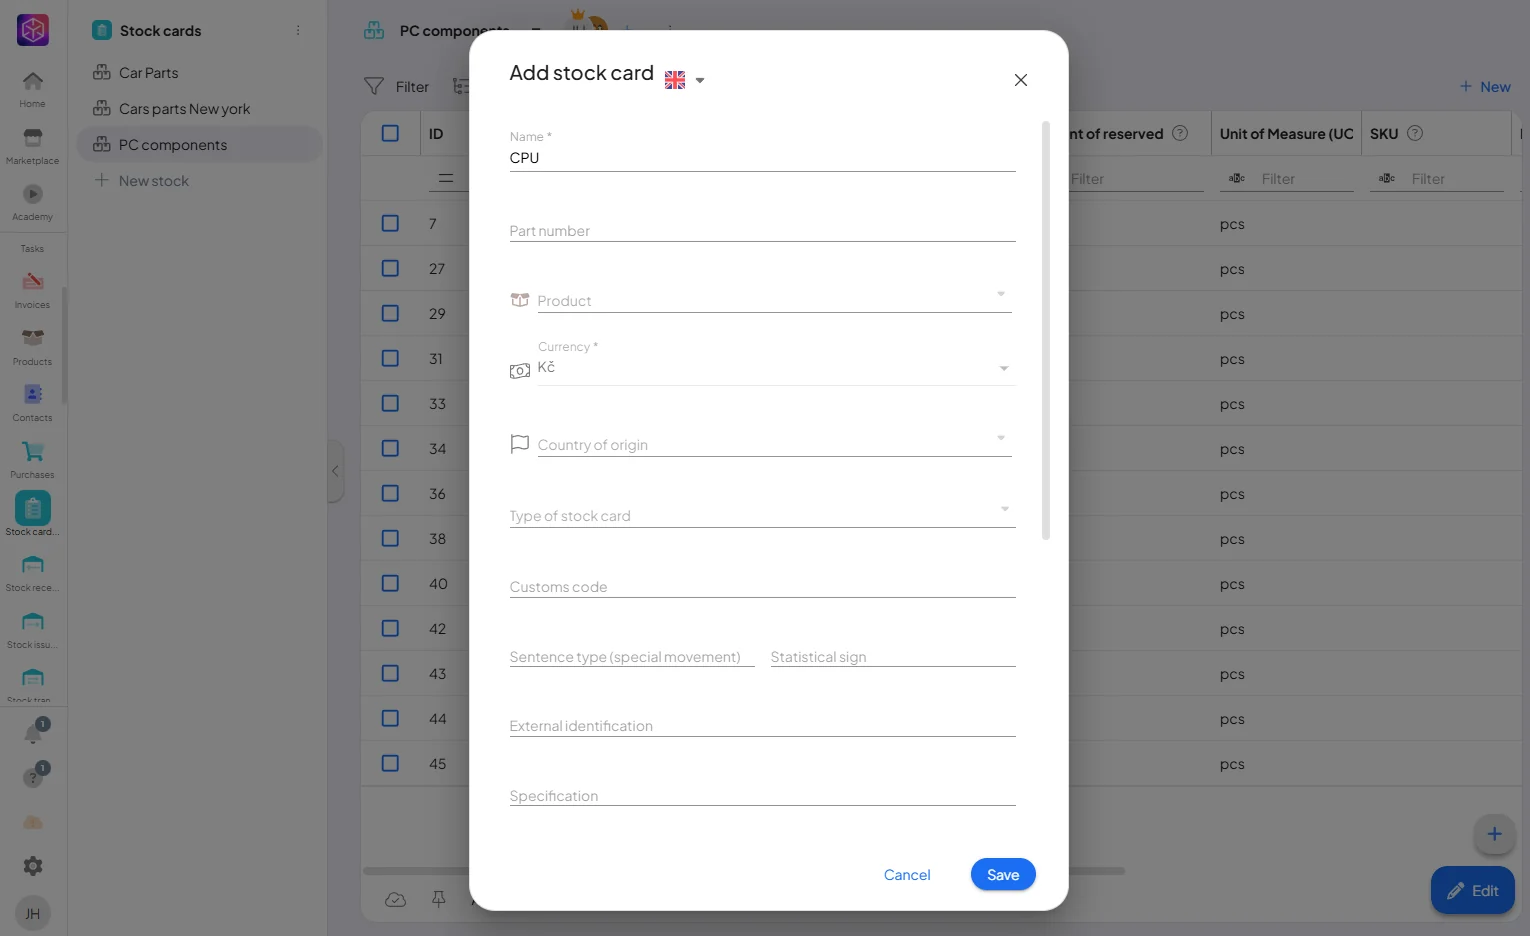
2. To create it, you only need to enter its name.
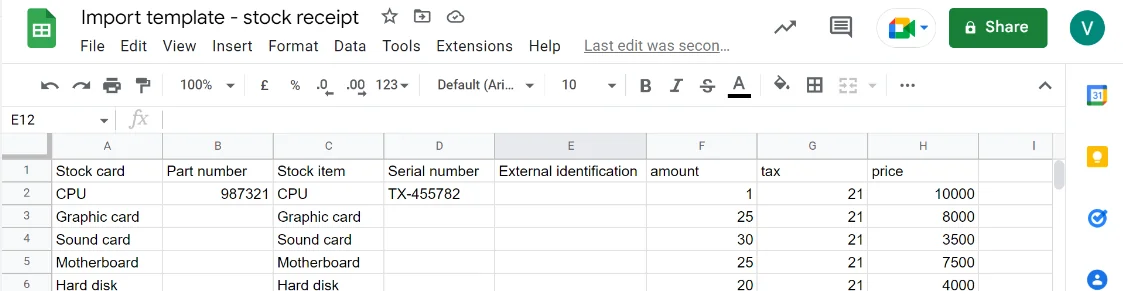
3. Create a spreadsheet (Excel, Google Sheet). Fill in the first row according to the attached photo. In order to correctly create the stock receipt, it is necessary to fill in the stock card.
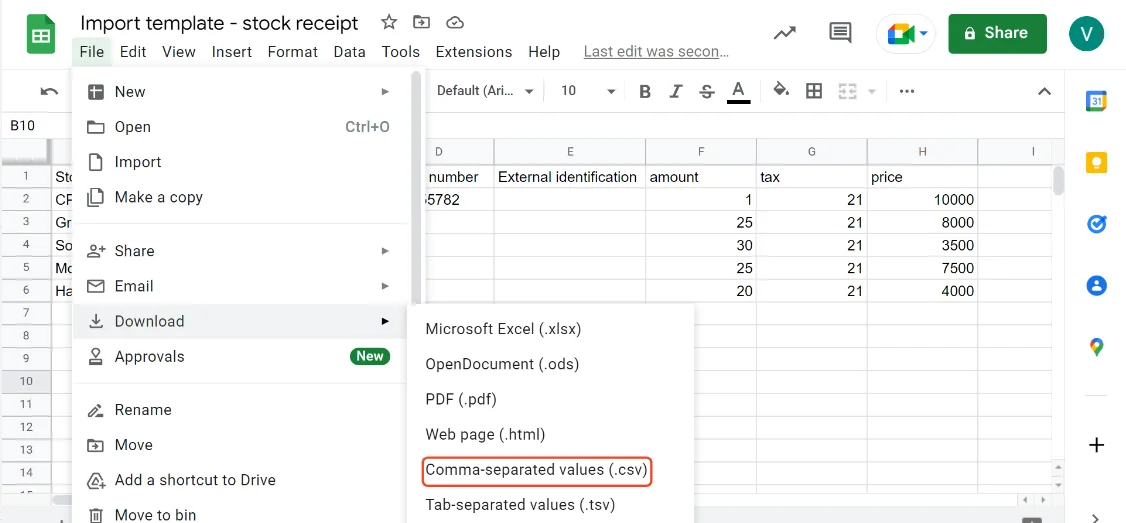
4. After creating the spreadsheet, download the file in .csv format.
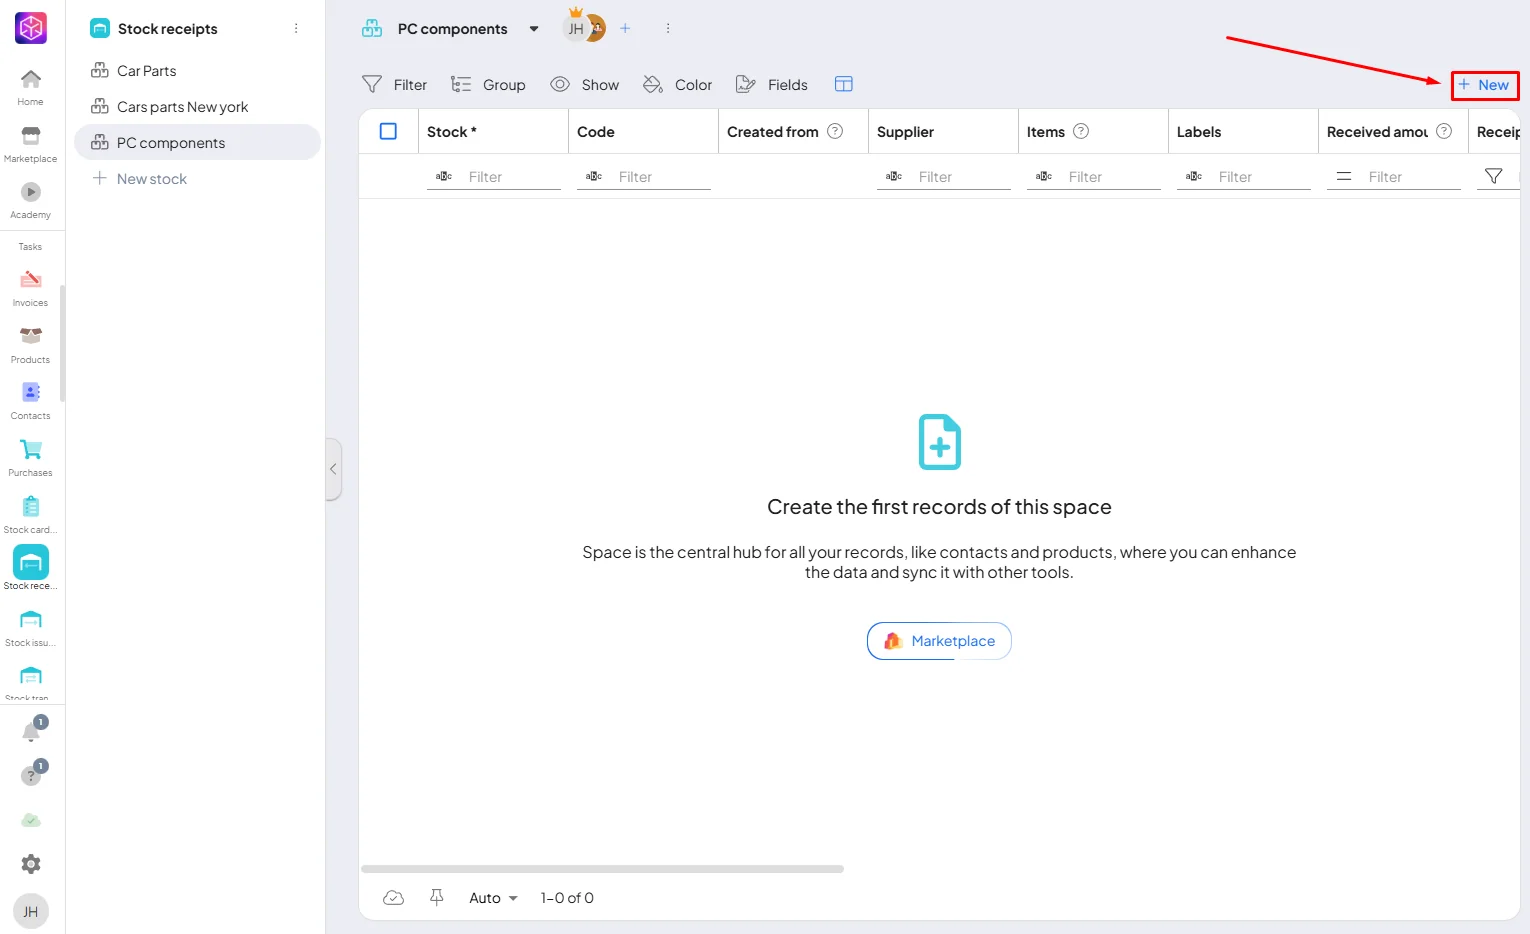
5. Open the stock receipts addon in Boost.space and click on “+ New”.
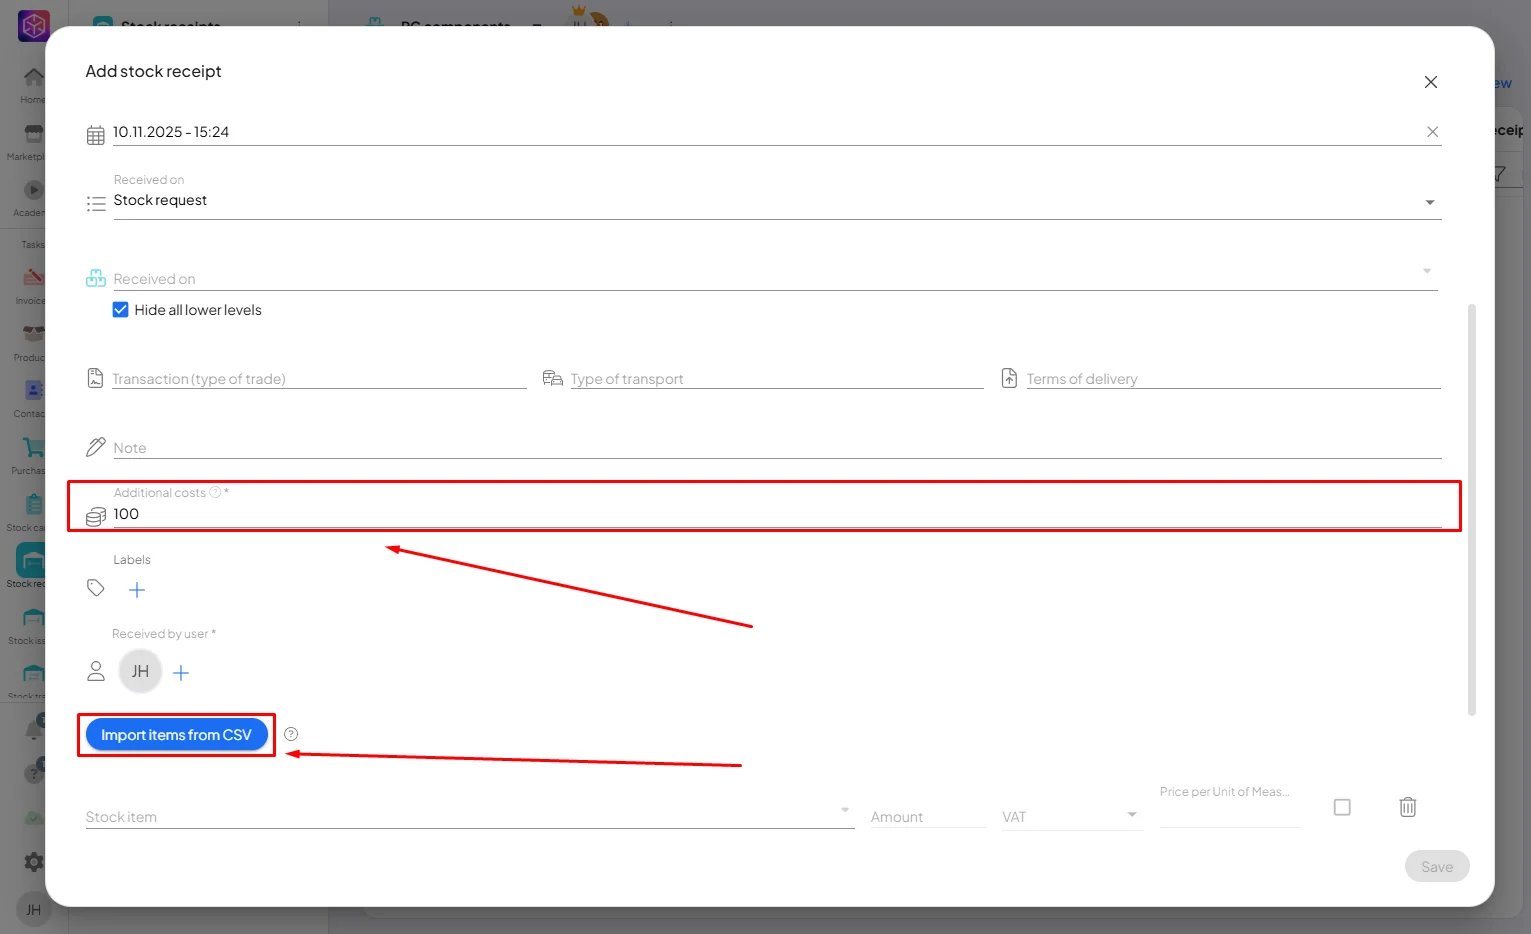
6. Fill in the required data. To create a stock receipt, press “Import items from CSV” and upload the created file.
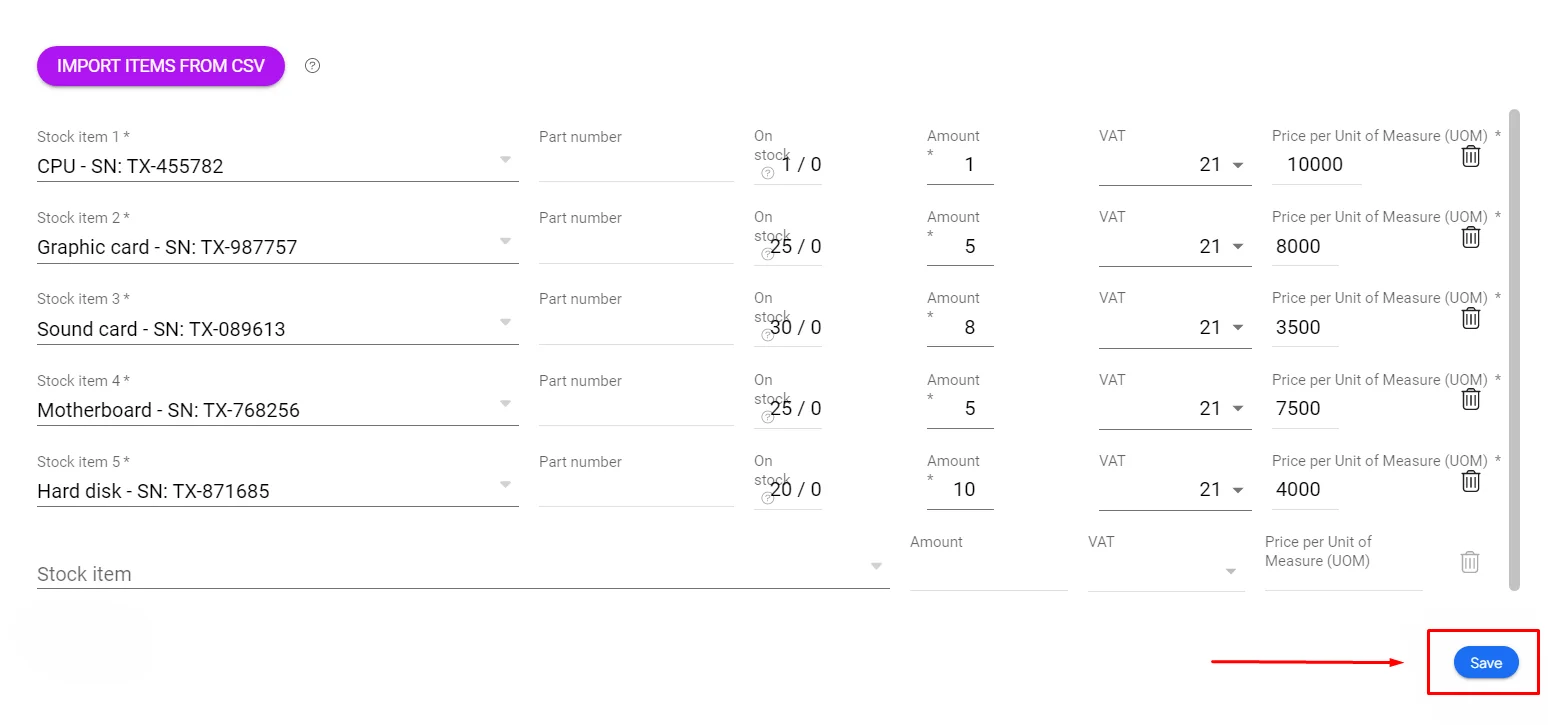
7. Records have been imported into the stock receipt! In order to create the stock receipt, click on “Save”.
Importing records into Stock Receipts in Boost.space is an efficient way to manage incoming inventory. By preparing your data in a properly formatted CSV file and uploading it into the Stock Receipts module, you can quickly record multiple items at once.
If you need help with anything, please contact us at support@boost.space.

