Pushwoosh
The Pushwoosh modules allow you to create, list, retrieve, and delete the notifications in your Pushwoosh account.
Getting Started with Pushwoosh
Prerequisites
- A Pushwoosh account
In order to use Pushwoosh with Boost.space Integrator, it is necessary to have a Pushwoosh account. If you do not have one, you can create a Pushwoosh account at go.pushwoosh.com/cp/register.
The module dialog fields that are displayed in bold (in the Boost.space Integrator scenario, not in this documentation article) are mandatory!
Connecting Pushwoosh to Boost.space Integrator
To connect your Pushwoosh account to Boost.space Integrator you need to obtain the API Token from your Pushwoosh account and insert it in the Create a connection dialog in the Boost.space Integrator module.
1. Log into your Pushwoosh account.

2. Click the Application for which you want to establish a connection > API Access > Generate New Access Token.
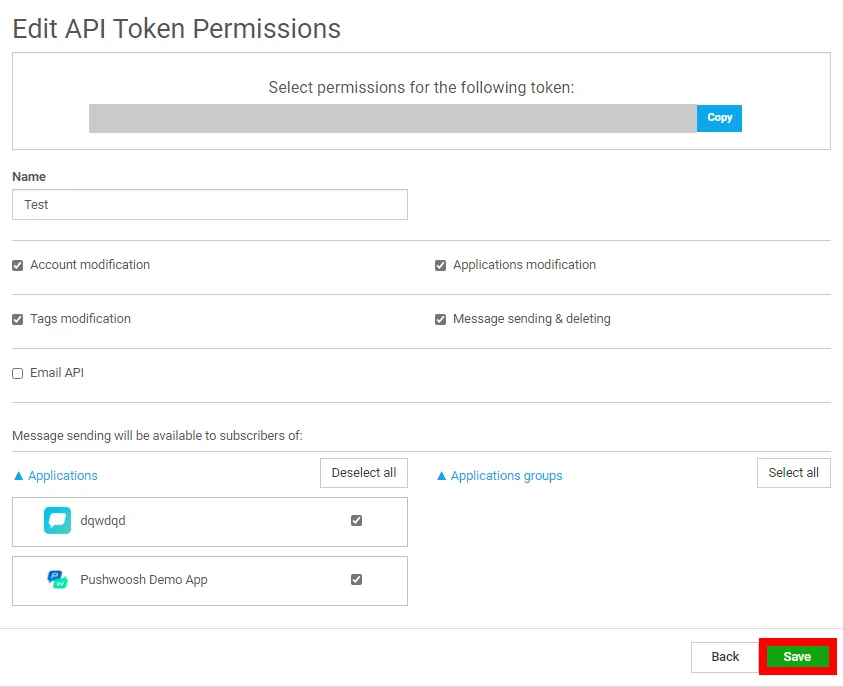
3. Enter a name for the API, select the access permissions, and click Save.
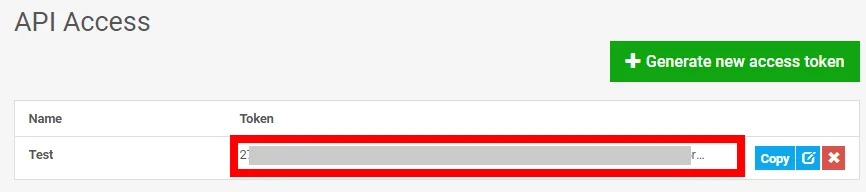
4. Copy the API key to your clipboard.
5. Go to Boost.space Integrator and open the Pushwoosh module’s Create a connection dialog.

6. In the Connection name field, enter a name for the connection.
7. Select the checkbox if your application has a private subscription offer.
8. In Your Pushwoosh API Token field, enter the API token copied in step 4 and click Continue.
The connection has been established.
Notifications
Search Push Notifications
Searches through push notifications history.
Connection
Establish a connection to your Pushwoosh account.
Source
Select the source of the notifications you want to search. For example, Twitter, Autopush.
Search By
Select the option to search the notifications:
-
Notification ID
-
Notification Code
-
Application Code
-
Campaign Code
Last Message ID
Enter the Last Message ID from the previous list push notification call.
Limit
Set the maximum number of notifications Boost.space Integrator should return during one scenario execution cycle.
Get a Push Notification
Get details of a single push notification.
Connection
Establish a connection to your Pushwoosh account.
Message Code
Enter the message code from the notification request whose details you want to retrieve.
Create a Push Notification
Creates a new push notification.
Connection
Establish a connection to your Pushwoosh account.
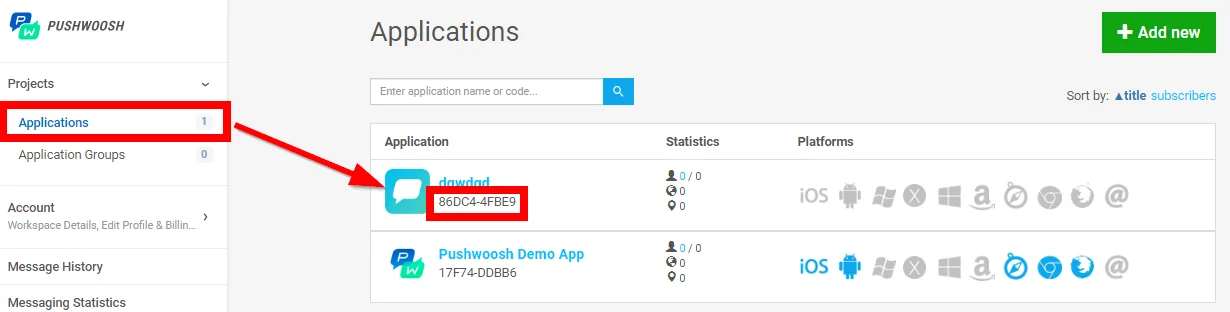
Application Code
Enter the application code in which you are creating a push notification. You can find the application code on your account’s application page.
Notifications
Add the notification details:
Send Date
Enter the date on which you want to send the push notification. See the list of supported formats.
Content
Enter the notification text.
Campaign Code
Enter the campaign code. You can find the Campaign Code in your application’s campaign section.
Link
Enter the URL address to be opened when the user opens the notification.
Preset Code
Enter the preset code available in the Preset section in the Application menu.
Transaction ID
Enter a unique message identifier to prevent duplicating messages in case of network problems.
Latitude
Enter the latitude details of the location to where the notification will be sent.
Longitude
Enter the latitude details of the location to where the notification will be sent.
Range
Enter the range within which the notification can be sent.
HTML Page ID
Enter the notification’s HTML page details.
Rich Media
Enter the rich media page ID of the notification. To locate the rich media ID, see Rich Media ID. For more information, see Rich Media.
Remote Page
Enter the remote rich HTML page URL address.
Minimize Link
Select the option to minimize the link in the notification:
-
Do not Minimize
-
Bitly Minimize
Platforms
Add the platforms on which the notification is available. For example, RSS
Send Rate
Enter the notification sending rate. Enter the number of pushes per second. The value must be lower than 1000 and greater than 100.
Use Template
Select whether to use a notification template.
Template Bindings
Add the details of the template bindings. See theTemplate Engine guide for details.
Capping Days
Enter the number of days applicable for frequent capping. See Frequency Capping guide or details.
Capping Count
Enter the maximum number of pushes that can be sent from a specific app to a particular device within a Capping Days period. If the message created exceeds the capping count limit for a device, it won’t be sent to that device. See Frequency Capping guide for details.
Inbox Date
Enter the date until which the message is available in the user’s inbox. See the list of supported formats.
Inbox Image
Enter the image URL address to be shown with the message.
Devices
Enter the device tokens of the devices to which the message should be sent to. See adding push tokens.
Users
Add the users to whom the message should be sent.
Filter
Enter the name of the filter to apply to the message. You can find filters in the application’s filter section.
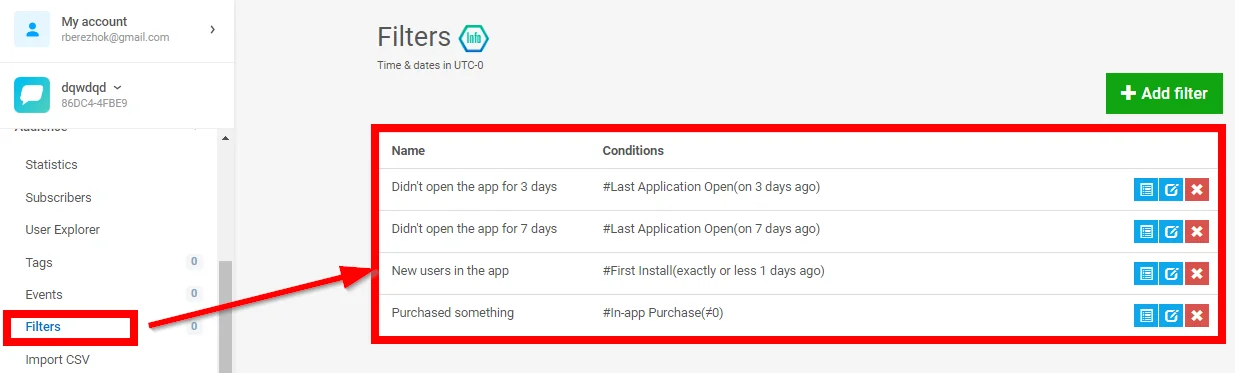
For more information, see Filters.
Conditions
Add the conditions for the message. For example, tags, operators. See Conditions to add them.
Conditions Definitions
Select the condition operators:
-
AND
-
OR
Delete a Push Notification
Deletes a scheduled push notification.
Connection
Establish a connection to your Pushwoosh account.
Message Code
Enter the message code from the notification request which you want to retrieve.
Other
Make an API Call
Performs an arbitrary authorized API call.
Connection
Establish a connection to your Pushwoosh account.
URL
Enter a path relative to https://cp.pushwoosh.com/json. For example: /1.3/createMessage
For the list of available endpoints, refer to the Pushwoosh API Documentation.
Method
Select the HTTP method you want to use:
GET to retrieve information for an entry.
POST to create a new entry.
PUT to update/replace an existing entry.
PATCH to make a partial entry update.
DELETE to delete an entry.
Headers
Enter the desired request headers. You don’t have to add authorization headers; we already did that for you.
Query String
Enter the request query string.
Body
Enter the body content for your API call.
Example of Use – Create a Message
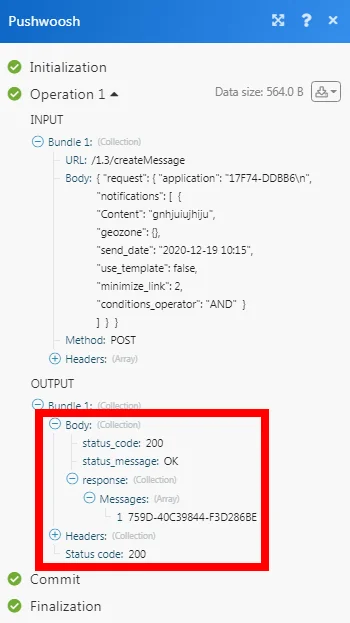
The following API call creates the message from your Pushwoosh account:
URL: /1.3/createMessage
Method: POST
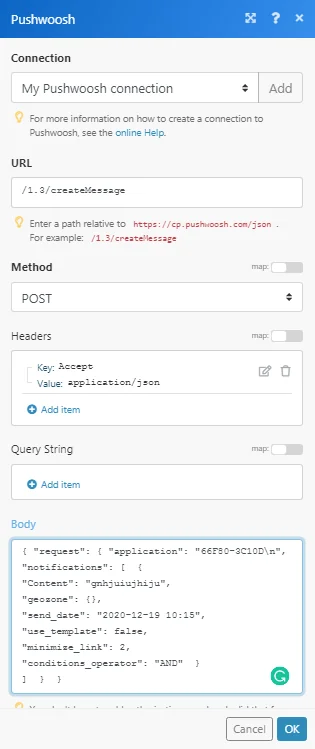
Matches of the search can be found in the module’s Output under Bundle > Body > response > Messages. In our example, the message is created successfully.
Legacy article, imported from the original Boost.space knowledge base (/knowledge-base/applications/communication/pushwoosh/).

